Quick Navigation:
- Common Reasons Why a Memory Card Might Not Be Recognized
- Preparing for Formatting
- Three Ways to Format an Unrecognized Memory Card on Mac
- Post-Formatting Steps
- Conclusion
Memory cards are essential tools for storing and transferring data, from photos and videos to documents and system backups. However, encountering an unrecognized memory card on your Mac can be frustrating, particularly when you need to access important files. In this guide, we will explore why your memory card might not be recognized, how to format it using various methods, and what steps to take if formatting does not resolve the issue.
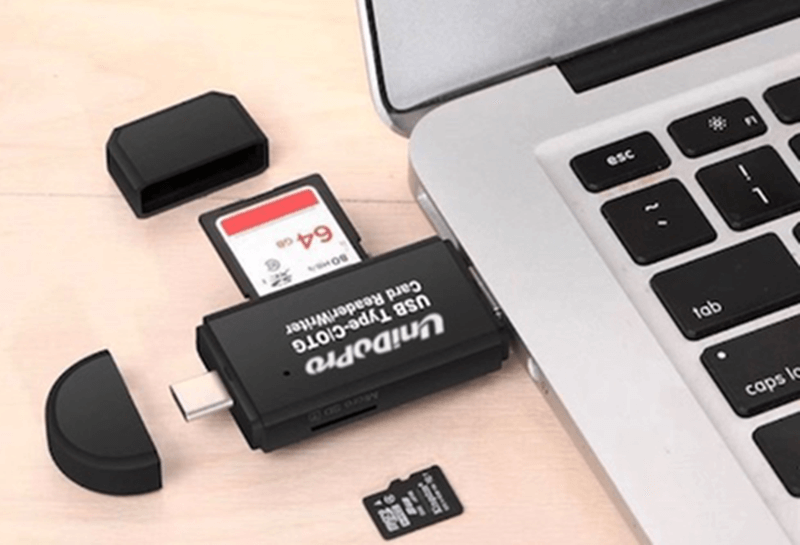
A memory card that is not recognized by your Mac can disrupt your workflow and cause significant inconvenience. Formatting the card is often a necessary step to restore its functionality. This guide will walk you through the reasons behind the issue, the preparation required before formatting, and step-by-step instructions on how to format an unrecognized memory card using built-in Mac tools and alternative methods.
Common Reasons Why a Memory Card Might Not Be Recognized
Before diving into the formatting process, it's essential to understand why your memory card might not be recognized by your Mac. Several factors could contribute to this issue:
Corrupted File System:
A corrupted file system is a common cause of an unrecognized memory card. Corruption can occur due to improper ejection, abrupt shutdowns, or malware infections. When the file system is damaged, the card may become unreadable by your Mac.
Physical Damage
Physical damage to the memory card or the card reader can prevent your Mac from recognizing the card. This damage can occur from mishandling, exposure to extreme temperatures, or water damage.
Compatibility Issues
Sometimes, the memory card may not be compatible with your Mac's hardware or operating system. For instance, older Macs might struggle with newer card formats or larger capacities.
Outdated macOS or Drivers
Running an outdated version of macOS or having outdated drivers can also cause recognition issues. Keeping your system updated is crucial for ensuring compatibility with various external devices.
Preparing for Formatting
Before formatting the memory card, it's vital to take some preparatory steps to avoid data loss and ensure the process goes smoothly.
Recover Data:
If the memory card is recognized intermittently or in read-only mode, attempt to back up any important data before proceeding with formatting. Data backup can be achieved through:
- Using Data Recovery Software: If the card is intermittently recognized, you can use data recovery tools such as Do Your Data Recovery for Mac or Data Rescue to recover files before formatting. (Check how to export and recover data from unrecognized memory card to your Mac >>)
- Copying Data to Another Device: If your Mac can read the card briefly, try copying essential files to your computer or another storage device.
Ensuring Proper Connections:
Ensure that the memory card is correctly connected to your Mac:
- Check Card Readers and Ports: Sometimes, the issue might be with the card reader or USB port. Test the card with different readers or ports to rule out these possibilities.
- Testing with Other Devices: Insert the memory card into another computer or device to determine if the issue is with the card or your Mac.
Three Ways to Format an Unrecognized Memory Card on Mac
Method 1: Format the Damaged Memory Card Using Disk Utility
macOS offers a built-in tool called Disk Utility that can format memory cards efficiently. Follow these steps to format an unrecognized memory card on Mac.
Step 1. Navigate to Applications > Utilities > Disk Utility. Alternatively, you can use Spotlight Search (Command + Space) and type "Disk Utility" to find and open it.
Step 2. Identify the Memory Card: In Disk Utility, you'll see a list of available drives and volumes on the left sidebar. Locate your memory card, which might be listed under "External" or as a removable device.
Step 3. Choose the Correct Format: Select the memory card from the sidebar. Click the "Erase" button at the top of the Disk Utility window. You'll be prompted to choose a format. Common formats include:
- MS-DOS (FAT): Suitable for smaller memory cards (up to 32GB) and widely compatible with various devices.
- ExFAT: Ideal for larger cards (over 32GB) and compatible with most modern devices and operating systems.
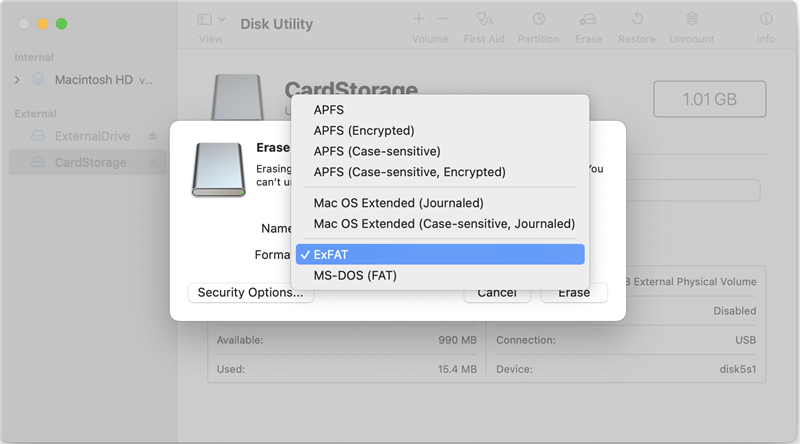
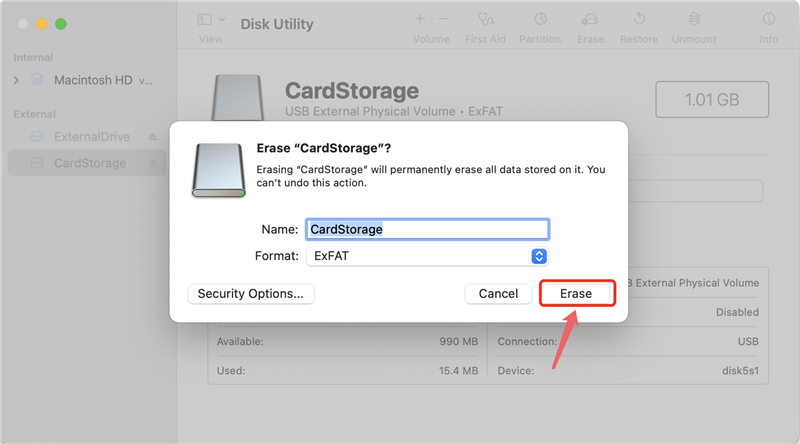
Step 4. Name and Erase: Enter a name for your memory card, select the format, and click "Erase." Disk Utility will format the card, which may take a few minutes. Once completed, your memory card should be recognized and ready for use.
Method 2: Format an Unrecognized Memory Card on Mac Using Terminal
Terminal commands offer a powerful way to interact with and manage your Mac's hardware and software directly. When it comes to formatting an unrecognized memory card, Terminal can be especially useful if traditional methods like Disk Utility do not work. Here's a step-by-step guide on how to format your memory card using Terminal:
Step 1. Launch Terminal: To open Terminal, navigate to Applications > Utilities > Terminal. Alternatively, you can use Spotlight Search by pressing Cmd + Space and typing Terminal to quickly locate and open it.
Step 2. List All Disks: In the Terminal window, type the command diskutil list and press Enter. This command will display a list of all connected drives and partitions. It provides essential information such as the disk identifier (e.g., /dev/disk4), the partition scheme, and the volumes on each disk.
Example output might look like this:
In this example, the memory card is identified as /dev/disk4. Ensure you correctly identify the disk you intend to format to avoid data loss on other drives.
Step 3. Confirm Disk Identifier: Note the disk identifier for your memory card. In this case, it's /dev/disk4. Double-check that this is the correct disk by verifying its size and type to avoid formatting the wrong disk.
Step 4. Format the Disk: To format the disk, use the diskutil eraseDisk command. The syntax for this command is:
diskutil eraseDisk FILE_SYSTEM DISK_NAME DISK_IDENTIFIER
- FILE_SYSTEM: The file system format you wish to use (e.g., ExFAT, MS-DOS (FAT)).
- DISK_NAME: A name you want to give your formatted disk (e.g., MyCard).
- DISK_IDENTIFIER: The disk identifier noted earlier (e.g., /dev/disk2).
For example, to format a disk as ExFAT with the name “MyDrive,” you would enter:
diskutil eraseDisk ExFAT MyDrive /dev/disk4
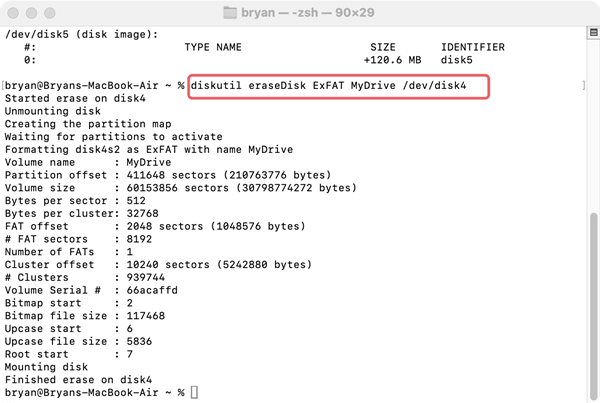
This command will erase all data on the disk and format it as ExFAT.
Step 5. Confirm Formatting: After executing the command, Terminal will proceed with the formatting process. You will see messages indicating the progress. Once completed, Terminal will confirm that the disk has been successfully formatted. You can check the updated status by using the diskutil list command again to ensure the disk appears with the new format and name.
Troubleshooting Terminal Formatting:
- Permission Issues: If you encounter permission errors, ensure you're running Terminal with the appropriate privileges. You might need to use sudo before the diskutil command to run it with superuser privileges. For example:
sudo diskutil eraseDisk ExFAT MyCard /dev/disk4
You will be prompted to enter your Mac’s administrator password.
- Incorrect Disk Identifier: Double-check the disk identifier if the formatting fails or if you receive an error stating that the disk could not be found. An incorrect identifier can lead to formatting the wrong disk or encountering errors.
- Error Messages: If you receive error messages during formatting, consult the Terminal output for specific issues. You might need to resolve hardware issues, check connections, or attempt formatting on a different Mac.
Verifying the Result:
- Check Disk Utility: After formatting through Terminal, open Disk Utility again to confirm that the memory card is recognized and formatted correctly. The card should appear in the sidebar with the new name and format.
- Test the Card: Insert the memory card into a device or use it on your Mac to ensure it functions correctly. Test writing and reading files to confirm that the formatting process resolved the issue.
Method 3: Format an Unrecognized Memory Card Using DoYourData Super Eraser
DoYourData Super Eraser for Mac offers easy and reliable solution to format unrecognized memory card on Mac. It will quickly format the unrecognized memory card for your Mac, and permanently remove all errors and data on the memory card. It means once the memory card is formatted by DoYourData Super Eraser for Mac, you will get a brand new memory card.
Format the memory card that can not be recognized by the Mac system with DoYourData Super Eraser for Mac.
Step 1. Connect the corrupted memory card to your Mac and then run DoYourData Super Eraser for Mac.

Step 2. Choose the data erasure mode "Wipe Hard Drive", select the drive corresponding to the memory card connected to your Mac that can’t be recognized and then click on the "Wipe Now" button so that DoYourData Super Erase for Mac can format it correctly.
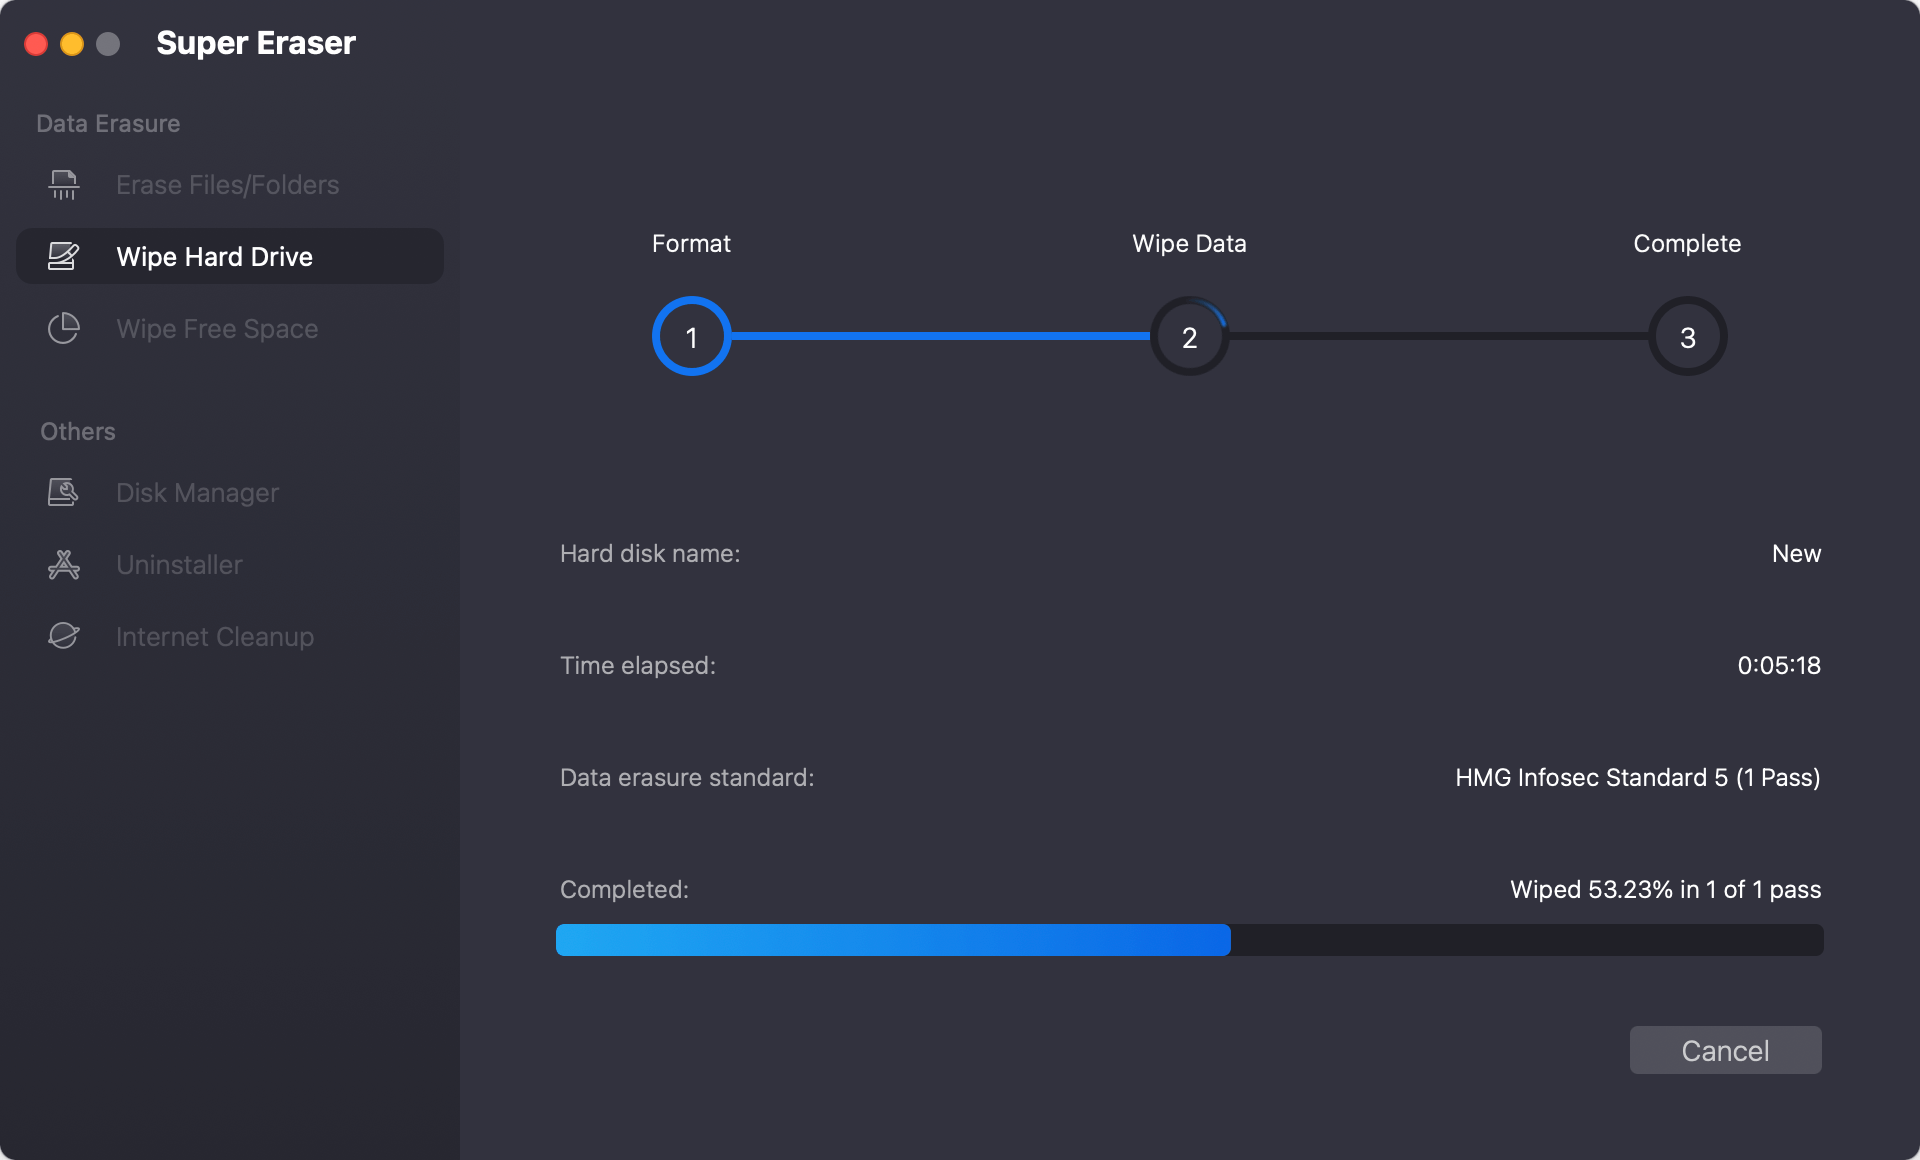
DoYourData Super Eraser for Mac will remove all your personal and important information from the memory card that is not recognized by the Mac in a completely simple way so that when you get rid of it you should not worry that an unauthorized person can retrieve any information that you have had in the past no matter if the memory card cannot be recognized by Mac OS.
After you format the memory card with DoYourData Super Eraser for Mac, you can reuse your memory card and the memory card can be recognized by your Mac or PC because all errors have been fixed. No any damage. Or you can sell, donate, discard or give away the memory card. All your history data stored on the memory card is gone forever.
Post-Formatting Steps
After formatting your memory card, you should verify its functionality:
Verifying the Format
- Check Recognition: Ensure your Mac recognizes the memory card by opening Finder and checking if it appears in the list of devices.
- Test Functionality: Insert the card into other devices or use it for its intended purpose to confirm it is functioning correctly.
Reinserting and Testing
Reinsert the card into your Mac or other devices to ensure it is consistently recognized. If the issue persists, it may indicate a hardware problem with the card or the card reader.
Troubleshooting Common Issues
If formatting doesn't resolve the problem, consider these additional steps:
If the Memory Card Is Still Not Recognized:
- Check for Hardware Issues: Inspect the memory card for visible damage and test it with other devices to confirm its status.
- Update macOS and Drivers: Ensure your macOS is up to date, as updates can improve hardware compatibility and address known issues.
- Seek Professional Help: If the card remains unrecognized, consult a professional data recovery service or contact the card manufacturer for support.
Conclusion
Formatting an unrecognized memory card on a Mac involves several steps, from understanding potential causes to using built-in tools and alternative methods. By following this guide, you can address recognition issues and restore the functionality of your memory card.
If you have lost data from your memory card, you can use Mac data recovery application such as Do Your Data Recovery for Mac to deeply scan the formatted or unrecognized memory card. It will find all recoverable files and help you recover them.

DoYourData Super Eraser for Mac
DoYourData Super Eraser for Mac is a 100% safe, powerful and easy-to-use data erasure program. It offers certified data erasure standards including Peter Gutmann, U.S. Army AR380-19, DoD 5220.22-M ECE to permanently erase data from Macs and external devices, making data recovery be impossible.