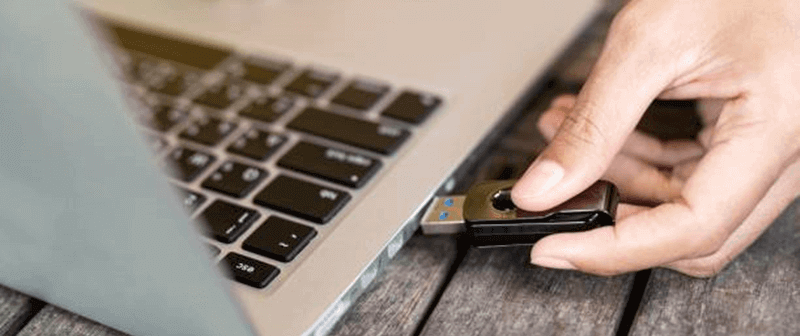
How to Format Unmounted or Inaccessible USB Flash Drive on Mac?
Your USB drive becomes unmountable or inaccessible? Don’t worry, you can use Disk Utility or other tools to help you format the USB drive and fix corrupted file system. Before you format the unmounted or inaccessible USB drive on Mac, you can use a Mac data recovery app to scan the USB drive and export all data from the drive to your Mac.
![]() Updated by Shirly Chen on August 5, 2024
Updated by Shirly Chen on August 5, 2024
Quick Navigation:
- Why Format a USB Flash Drive on Mac?
- Recover Data Before Formatting a Unmounted or Inaccessible USB Drive on Mac
- Format Unmounted or Inaccessible USB Drive on Mac by Using Disk Utility
- How to Wipe Damaged USB Drive on Mac Before Selling or Donating?
- Conclusion
Formatting a USB flash drive is an essential task for many Mac users, whether for clearing old data, fixing corrupted files, or changing the file system to ensure compatibility with different devices. A well-formatted drive ensures smooth data transfer and optimal performance. Understanding the process and knowing the right steps can save time and prevent data loss.
In the context of USB flash drives on a Mac, the term "unmounted" refers to a state where the drive is connected to the computer but not actively recognized or accessible by the operating system. This can happen for various reasons, such as improper ejection or corruption, and requires reformatting to restore functionality.
This article will show you how to format unmounted or inaccessible USB drive on Mac.
Why Format a USB Flash Drive on Mac?
Formatting a USB flash drive serves several purposes:
- Clearing data for new usage: Formatting wipes the drive clean, allowing it to be used for new data storage without remnants of previous files.
- Fixing corrupted drives: If a drive becomes corrupted, reformatting can often resolve the issue and restore the drive to working condition.
- Changing the file system for compatibility with different devices: Different devices and operating systems may require specific file systems (e.g., macOS Extended, exFAT, FAT32). Formatting allows you to set the appropriate file system for your needs.
Recover Data Before Formatting a Unmounted or Inaccessible USB Drive on Mac
First of all, open Disk Utility, select the USB drive and click on First Aid button. Then check if you can access to the USB drive and copy all data from it to your Mac. If you can not repair the USB drive using First Aid, just use a data recovery app to scan inaccessible USB drive and export all data from it to your Mac.
Step 1. Download and install Do Your Data Recovery for Mac, then open it.
Step 2. Open Do Your Data Recovery for Mac, select the USB drive to start data recovery.

Step 3. Click on Scan button to deeply scan the USB drive and find all recoverable files.

Step 4. Once the scan is completed, select the wanted files, click on Recover button. Then save the files to your Mac.

Before formatting your unmounted or inaccessible USB flash drive, you also need to:
- Ensure the drive is properly connected to the Mac: Check that the USB flash drive is securely connected to one of the Mac's USB ports.
- Check if the drive is recognized but unmounted: Open Disk Utility to see if the drive is listed. If it appears but is unmounted, you can proceed with the formatting process.
Format Unmounted or Inaccessible USB Drive on Mac by Using Disk Utility
Accessing Disk Utility
To format an unmounted USB flash drive on a Mac, you need to access Disk Utility. This built-in tool allows you to manage and format storage devices easily.
1. How to open Disk Utility from Applications or Spotlight:
- From Applications: Open Finder, go to the "Applications" folder, then to the "Utilities" folder. Inside, you'll find Disk Utility. Double-click to open it.
- From Spotlight: Click the Spotlight icon (magnifying glass) in the upper-right corner of your screen, or press Command + Space bar. Type "Disk Utility" and press Enter to open it.
2. Navigating the Disk Utility interface:
- Once Disk Utility is open, you'll see a list of all connected storage devices on the left-hand side.
- The main window displays information and options for the selected device.
Identifying the USB Flash Drive
After opening Disk Utility, the next step is to locate your unmounted USB flash drive.
1. Locating the unmounted USB flash drive in Disk Utility:
- In the left sidebar, look for your USB flash drive. It should appear under the "External" section. If it's unmounted, it may appear grayed out.
- Click on the drive to select it. Information about the drive will appear in the main window.
2. Differentiating between internal and external drives:
- Internal drives are usually listed under the "Internal" section in the sidebar and typically include the Mac's main hard drive or SSD.
- External drives, including your USB flash drive, are listed under the "External" section. This helps avoid confusion and ensures you format the correct drive.
Formatting the Drive
To format your unmounted USB flash drive on a Mac, follow these steps:
1. Selecting the USB flash drive:
In Disk Utility, ensure you have identified the correct USB flash drive in the "External" section of the left sidebar. Click on the drive to select it, making sure it is highlighted.
2. Choosing the "Erase" option:
With the USB flash drive selected, click the "Erase" button at the top of the Disk Utility window. This will open the Erase dialogue box.
3. Setting the format type:
In the Erase dialogue box, you will see a drop-down menu labeled "Format." Click on it to choose the appropriate file system for your needs. Common options include:
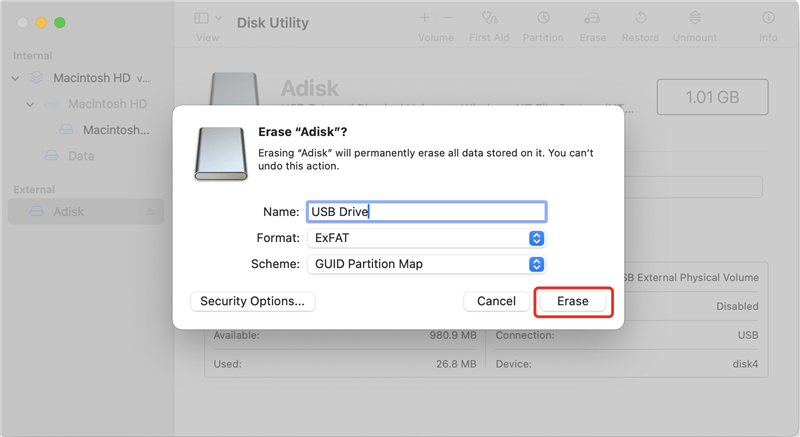
- APFS/macOS Extended (Journaled): Ideal for use with Mac systems.
- ExFAT: Suitable for use with both Mac and Windows systems, and for transferring large files.
- MS-DOS (FAT32): Compatible with most devices but has a 4GB file size limit.
4. Naming the drive:
Below the format options, there is a field labeled "Name." Enter a name for your USB flash drive. This name will be how the drive is identified on your Mac and other devices.
5. Starting the formatting process:
After selecting the format type and naming the drive, click the "Erase" button at the bottom of the dialogue box to begin the formatting process. Disk Utility will erase and format the drive according to your specifications.
A progress bar will appear, showing the status of the formatting process. Once it is complete, a confirmation message will appear.
Your USB flash drive is now formatted and ready for use. It should automatically mount and appear on your desktop or in Finder, ready for new data.
Verifying the Format
After formatting your USB flash drive, it's important to verify that the process was successful and the drive is ready for use.
1. Checking the newly formatted drive in Disk Utility:
- Once the formatting process is complete, the USB flash drive should still be selected in Disk Utility. Check the information displayed in the main window to confirm that the drive is using the desired format and has the correct name.
- Ensure that the capacity and available space reflect the changes made during formatting.
2. Ensuring the drive is now mounted and ready for use:
- The newly formatted drive should automatically mount and appear in Finder and on your desktop. If it doesn't, you can manually mount it by selecting the drive in Disk Utility and clicking the Mount button at the top of the window.
- Open Finder and navigate to the USB flash drive to confirm that it is accessible and ready for storing files.
Troubleshooting Common Issues
Despite following the steps carefully, you might encounter some issues. Here's how to address them:
1. What to do if the drive is not recognized:
- Check Connections: Ensure the USB flash drive is properly connected to the Mac. Try a different USB port or use another USB cable.
- Restart Your Mac: Sometimes, a simple restart can resolve recognition issues.
- Use Another Computer: Connect the USB flash drive to another computer to see if it is recognized. If not, the drive itself may be faulty.
2. Handling errors during the formatting process:
- Disk Utility Errors: If you receive an error message in Disk Utility, note the specific error code or message. It may provide clues about the issue.
- First Aid: Before reattempting to format, run the First Aid tool in Disk Utility on the drive to check and repair any disk errors.
- Reformat: Try reformatting the drive again, ensuring you select the correct format and settings.
3. Using Terminal for advanced troubleshooting:
When facing issues with an unmounted or problematic USB drive that Disk Utility cannot process properly, you can use Terminal commands to erase the USB drive. Here's how to do it:
Step 1. Open Terminal
- Navigate to the "Applications" folder from Finder on your Mac.
- Access the "Utilities" folder within "Applications."
- Locate and launch "Terminal" to open the command line interface.
Step 2. Use the diskutil eraseDisk command to format the drive. For example:
diskutil eraseDisk exFAT MyUSB MBRFormat /dev/disk2
Replace exFAT with the desired format, MyUSB with the drive name, and /dev/disk2 with the correct identifier for your USB flash drive.
Step 3. Ensure you have noted the "Device Node" representing the USB drive. Next, use the following command to erase the disk, formatting it to the APFS format:
diskutil eraseDisk APFS [device node]
Replace [device node] with the actual device node of your USB drive.
Erase USB Drive in Recovery Mode
When erasing a drive that is integral to your Mac's startup process, you may need to use Recovery Mode. Here’s how to put both types of Macs into Recovery Mode and erase a USB drive:
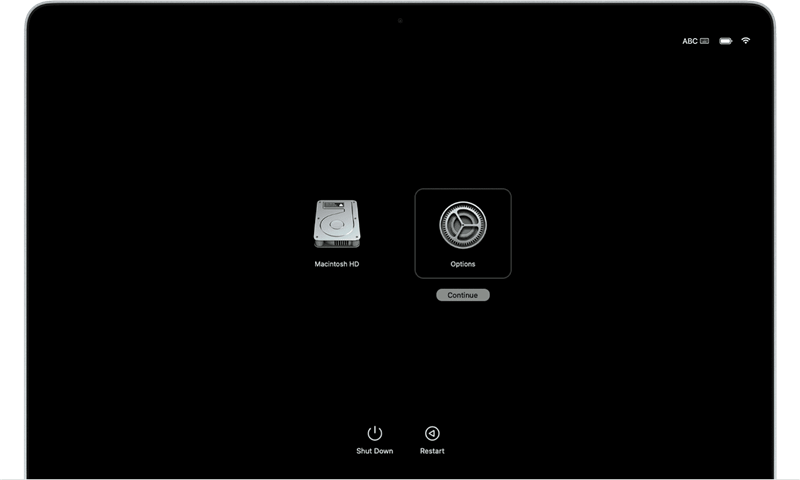
For Intel Macs:
- Shut down your Mac. Hold down the "Command + R" keys while turning it on.
- Release the keys when the Apple logo appears. Enter your username and password to proceed to the "macOS Utilities" screen.
For Apple Silicon Macs:
- Turn off your Mac. Hold the Power button when starting it again.
- Release the button when the "Options" screen appears. Click on it and enter your username credentials to access the "macOS Utilities" screen.
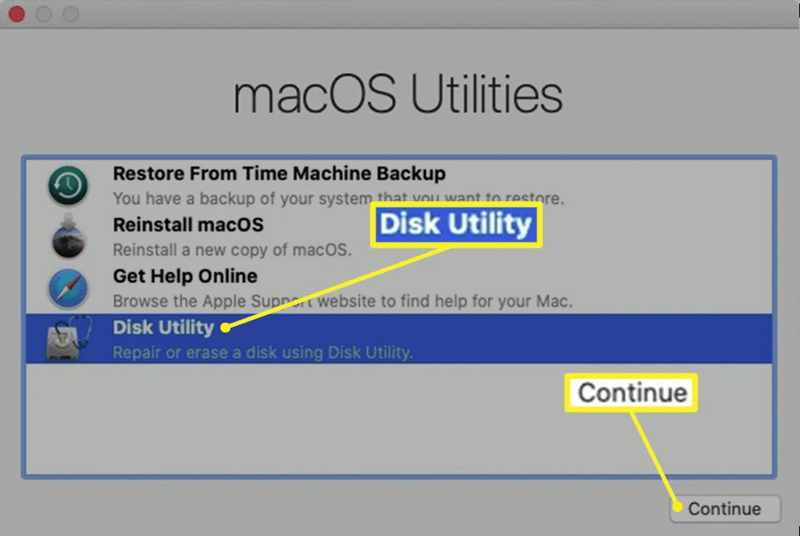
Steps to Erase the USB Drive in Recovery Mode:
- In the "macOS Utilities" window, open Disk Utility. Select the USB drive volume you want to erase.
- Click the "Erase" button and follow the on-screen instructions to format the drive. Once completed, quit Disk Utility and restart your Mac to exit Recovery Mode.
How to Wipe Damaged USB Drive on Mac Before Selling or Donating?
To permanently wipe all data from the damaged USB drive before you sell, donate or dispose of it, you can use a data erasure app to wipe the USB drive.
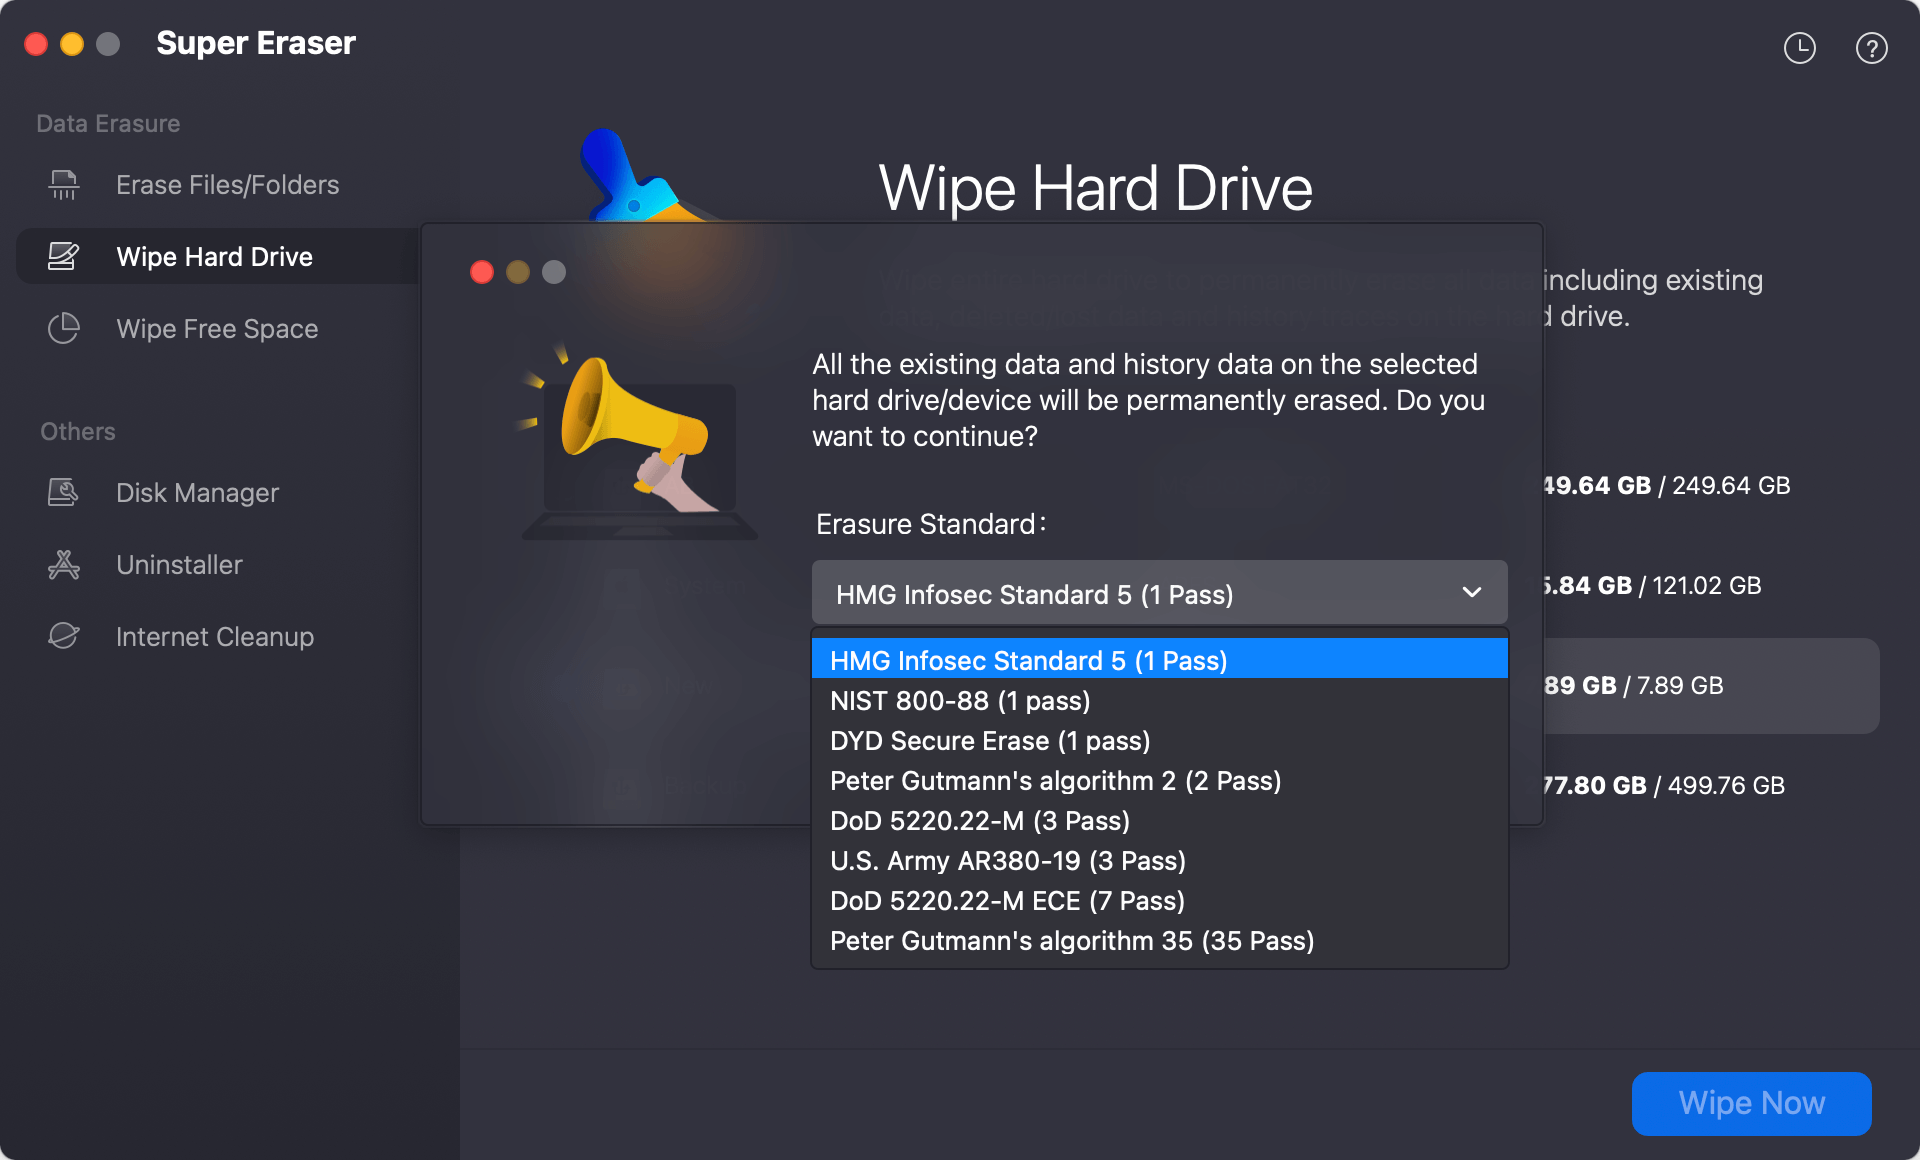
Step 1. Download and install DoYourData Super Eraser for Mac, connect the USB drive to your Mac.
Step 2. Open DoYourData Super Eraser for Mac, choose Wipe Hard Drive mode. Then select the USB drive and click on Wipe Now button.

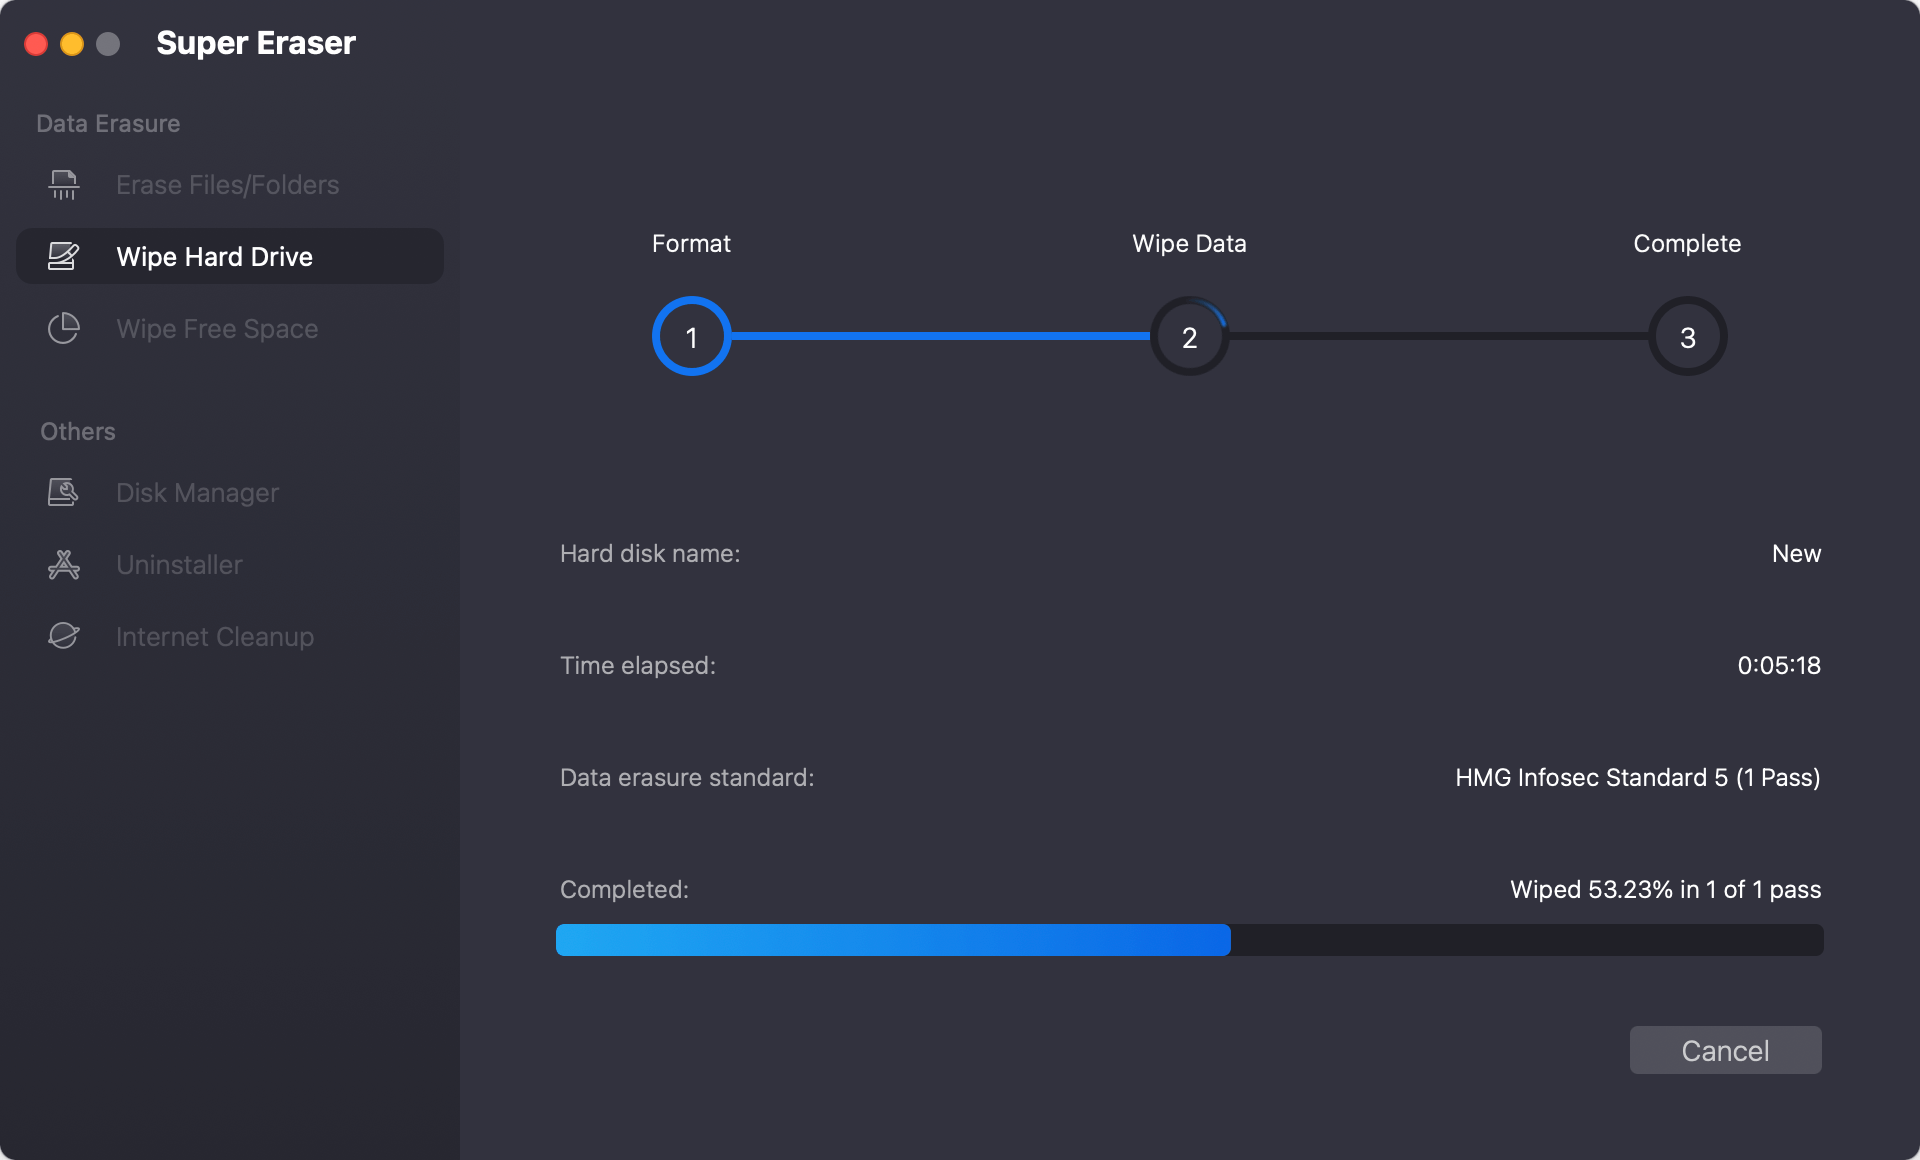
Step 3. Select a data erasure standard, then click on Continue button to format and wipe the damaged USB drive.
Once the process gets finished, all data stored on the unmounted/inaccessible USB drive is lost for good, cannot be recovered by any data recovery software.
Conclusion
Formatting an unmounted USB flash drive on a Mac is a straightforward process when you follow the right steps. By accessing Disk Utility, selecting the correct drive, choosing the appropriate format, and verifying the results, you can ensure your USB flash drive is ready for use. If you encounter issues, troubleshooting steps and advanced tools like Terminal can help resolve common problems. Proper formatting enhances the functionality and compatibility of your USB flash drive, making it a reliable tool for data storage and transfer.

DoYourData Super Eraser for Mac
DoYourData Super Eraser for Mac is a 100% safe, powerful and easy-to-use data erasure program. It offers certified data erasure standards including Peter Gutmann, U.S. Army AR380-19, DoD 5220.22-M ECE to permanently erase data from Macs and external devices, making data recovery be impossible.
Written & Updated by Shirly Chen
Shirly Chen has been writing data recovery, data erasure articles for DoYourData over 4 years. She has been working as a professional website content writer & editor for quite a long time. She also writes articles about disk clone, Mac optimization, disk backup, etc.