Quick Navigation:
- Before Wiping a CF Card on Mac
- Erase SD Card on Mac Using Disk Utility
- Erase CF Card on Mac Using Terminal
- Wipe CF Card on Mac Using Mac Disk Wipe Software
- Post-Wiping Checks
- Troubleshooting Common Issues
- Conclusion
- FAQs About Wiping CF Card on Mac
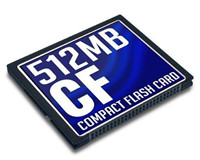
CompactFlash (CF) cards are a type of memory card used primarily in digital cameras, audio recorders, and other devices that require high-capacity storage. They have been popular due to their durability and high performance, but like all storage media, they need occasional maintenance. One critical task is wiping the CF card—whether to securely delete data before disposal, repurpose the card for new uses, or resolve issues. This guide will walk you through the steps for wiping a CF card on a Mac, using Disk Utility, Terminal or third-party disk wipe tool.
Before Wiping a CF Card on Mac
Before you start the wiping process, a few preparatory steps are necessary:
Backup Important Data
The first and foremost step is to ensure that all important data on the CF card is backed up. Wiping the card will erase all data on it, so if you have photos, videos, or other important files, make sure to copy them to another storage device or cloud service. This will prevent any data loss and ensure you have a backup in case you need it later.
Ensure Proper Connection
The CF card needs to be properly connected to your Mac for you to perform any operations on it. Since many Macs do not have built-in CF card slots, you'll need a CF card reader. Connect the CF card reader to a USB port on your Mac and insert the CF card into the reader. Wait for a few moments until the Mac recognizes the CF card and it appears on the desktop or in Finder.
Erase SD Card on Mac Using Disk Utility
Disk Utility is a powerful and user-friendly application built into macOS that allows you to manage your disk drives and external storage devices. It provides a range of functionalities, including the ability to format or erase disks, which is particularly useful for preparing a CompactFlash (CF) card for new use or troubleshooting. Here's a detailed guide on how to use Disk Utility to wipe a CF card on your Mac:
Step 1. Opening Disk Utility: To begin, you need to open Disk Utility. You can do this in several ways:
- Spotlight Search: Press Command + Space to open Spotlight, then type Disk Utility and press Enter.
- Applications Folder: Navigate to Applications > Utilities > Disk Utility.
- Launchpad: Go to Launchpad > Other > Disk Utility.
Disk Utility Window: Once Disk Utility is open, you'll see a window that displays all connected disks and volumes on the left sidebar. This includes internal hard drives, external storage devices, and any connected CF cards.
Step 2. Connecting the CF Card:
- Insert the CF Card: If you haven't already done so, connect your CF card to your Mac using a CF card reader. Ensure that the card reader is properly connected to a USB port on your Mac and that the CF card is fully inserted into the reader.
- Wait for Recognition: macOS should automatically recognize the CF card. After a moment, you should see the CF card appear in the Disk Utility sidebar under the list of available drives.
Step 3. Selecting the CF Card:
- Locate the CF Card: In Disk Utility, you'll see a list of all connected disks and their partitions. Find the CF card in this list. It might be labeled with a generic name like UNTITLED or display the card's brand name.
- Select the Card: Click on the CF card to highlight it. Make sure you have selected the correct device to avoid erasing the wrong disk.
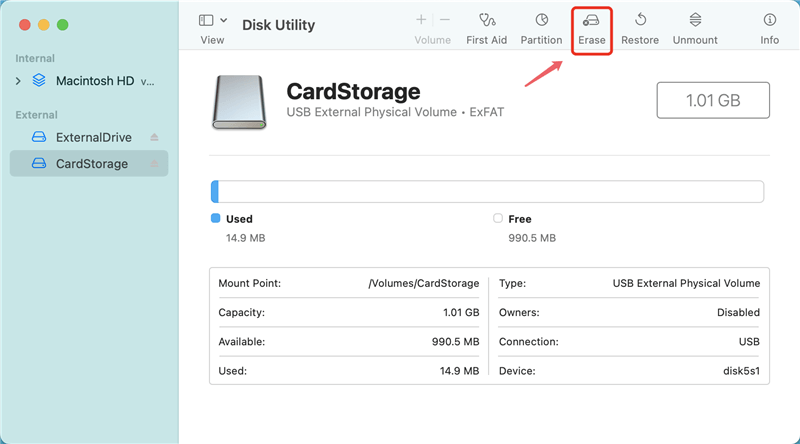
Step 4. Erasing the CF Card:
- Click Erase: With the CF card selected, locate the Erase button at the top of the Disk Utility window. This button initiates the formatting process.
- Erase Dialog Box: Clicking Erase will bring up a dialog box with several options:
- Name: Enter a name for the CF card. This is how it will appear on your desktop and in Finder.
- Format: Choose the file system format for the CF card. Here are common options:
- MS-DOS (FAT): This format is compatible with most devices and is a good choice for cards used in cameras or other electronics.
- ExFAT: This format supports larger files and is suitable for modern devices that require compatibility with large file sizes.
- Scheme: Select the partition scheme. For most CF cards, the default option of GUID Partition Map or Master Boot Record will be appropriate.
- Security Options: Select data erasure level to erase the CF card.
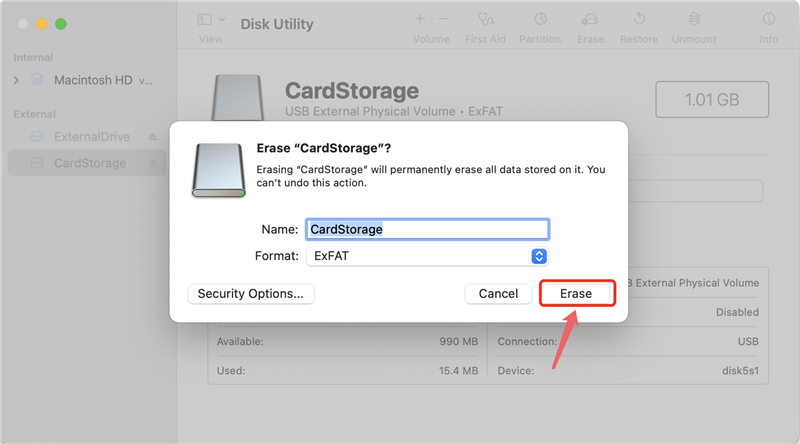
Step 5. Confirm the Erase Operation: After configuring the options, click Erase to start the process. Disk Utility will format the CF card according to your selected parameters, which involves erasing all existing data and setting up a new file system.
Step 6. Completion: Once the formatting process is complete, Disk Utility will display a confirmation message. The CF card is now wiped and ready for new data.
Verification
- Reinsert the CF Card: Safely eject the CF card by dragging its icon to the Trash or using the Disk Utility eject button. Reinsert the card into the card reader to ensure it is properly recognized.
- Check the CF Card: Open Finder and locate the CF card. Verify that it appears with the new name you assigned and that it is empty. You can also check the formatting by selecting the CF card and viewing its details in Finder’s Info panel.
- Test Usage: To confirm that the CF card is fully functional, try copying some files to it or using it in the device it is intended for. This ensures that the card is properly formatted and ready for use.
Erase CF Card on Mac Using Terminal
For advanced users or those who prefer command-line tools, Terminal can be used to wipe a CF card. Here's a step-by-step guide:
Step 1. Open Terminal by searching for it in Spotlight (press Command + Space and type "Terminal") or navigating to Applications > Utilities > Terminal.
Step 2. In Terminal, type the command diskutil list and press Enter. This command will list all connected disks and their partitions.
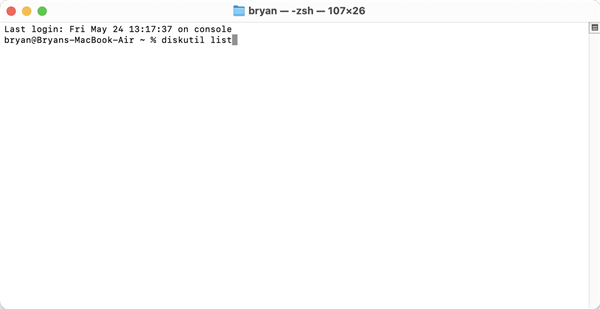
Identify your CF card from the list. It will typically be listed as something like /dev/disk4 or another identifier. Be sure to correctly identify the CF card to avoid wiping the wrong disk.
Step 3. Before you can erase the CF card, it needs to be unmounted. Type the following command in Terminal and press Enter:
diskutil unmountDisk /dev/diskX
Replace /dev/diskX with the identifier of your CF card.
Terminal will unmount the CF card, making it ready for the wiping process.
Step 4. To erase and format the CF card, use the diskutil command with the eraseDisk option. The general format of the command is:
diskutil eraseDisk FILE_SYSTEM DISK_NAME /dev/diskX
Replace FILE_SYSTEM with the desired format (e.g., MS-DOS or ExFAT), DISK_NAME with the name you want to give the CF card, and /dev/diskX with the identifier of the CF card.
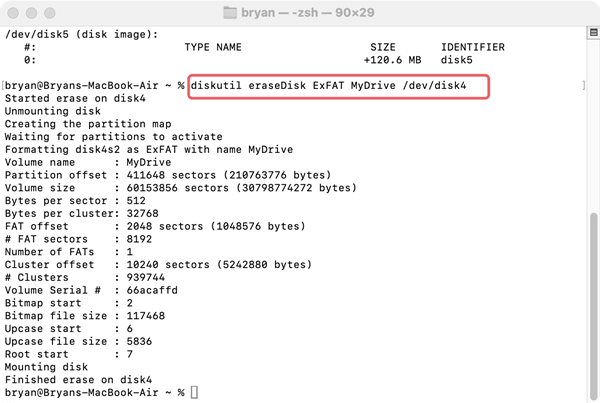
For example, to format the CF card as ExFAT with the name MyDrive, you would type:
diskutil eraseDisk ExFAT MyDrive /dev/disk4
Press Enter to execute the command. Terminal will begin formatting the CF card according to your specifications.
Verification
After wiping the CF card using Terminal, you can recheck the disk list using diskutil list to ensure that the CF card is correctly formatted. Reinsert the CF card into your system to verify that it's empty and formatted as expected.
Wipe CF Card on Mac Using Mac Disk Wipe Software
Mac data recovery software can unformat CF card and get all lost data back. If you will sell, donate or throw out an old CF card, you should permanently erase all existing data and deleted/formatted data from it, ensure no data is recoverable. Mac disk wipe software - such as DoYourData Super Eraser for Mac can help you wipe a CF card on Mac and permanently erase all data from it.
Step 1. Download and install DoYourData Super Eraser for Mac on your Mac and connect the CF card to the same Mac.
Step 2. Open DoYourData Super Eraser for Mac, choose Wipe Hard Drive mode. Select the CF card, click on Wipe Now button.

Step 3. Select a data erasure standard, then click on Continue button to start wiping the CF card.
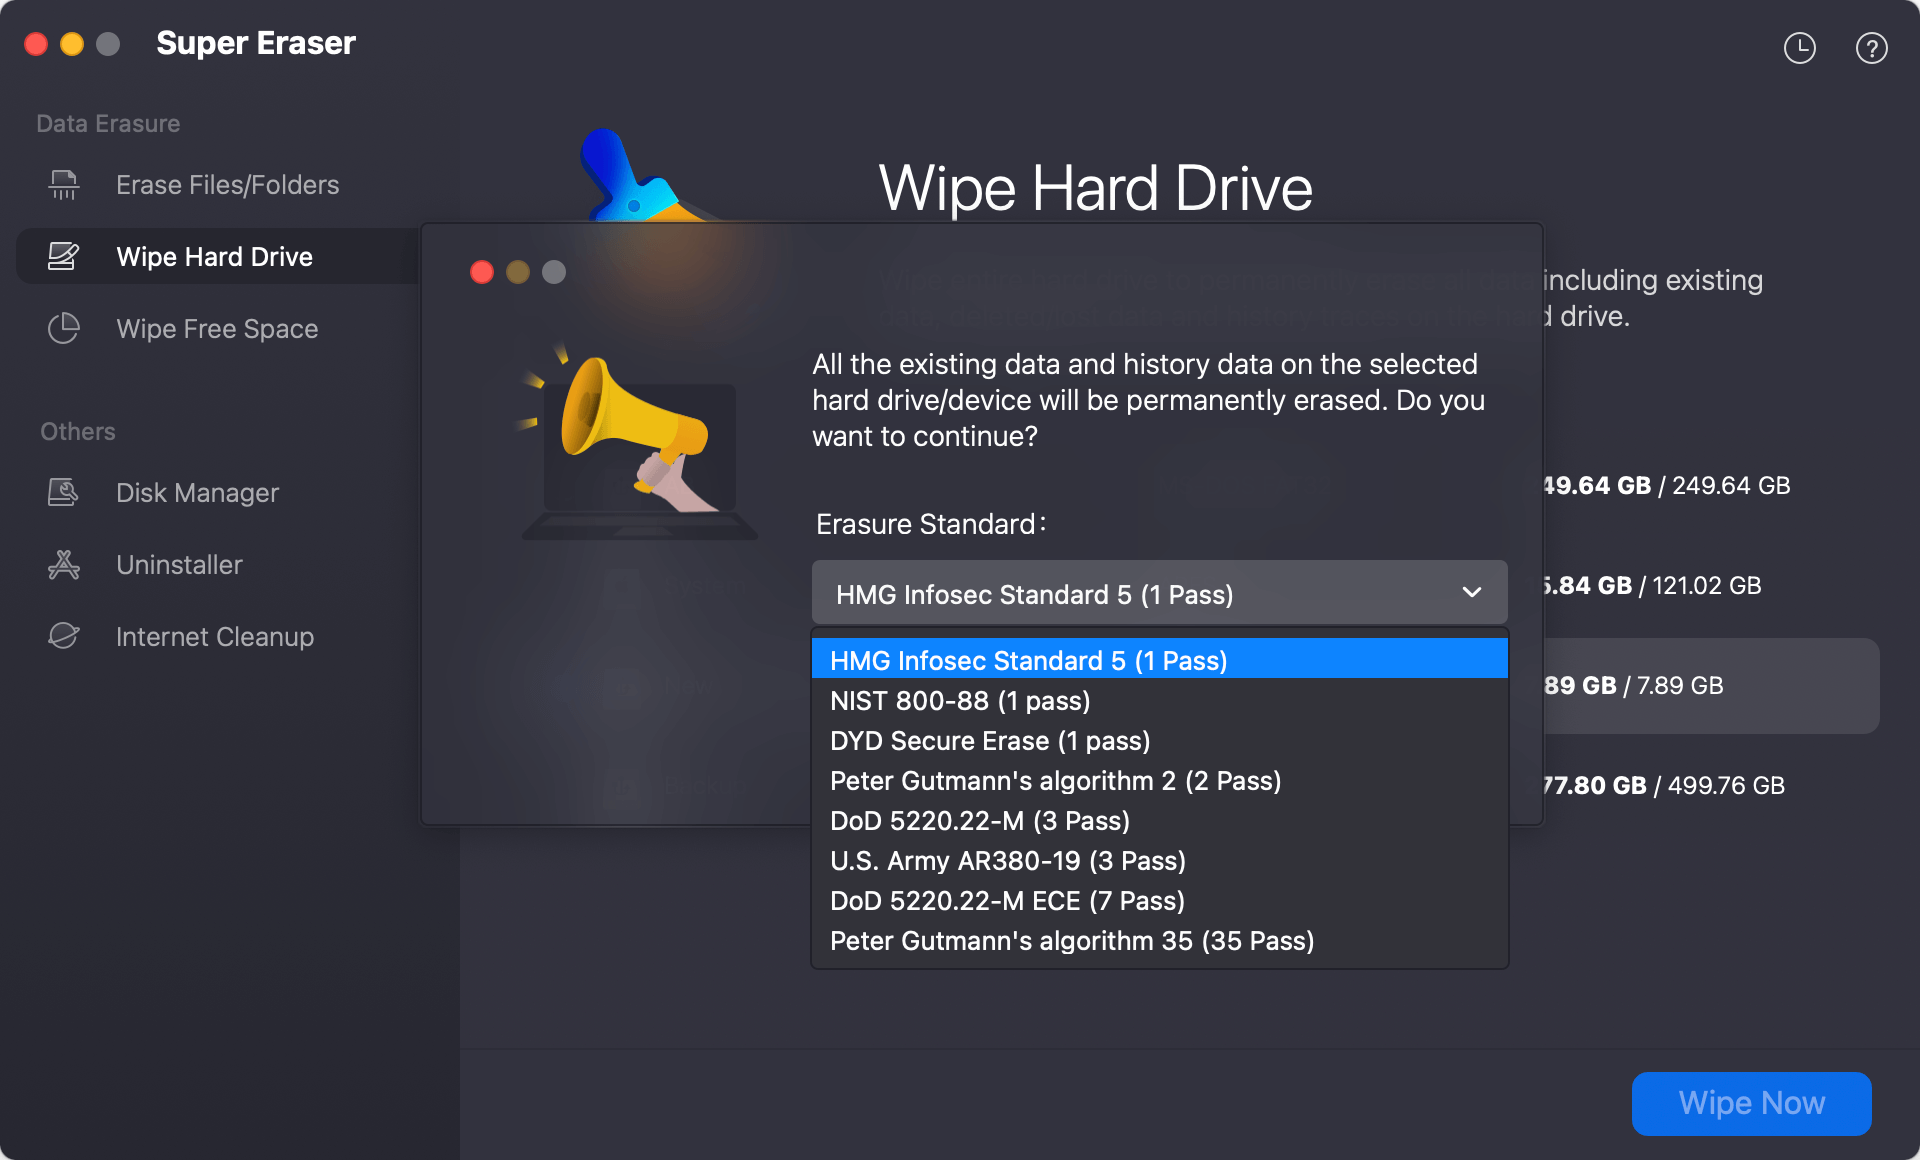
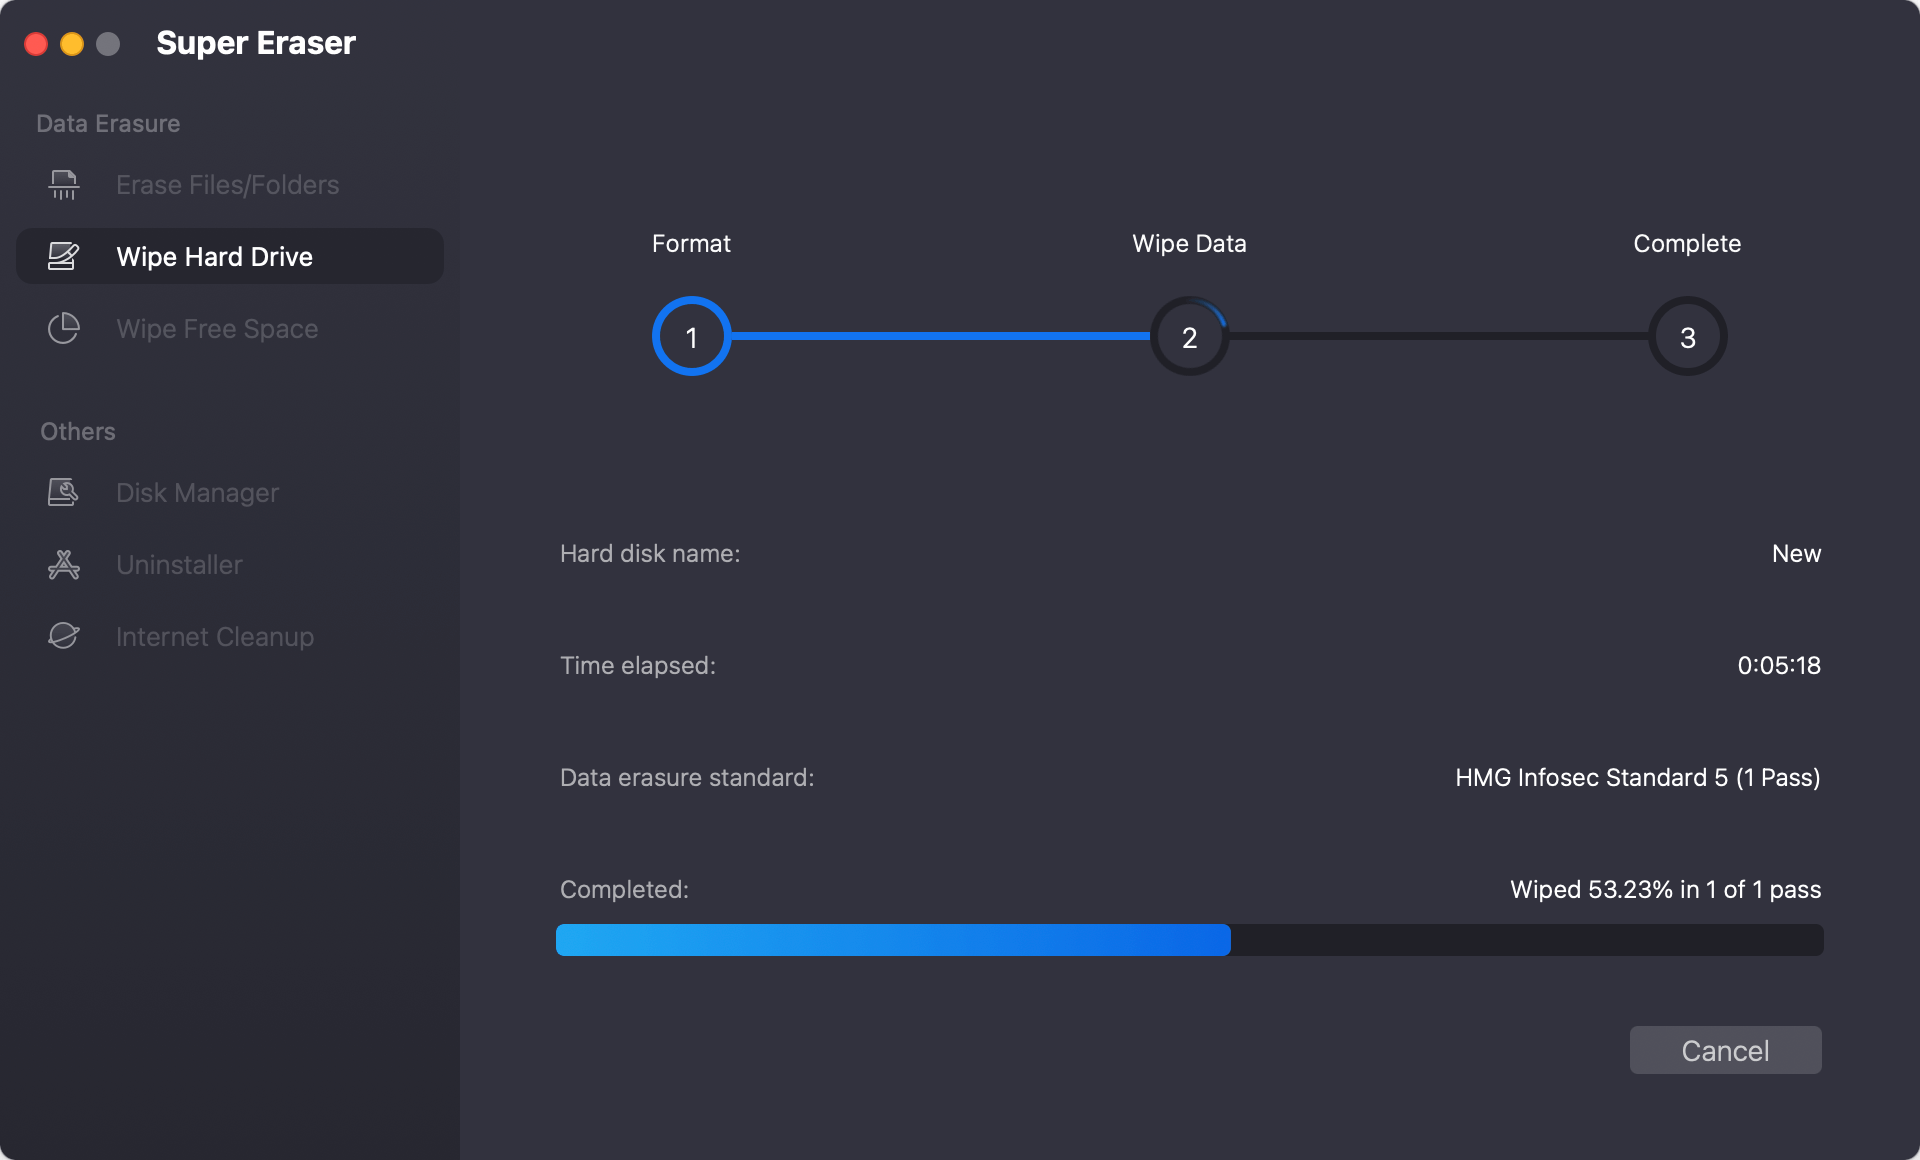
It will erase all data (including existing data, deleted/formatted/lost data) from the CF card, leaving no trace for data recovery.
Post-Wiping Checks
Once the CF card has been wiped, it’s important to perform a few checks:
Reconnecting the CF Card
- Safely eject the CF card from the card reader by dragging its icon to the Trash or using Disk Utility's eject function.
- Reinsert the CF card to ensure that it is recognized by your Mac and appears as a new, empty volume.
Verify Wipe
- Open Finder and check the CF card’s contents to confirm that it is empty.
- Check the formatting and make sure that it is set up according to your requirements.
Troubleshooting Common Issues
Here are some common issues you might encounter and how to troubleshoot them:
CF Card Not Recognized
- Check Connections: Ensure the CF card is properly inserted into the card reader and that the card reader is properly connected to your Mac.
- Try a Different Reader: If the CF card is not recognized, try using a different CF card reader or USB port.
- Restart Your Mac: Sometimes, simply restarting your Mac can resolve recognition issues.
Errors During Wiping
- Permission Errors: If you encounter permission errors, make sure you are running Disk Utility or Terminal with administrative privileges. You may need to enter your Mac's password to proceed.
- Disk Errors: If Disk Utility or Terminal reports errors, the CF card might be physically damaged or corrupted. In such cases, you may need to use specialized data recovery or repair tools.
Conclusion
Wiping a CF card on a Mac is a straightforward process using Disk Utility, Terminal or DoYourData Super Eraser for Mac. By following the steps outlined in this guide, you can securely erase the data on your CF card, prepare it for new uses, or troubleshoot any issues. Remember to always back up important data before wiping and double-check that you are working with the correct disk to avoid accidental data loss. Proper maintenance of your CF card ensures its longevity and reliability in future use.
FAQs About Wiping CF Card on Mac
1. How to format a CF card for Mac?
Open Disk Utility, then select the CF card, click Erase. Select ExFAT (if the CF card is bigger than 32GB) or MS-DOS (FAT) (if the CF card is 32GB or smaller) as the Format, then click Erase again to format the CF card.
2. Can I recover lost data from a formatted CF card on Mac?
Yes, Mac data recovery software can deeply scan the formatted CF card and get all lost data back:
- Download and install Do Your Data Recovery for Mac, open it.
- Select the formatted CF card.
- Click on Scan button to deeply scan the formatted CF card.
- Preview and recover lost files after scanning.
3. How to wipe a CF card on Mac?
To permanently erase data from a CF card, you can try Mac disk wipe software:
- Download and install DoYourData Super Eraser for Mac.
- Open this Mac disk wipe software.
- Choose Wipe Hard Drive mode.
- Select the CF card.
- Click on Wipe Now button.
4. Which tool can help in formatting or wiping CF card on Mac?
Here are 5 tools can help you format or wipe CF card on Mac:
- Terminal
- Disk Utility
- DoYourData Super Eraser for Mac
- MacClean360
- DoYourData NTFS for Mac

DoYourData Super Eraser for Mac
DoYourData Super Eraser for Mac is a 100% safe, powerful and easy-to-use data erasure program. It offers certified data erasure standards including Peter Gutmann, U.S. Army AR380-19, DoD 5220.22-M ECE to permanently erase data from Macs and external devices, making data recovery be impossible.