How to Take Screenshots and Recover Deleted Screenshots on Mac?
![]() Updated by Justin Kenny on 2020-01-28
Updated by Justin Kenny on 2020-01-28
Summary: this article will show you the effective methods to capture screenshot on Mac and help you recover permanently deleted screenshots or other images on Mac.
Users can take screenshots easily on Mac. There are different methods to take screenshots on Mac with the system built-in options. Here we will show you the methods in detail to take screenshots on Mac.

Sometime, you may delete some of your screenshots by mistake. If some of the deleted screenshots are important and needed, you will try to recover the deleted screenshots. However, how to recover deleted screenshots on Mac? Don’t worry, we will also share the different solutions for deleted screenshots recovery on Mac.
How to take screenshots on Mac?
On Mac, there are a few quick keyboard shortcuts that can help you take screenshots easily. You can take screenshots for your entire screen, part of your screen, or specified window/menu.
Take a screenshot for the entire screen
First, you can take screenshot of your entire screen by clicking the key combination Command+Shift+3 at once. It will capture the entire screen and save the screenshot into a .png file directly on the desktop of your Mac.

Take a screenshot for a specific window/menu
If you only want to take a screenshot for a windows or menu, there is another way to achieve the goal. You can first click Command+Shift+4 keys at once, and then please press the Space key. The mouse cursor will turn into a camera icon. You can then move the cursor over a specific window or menu. The selected window or menu will be highlighted. Click the window or menu, it will create a screenshot for the selected window or menu directly.

Take a screenshot of part of the screen
Also, there is another flexible way to take a screenshot on Mac. You can take a screenshot for part of the screen. First, you still need to click the keyboard shortcut Command+Shift+4 and the mouse cursor will turn into a crosshair icon. You can move it to a specific location first, and then please click and drag it to select the part of your screen. Once your release the mouse button, a screenshot of the selected part of screen will be created.
How to recover deleted screenshots on Mac?
After deleting screenshot files on Mac, you will be able to recover them if the deleted screenshots are not overwritten or damaged by newly added data. If the deleted screenshots are not deleted permanently on your Mac, you can try to recover them easily as follows.
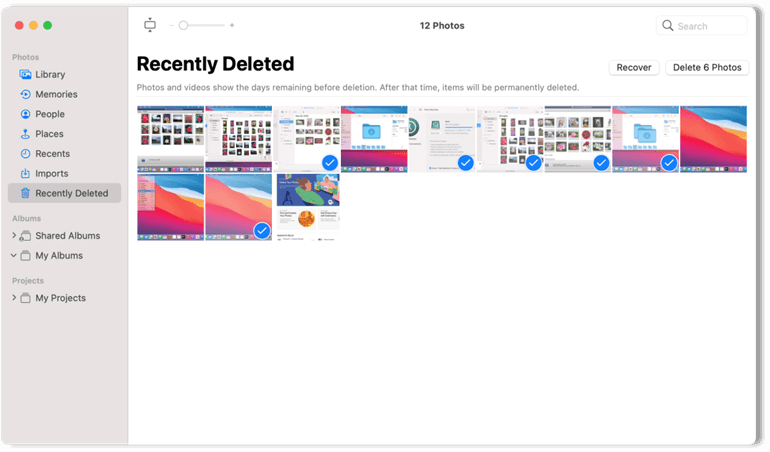
Recover deleted screenshots in Photos app
If the screenshots were imported into the Photos app and you deleted some of them there, the deleted files will be put into the “Recently Deleted” folder. The deleted files will be kept for 30 days if you don’t delete them here. Then you can have a chance to regret the deletion operation. Select the deleted screenshots that you want to recover, then just click the “Recover” button. The selected screenshots will then be put back to the original folder.
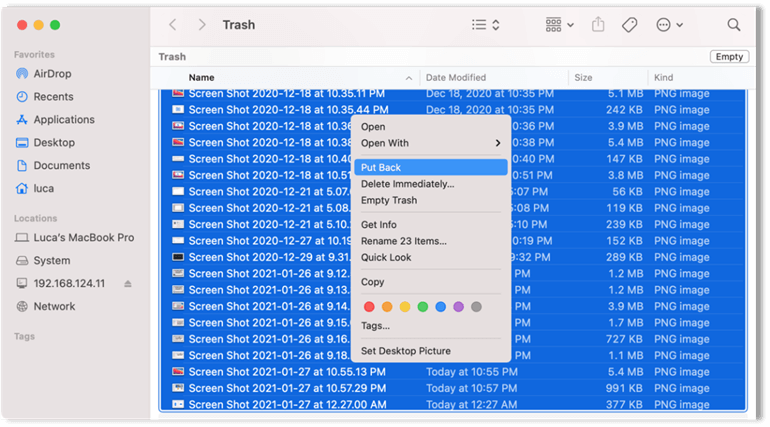
Restore the deleted screenshots from Trash
By default, the screenshots will be saved on the desktop on Mac. If you delete the screenshot files by accidental, these pictures will be moved to Trash. If the empty is not emptied, you can then get into the Trash to recover the deleted screenshots directly. Select the deleted screenshots and right-click, a menu bar will pop up. Please click the “Put Back” option and the deleted screenshots will be restored to the original folder.
Retrieve permanently deleted screenshots
However, you may deleted the screenshots permanently from your Mac by removing pictures from “Recently Deleted” in Photos app, or emptying the Trash. Is it possible to recover the deleted screenshots in such a case? The answer is yes. After deleting the screenshots permanently, if you can try to recover the files with a reliable data recovery software immediately, there will be a great chance to get back the deleted screenshots in such a case.
To recover deleted screenshots on Mac, we suggest you try the best Mac data recovery software - Do Your Data Recovery for Mac. The software is effective to recover deleted or lost files on Mac. It supports data recovery for pictures, videos, audio files, documents, and so on.
Also, the software is very simple to use. We will show you the simple steps to recover deleted screenshots with this software. First, please download the software and install it on your Mac.
Run the software from Launchpad and do as follows to recover screenshots.
Step 1. Select the drive on which you deleted the screenshots.

Step 2. Click the “Scan” button to scan the drive to search the lost screenshots.

Step 3. After the scan is done, you can choose the deleted screenshots to recover.

Note: Please ensure to save the recover data to another drive. Also, don’t add new data to the drive after deleting the screenshots to avoid further damage to the lost data.
If you deleted some screenshots or other pictures on your Mac, you can try the above methods to recover the pictures. Also, the software can also help you recover lost data in any other cases. For example, if you mistakenly format/erase drive, delete/lose volumes, or the drive get corrupted, and so on, you can also try this software. It can help you recover lost data effectively and quickly in these cases. Feel free to download and have a full trial first.
Written & Updated by Justin Kenny
Justin Kenny is a writer & editor of DoYourData. He joined DoYourData in 2016 and focuses on writing articles about Windows data recovery, Mac data recovery, external device data recovery, hard drive clone, data erasure, Mac cleanup, computer issue fixes, etc. He is a super fan of Apple devices and is big on testing new digital device and system utility software.