Recover Overwritten Or Replaced Files On Mac
![]() Updated by Justin Kenny on 2022-04-28
Updated by Justin Kenny on 2022-04-28
You're not alone, whether you've ever copied files to your Mac and gotten a pop-up asking if you want to change the current version. While editing files, you'll see the same thing if you simultaneously hit the "Command" and "S" keys.
Since we know what we're doing and the current files we're working with, we're more inclined to select "Replace." However, we may make errors in replacing the existing files because we are overconfident. That's why learning how to restore an overwritten file on a Mac is so important.
When your operation or a system mistake overwrites files like documents, spreadsheets, and music files, the earlier copies are preserved on your Mac's hard disk, and you may restore them. In the next section, let's look at all of the methods you may reverse a file replacement on a Mac.
Top 4 Methods to Recover Overwritten/Replaced Files and Folders
Things are getting out of hand. As a result, this does not mean we are helpless. Mac users may use this article to learn how to restore files that have been overwritten or replaced.
Method 1: Using Time Machine
Users' needs are taken into account by the powerful macOS. A built-in backup application called Time Machine helps you keep frequent backups of your Mac in the event of unexpected data loss. For example, if you accidentally overwrite a file, you might lose data.
On the other hand, Time Machine is not a cloud storage service that can back up your Mac's data in real-time or sync. As a result, you can only restore an overwritten file if you've started your Time Machine before the overwrite occurred. Otherwise, you'll have to rely on a cloud backup or data recovery program.
You may follow these procedures to recover files from Time Machine:
Use the Finder to identify the folder where the overwritten file was originally placed.
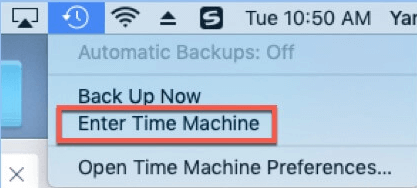
In the top right-hand corner of your screen, click the Time Machine button. Then, choose Enter Time Machine from the Time Machine menu to begin the procedure.
Select the original file by clicking the up arrow and going back to the time before it was replaced.
When you're done, click Restore and choose whether you want the prior or current file to retain.
Now that the overwritten files have been restored, you may access and modify the restored files.
Method 2: Without Time Machine
Autosave is included in the macOS operating system. Your files are saved in all their previous versions. Every time you open, reverse, alter, or rename your file, or when you save it, every modification is preserved.
In the event that one of your files is accidentally erased, you may attempt to recover it by following these steps:
Make a new file with the same name and save it in the same folder.
Open this file and choose "File" from the menu. It's on the left side of the screen, at the top. Then select "Revert to" and then "Browse All Versions."

Select the version you want to restore and click "Restore." A copy of the file that was overwritten has been retrieved.
Restore the file by selecting the location.
Those who want part of their data back will allow them to retrieve an earlier version of the file that was overwritten.
Method 3: Using Cloud Backup
Time Machine is a good option to secure your data, but other options may also be used. Any of the cloud's backup systems may be utilized to restore data that have been overwritten.
iCloud backups, which may be configured on your Mac, give you a second chance to restore accidentally erased data. To recover files that have been overwritten in an iCloud backup, follow these instructions.
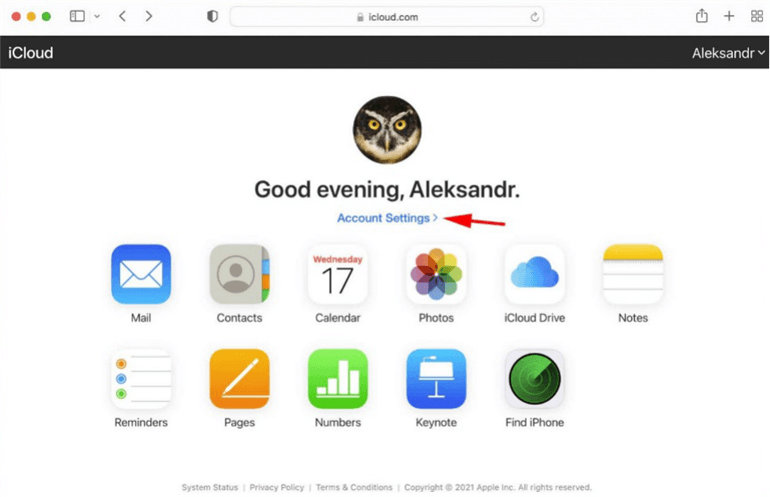
Use your Apple ID and password to access iCloud.com.
Select the Settings option.
Click Restore Files in the Advanced section at the bottom left of the screen.

The files you want to recover may be selected by checking the boxes next to their names and then selecting the Recover option. You may also opt to restore all of the data in the backup by selecting Select All.
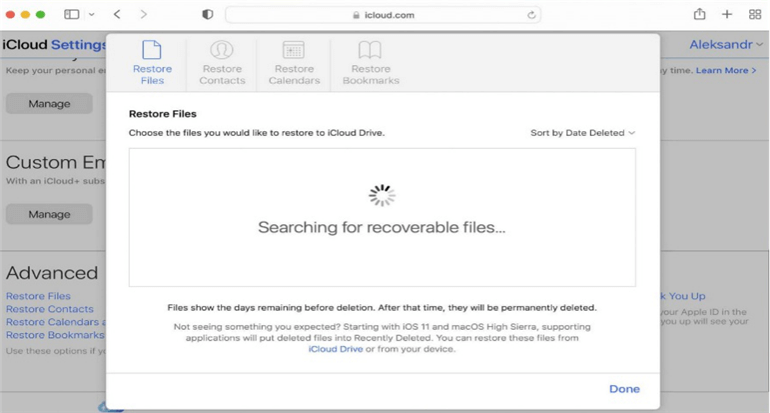
Then choose Restore Files.
Method 4: Using Data Recovery Software
Data recovery software is the best solution to recover overwritten or replaced files on a Mac. Do Your Data Recovery for Mac is a powerful data recovery software. It can help you recover deleted, formatted or lost files on Mac or from external hard drive, memory card, USB flash drive, etc.
Do Your Data Recovery for Mac
- Recover overwritten or replaced files and folders on Mac.
- Recover permanently deleted files on Mac.
- Recover formatted or erased data on Mac.
Step 1. Run Do Your Data Recovery for Mac, choose the hard drive where you delete or lose your files to start data recovery.

Step 2. Click on Scan button. Try advanced recovery mode to deeply scan the hard drive and find all lost files including overwritten or replaced files.

Step 3. Once the scan is completed, you can preview and recover the wanted files.

Conclusion
At first appearance, overwriting or changing files on your Mac might be a frightening experience. Your worry will likely rise even more when you discover that your overwritten file has escaped the Trash Bin.
Fortunately, the methods outlined in this article will allow you to restore your data in a matter of minutes. From Apple's Time Machine to a slew of cloud-based services, you have no shortage of ways to get your data back.
Of course, we recommend you back up your Mac with Time Machine or a disk cloning app - which is able to create bootable clone backup for your Mac.
Written & Updated by Justin Kenny
Justin Kenny is a writer & editor of DoYourData. He joined DoYourData in 2016 and focuses on writing articles about Windows data recovery, Mac data recovery, external device data recovery, hard drive clone, data erasure, Mac cleanup, computer issue fixes, etc. He is a super fan of Apple devices and is big on testing new digital device and system utility software.