Quick Navigation:
From magnetic tapes to current solid-state drives, storage devices have changed a lot as technology has grown and changed. Among these, the floppy disk is one of the most important in the history of computers. IBM created the floppy disk in the late 1960s. It was widely used for data keeping, especially in the 1980s and 1990s. These disks, which came in 8-inch, 5.25-inch, and the most common 3.5-inch sizes, were essential for storing data, distributing software, and starting up systems.
Even though they don't hold as much data as hard drives do now, floppy disks were essential in the early days of personal computers. This article details floppy disks, including what they are, how they work, what they're used for, and how to format them. It's a complete guide to this once-essential technology.
What Is A Floppy Disk?
A floppy disk, sometimes called a diskette, is a way to store data. It comprises a thin, bendable magnetic disk inside a square or rectangular plastic shell. The disk's magnetic designs store data. A floppy disk drive (FDD) can read and write to the disk.
Background History:
In the late 1960s, IBM engineers led by Alan Shugart came up with the idea for the floppy drive. The first floppy disk that could be bought was an 8-inch disk with 80 kilobytes of storage space. It came out in 1971. Over time, versions that were smaller and worked better were made:
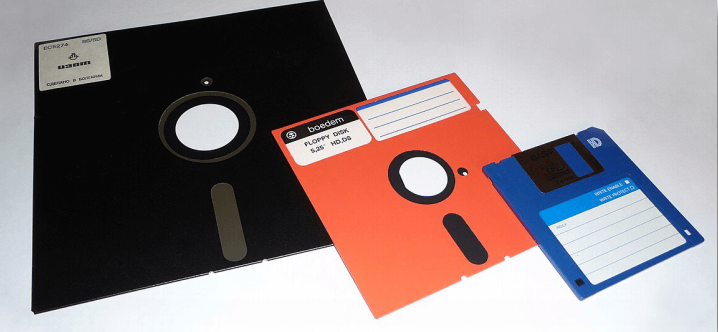
- 8-inch floppy disk: The first one came out in the early 1970s.
- 5.25-inch floppy disk: This version, which came out in 1976, was easier to carry around and quickly became the standard for personal computers.
- 3.5-inch floppy disk: Sony released this version in 1982. It has a hard plastic case, a metal cover that slides over the magnetic surface, and storage sizes of 720 KB, 1.44 MB, and 2.88 MB.
Structure and Functionality:
A floppy disk is made up of several important parts:
- Magnetic Disk: The real way that data is stored is by a thin, bendable sheet covered in iron oxide.
- Plastic Shell: The case around the magnetic disk that keeps it safe.
- Metal Shutter: This is a cover that slides over the magnetic surface to keep it clean and safe when not in use.
- Hub Ring: A metal ring in the middle of the disk lets the drive device turn it.
- Index Hole: The drive can tell where the disk's data area starts by this hole.
- Write-Protect Notch: A small switch that can be changed to prevent data from being accidentally overwritten.
Uses of Floppy Disks:
Before more modern storage options came out, floppy disks were used for many things, such as:
- Data Storage and Transfer: In the early days of personal computers, floppy disks were the main way things were stored and sent.
- Software Distribution: Floppy disks were used to spread a lot of software, including operating systems.
- Boot Disks: Boot disks, which let computers start up and run an operating system or diagnostic tools, were often made from floppy disks.
- Backup: They were a simple way to keep copies of important files.
How to Format A Floppy Disk?
Setting up a file system on a hard disk is called formatting it. This prepares the disk to store data. During this step, any current data is erased, and the disk is divided into sectors and tracks that the operating system can use to store and retrieve files.
Method 1. Steps to Format a Floppy Disk Using Windows
What you need to do if you have an older version of Windows:
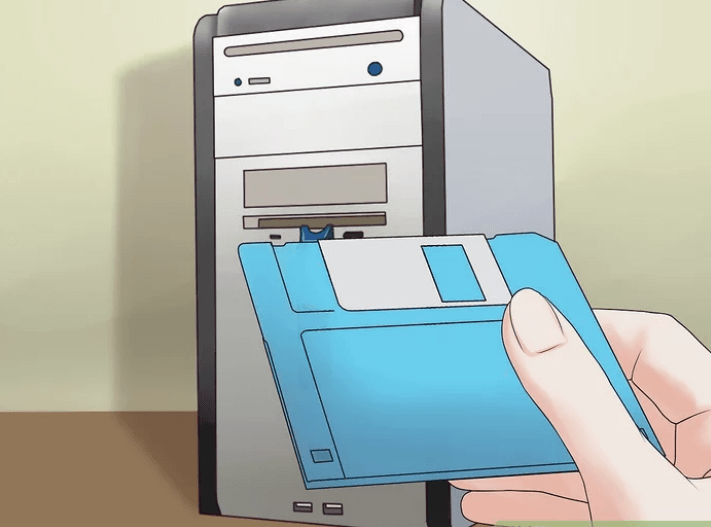
1. Insert the Floppy Disk: Put the floppy disk into your computer's disk drive.
2. Open My Computer: The "My Computer" icon on the screen should be double-clicked.
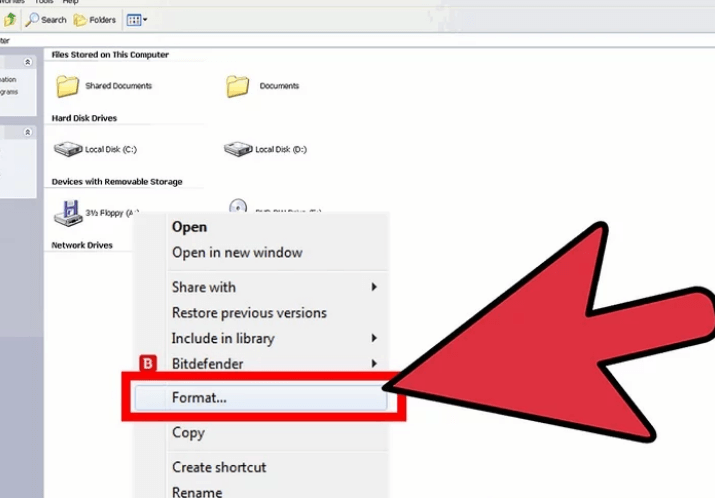
3. Select the Floppy Disk Drive: Right-click the "A:"-labeled floppy disk drive icon.
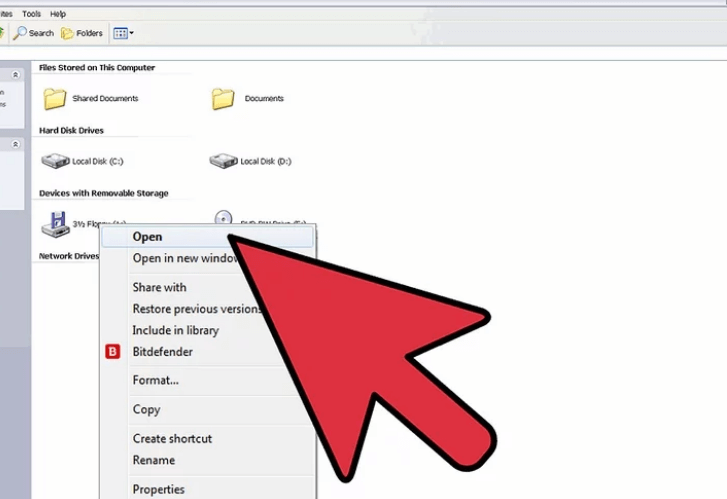
4. Choose Format: In the choice that comes up, choose "Format."
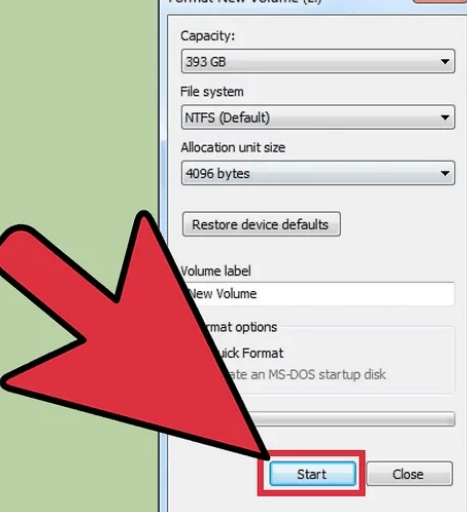
5. Format Options: You can choose from the following in the format text box:
- Capacity: This should figure out the amount of your floppy disk on its own (1.44 MB, for example).
- File System: Pick either FAT or FAT32. FAT is often used for hard disks.
- Allocation Unit Size: Do not change this. Leave it as it is.
- Volume Label: You can give your hard disk a name.
- Format Options: You can choose either a quick format (which only deletes the files' layout) or a full format (which deletes all the data and checks for bad sectors).
6. Start Formatting: Press "Start" to start the coding. A message will say all the data on the disk will be erased. Confirm to go ahead.
7. Formatting Complete: Once the coding is done, a message will show that the process is complete. You can now use your floppy drive.
Method 2. Steps to format Using DOS
If you want to use DOS or need to prepare a floppy disk on an older computer that doesn't have a graphical user interface, do these things:
- Insert the Floppy Disk: Put the disk into the drive for the disk.
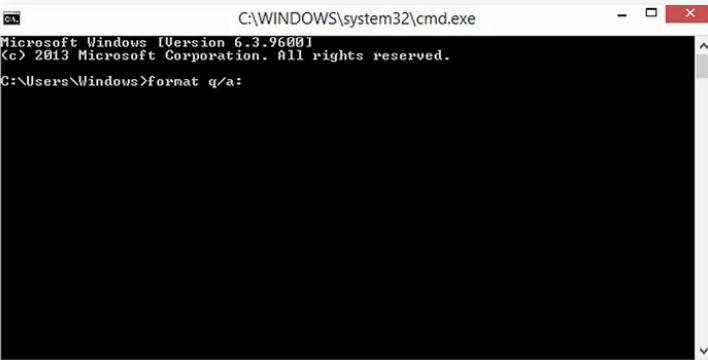
- Open Command Prompt: Come up with the Command Prompt (CMD). In Windows, type "cmd" into the Run box, which you can get to by pressing Win + R.
- Type the Format Command: Type the following instructions into the command prompt and press Enter:
Format A:

If the letter given to your floppy disk drive differs, change "A:" to that letter.
- Confirm Formatting: Press Enter to tell you to add a new disk. Confirm to go ahead.
- Volume Label: At this point, you will be asked to enter a volume label, which is the name of your disk. You can type a name or press Enter to leave the field empty.
- Formatting Complete: The system will show you a message telling you that the style is complete. You can now use your floppy drive.
Conclusion:
The floppy disk was once a revolutionary way to store data, but newer technologies have mostly replaced it. But knowing about its past, structure, and how it works can help you understand how computer storage has changed over time.
Even though you don't need to format floppy disks often these days, you still need to know how to do it if you work with old computers or manage legacy systems. By following the steps in this article, you can ensure that your floppy disks are made correctly and ready to use. It will also help you keep a piece of computer history.
Written & Updated by Ricky Lin
Ricky Lin is an senior editor of DoYourData who lives in Adelaide, Australia. He is interested in writing technology articles related with data recovery, computer issue fixes, disk clone, iPhone data recovery, video edit, Mac optimization, etc. He Joined DoYourData in 2019 and have written 500+ articles to help both Windows users and Mac users to solve data or computer problems.