Home > Hard Drive Solutions for Mac
How to Make NTFS Be Compatible With macOS?
The quickest way to make NTFS file system be compatible with macOS is to install a NTFS driver on your Mac. DoYourData NTFS for Mac, the best NTFS driver for Mac, can help you quickly enable NTFS read-write on Mac. It means you can use any NTFS drive on Mac without any limitation.
![]() Updated by Justin Kenny on March 15, 2024
Updated by Justin Kenny on March 15, 2024
Quick Navigation:
Interoperability between operating systems is important for people working on many different platforms. Problems with compatibility between NTFS (New Technology File System) and macOS have made it hard to move data without any problems. Microsoft created NTFS as a proprietary file system.
It has many useful and reliable features, but macOS doesn't handle it by default. Users who need to share files between Windows and macOS have trouble because of this separation. However, there are many ways to bridge this gap and make macOS compatible with NTFS, making processes easier and boosting productivity.
NTFS and Mac: Are They Compatible?
NTFS is the file system that comes with Windows. It is known for having advanced features like journaling, file compression, encryption, and the ability to handle big file sizes and volumes. On the other hand, macOS mostly uses the APFS or HFS+ file systems.
macOS can read NTFS drives but can't be written right out of the box. Users who often switch between Windows and macOS will find this limitation annoying because it makes it harder to share files without any problems.
Methods to Make NTFS Be Compatible with macOS
NTFS is a Windows based file system, and it is not supported by macOS. If you want to use NTFS drive on Mac just like you use a APFS drive on Mac, you should find a method to add the NTFS to the Mac's native file system list. Here are solutions you can try.
Method 1: Enable NTFS on Mac with Third-Party Tools
Using an automatic tool to make macOS compatible with NTFS speeds up the process and makes it easy to use. To easily turn on NTFS on your Mac, do these steps:
Step 1. Check out reliable NTFS for Mac tools you can trust, like DoYourData NTFS for Mac, Paragon NTFS for Mac or Tuxera NTFS for Mac. Pick the one that meets your needs and fits your budget. Here, you can try the easy-to-use DoYourData NTFS for Mac.
Step 2. Download and install DoYourData NTFS for Mac on your Mac. After loading the app, you can start it from the Launchpad or the Applications folder.
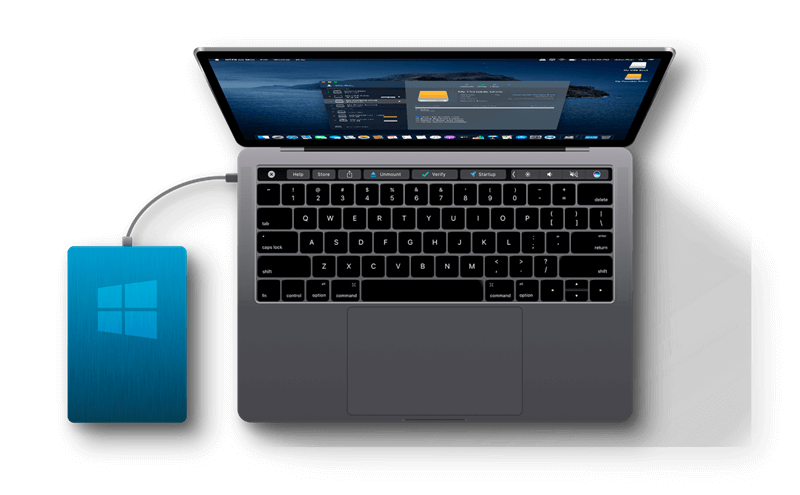
Step 3. Connect the NTFS drive to your Mac, it will be recognized by DoYourData NTFS for Mac.
Step 4. Select the NTFS drive, if it is not mounted, just click on Mount button. Then click on Enable Writable button to all your Mac read-write any NTFS drive without any limitation.
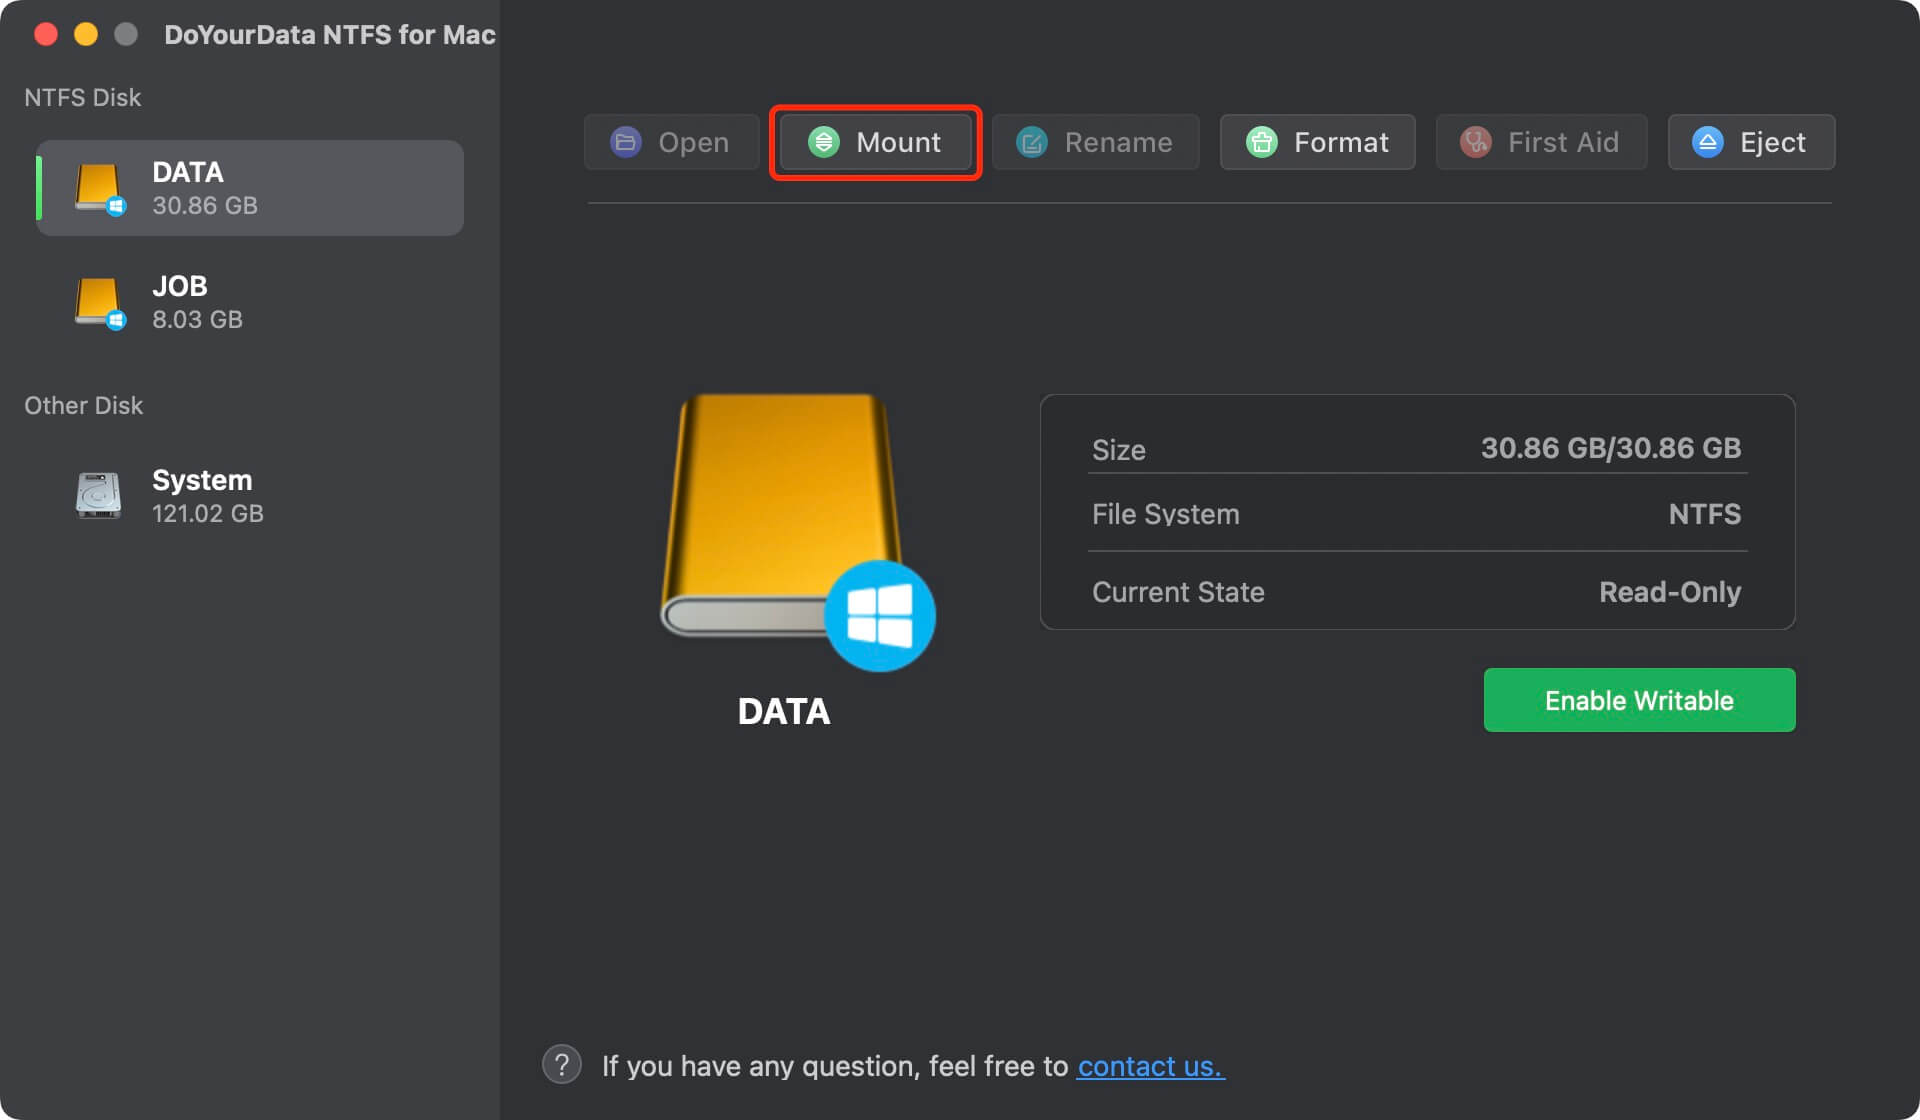
Now that NTFS compatibility is turned on, you can view, change, and move files between your Mac and NTFS-formatted drives, and write data to the NTFS drive on Mac without any problems.
Method 2: Enable Access to NTFS Drive on Mac
You must do more work on macOS to access NTFS drives, but it can be done with third-party tools. To give your Mac write access to NTFS files, follow the:
- For NTFS write access to work, FUSE (Filesystem in Userspace) is a key part. You can get the installer package from the FUSE for macOS page. To run FUSE on your Mac, follow the steps given.
- The open-source NTFS driver NTFS-3G works with macOS. Get the NTFS-3G software package from a reliable source and install it as instructed.
- If the NTFS drive is installed, you can safely remove it from your Mac.
- Start up the Terminal app on your Mac. You can use Spotlight to look for it or look in the Utilities folder inside the Applications folder.
- To remove the NTFS drive from Terminal, type the following command:
diskutil unmount /Volumes/NTFS_Drive_Name
Find your NTFS drive and replace "NTFS_Drive_Name" with its name. - After taking the drive off of the mount, use these commands in Terminal to mount it with NTFS-3G:
sudo /usr/local/bin/ntfs-3g /dev/diskXsY /Volumes/NTFS_Drive_Name -olocal -oallow_other
Change "diskXsY" to the NTFS drive's disk number and "NTFS_Drive_Name" to the mount point you want to use. - Type in your master password when Terminal asks you to do so. Type in the password and hit "Enter."
- Now that you have mounted the NTFS drive with NTFS-3 G, you should be able to write to it. The Finder lets you access the drive and change files as needed.
Method 3: Enable NTFS via Terminal on Mac
It's complicated, but it makes Macs accept NTFS writes. Terminal is a built-in app for Mac computers often used to edit and change Mac computers and storage devices. You can turn on NTFS on Mac computers by following these steps:
- Hook up the NTFS drive to your Mac and start up Terminal.
- Type the order here and hit "Return." /etc/fstab nano -e
- Press Return after typing LABEL=NAME none ntfs rw, auto, nobrowse. Type the name of your Mac's NTFS drive where "NAME" is.
- On a Mac, press Control + O > Control + X.
- hit "Go" in Finder, then "Go to Folder" and "Type: /Volumes." Finally, hit "Go." The name should be changed to the name of your NTFS drive.
Conclusion:
Data flow between platforms requires overcoming the compatibility problem between NTFS and macOS. Third-party tools make it easy for users to make their Macs compatible with NTFS, which makes file sharing easier and boosts productivity.
For more advanced users, manual ways using Terminal commands and open-source drivers give them more freedom and control. Users can fill the gap between Windows and macOS with these tools, ensuring that processes run smoothly and that they get the most out of their computer experience.
DoYourData NTFS for Mac is an easy-to-use NTFS for Mac tool. You can easily make NTFS be compatible with macOS with this tool. It also can help you mount NTFS drive on Mac, fix crashed NTFS drive or format damaged drive on Mac.
Written & Updated by Justin Kenny
Justin Kenny is a writer & editor of DoYourData. He joined DoYourData in 2016 and focuses on writing articles about Windows data recovery, Mac data recovery, external device data recovery, hard drive clone, data erasure, Mac cleanup, computer issue fixes, etc. He is a super fan of Apple devices and is big on testing new digital device and system utility software.