Quick Navigation:
- Why ExFAT or FAT32 Drive Not Mounting on Mac?
- Method to Fix ExFAT or FAT32 Drive Not Mounting on Mac
- Recover Lost Data After Fixing ExFAT or FAT32 Drive Not Mounting on Mac
- Conclusion
External storage drives are essential for keeping, moving, and getting big amounts of data on many devices. However, it's normal for Mac users to have problems with ExFAT or FAT32 drives that get worse over time. It can slow down work and make users feel helpless.
Not getting to the data on these drives can be very annoying, whether it's a beloved collection of photos, important work papers, or important backups. This detailed guide will discuss the confusing world of ExFAT or FAT32 drive mounting problems on Mac systems.
We will give you the knowledge and tools to solve these problems. Let's explore together and learn how to mount an ExFAT or FAT32 drive on a Mac!
Why ExFAT or FAT32 Drive Not Mounting on Mac?
- The external drive's file system could become damaged if it is ejected incorrectly, the power goes out, or there are system problems.
- If the USB cables, ports, or connections are broken or loose, the Mac might not be able to find the external drive, which can cause mounting problems.
- Even though ExFAT and FAT32 are generally supported file systems, there may be problems when the drive is set up differently or Mac's operating system isn't incompatible.
- Mounting problems can happen if you use old versions of macOS or software that doesn't work with the external drive.
Method to Fix ExFAT or FAT32 Drive Not Mounting on Mac
If the ExFAT or FAT32 drive is not mounting on your Mac, you can use Disk Utility to fix this issue. Or use Terminal to force mount the drive.
Method 1: Manually Mount ExFAT or FAT32 Drive in Disk Utility
You can use Disk Utility to mount your ExFAT or FAT32 drive by hand if your Mac isn't mounting it immediately.
Step 1. Launch the Disk Utility by going to Applications > Utilities.
Step 2. The Disk Utility window shows a list of drives linked to your Mac. Find the ExFAT or FAT32 drive that hasn't been put into use.
Step 3. To choose the ExFAT or FAT32 drive, click on it. You'll see information about it on the main page of Disk Utility. A toolbar with different choices is at the top of the Disk Utility window. Press the "Mount" button. Disk Utility will try to access the chosen ExFAT/FAT32 drive.

If asked, enter your user password to let the mounting process begin. Disk Utility will start mounting the ExFAT/FAT32 drive. Wait for the process.
Step 4. Check to see if the ExFAT/FAT32 drive is successfully mounted when the process is done. It should show up on your screen and in Finder.
Method 2: Check Finder Settings
If your ExFAT or FAT32 drive doesn't show up on your Mac, you can fix the problem by changing the settings in Finder. To do this, follow these steps:
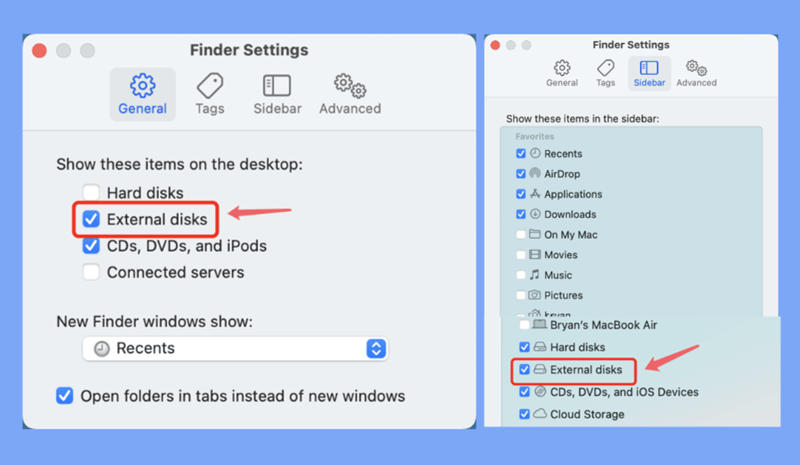
Step 1. Open a Finder, click Finder on Apple menu, choose Settings.
Step 2. Open Finder Settings window, click General and Sidebar, select External disks.

Method 3: Use First Aid in Disk Utility
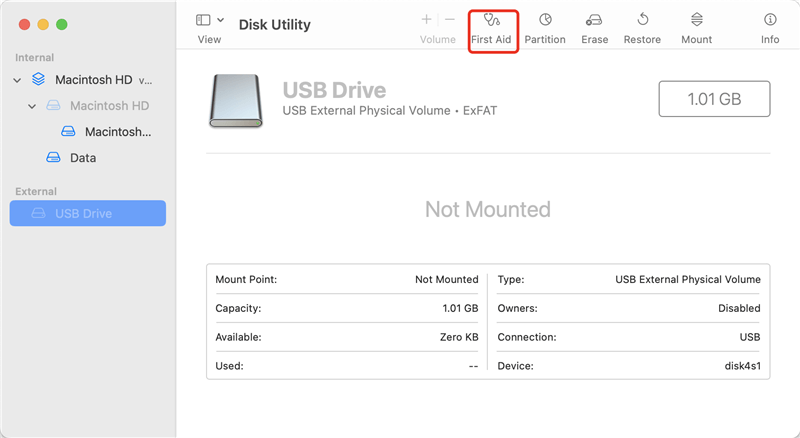
If your ExFAT or FAT32 drive is having trouble mounting because it is damaged, the First Aid tool in Disk Utility can help fix any disk errors. To run First Aid on your USB drive, do the following:
Step 1. You can open Disk Utility by going to Applications > Utilities. Find and open Disk Utility.
Step 2. In Disk Utility, you can see a list of all the drives linked to your Mac. In the sidebar, find your ExFAT or FAT32 drive and click on it.
Step 3. Click on the "First Aid" button at the top of the Disk Utility window. This choice looks over the chosen disk for errors and fixes them if it finds any.

A window pop-up will ask if you want to run First Aid on the chosen disk. Press "Run" to begin.
Disk Utility will start looking for problems on your ExFAT or FAT32 drive and fixing them. The process could take a while, depending on how big the drive is and how bad the damage is.
As soon as First Aid is done scanning, Disk Utility will show a message telling you if any problems were found and fixed. Check the data to make sure the process of fixing it worked.
Step 4. After running First Aid, either remove the ExFAT or FAT32 drive and reconnect it or restart your Mac to try to mount it again.
The ExFAT or FAT32 drive should be able to mount on your Mac. You should be able to get to its data without any problems if it does.
Note: If it still not mounting on the Mac, click on Erase button to reformat the ExFAT or FAT32 drive.
Method 4: Using Terminal to Mount ExFAT or FAT32 on Mac
Disk Utility or Finder Settings may not be able to mount your ExFAT or FAT32 disk, but you can try the Terminal more directly. To mount your disk in Terminal, follow these steps:
Step 1. You can open Terminal by going to Applications > Utilities or using Spotlight to look for it.
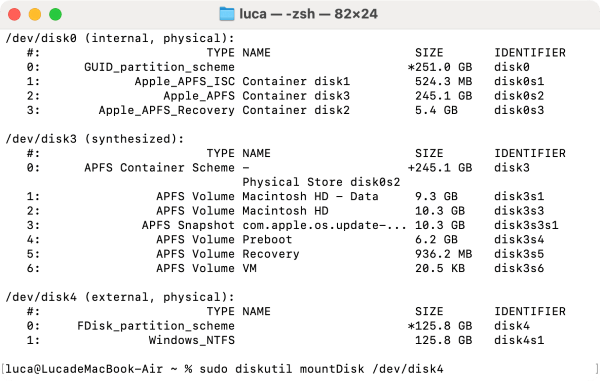
Step 2. Type in "diskutil list" and press Enter. This program will show a list of connected disks and what they are called. Find your ExFAT or FAT32 disk in the list and write down its name.
Step 3. Enter diskutil mountDisk /dev/diskX to mount the disk. (X is the disk number)

Check if your ExFAT or FAT32 disk has been mounted after running the command properly. It should show up on your screen and in Finder.
Recover Lost Data After Fixing ExFAT or FAT32 Drive Not Mounting on Mac
If you have lost data due to erasing the ExFAT or FAT32 drive, just use a data recovery app to get the lost data back.
Step 1. Download and install Do Your Data Recovery for Mac on your Mac, make sure the ExFAT or FAT32 drive is connected to the Mac.
Step 2. Open Do Your Data Recovery for Mac, then select the ExFAT or FAT32 drive to start data recovery.

Step 3. Click on Scan button to deeply scan the ExFAT or FAT32 drive.

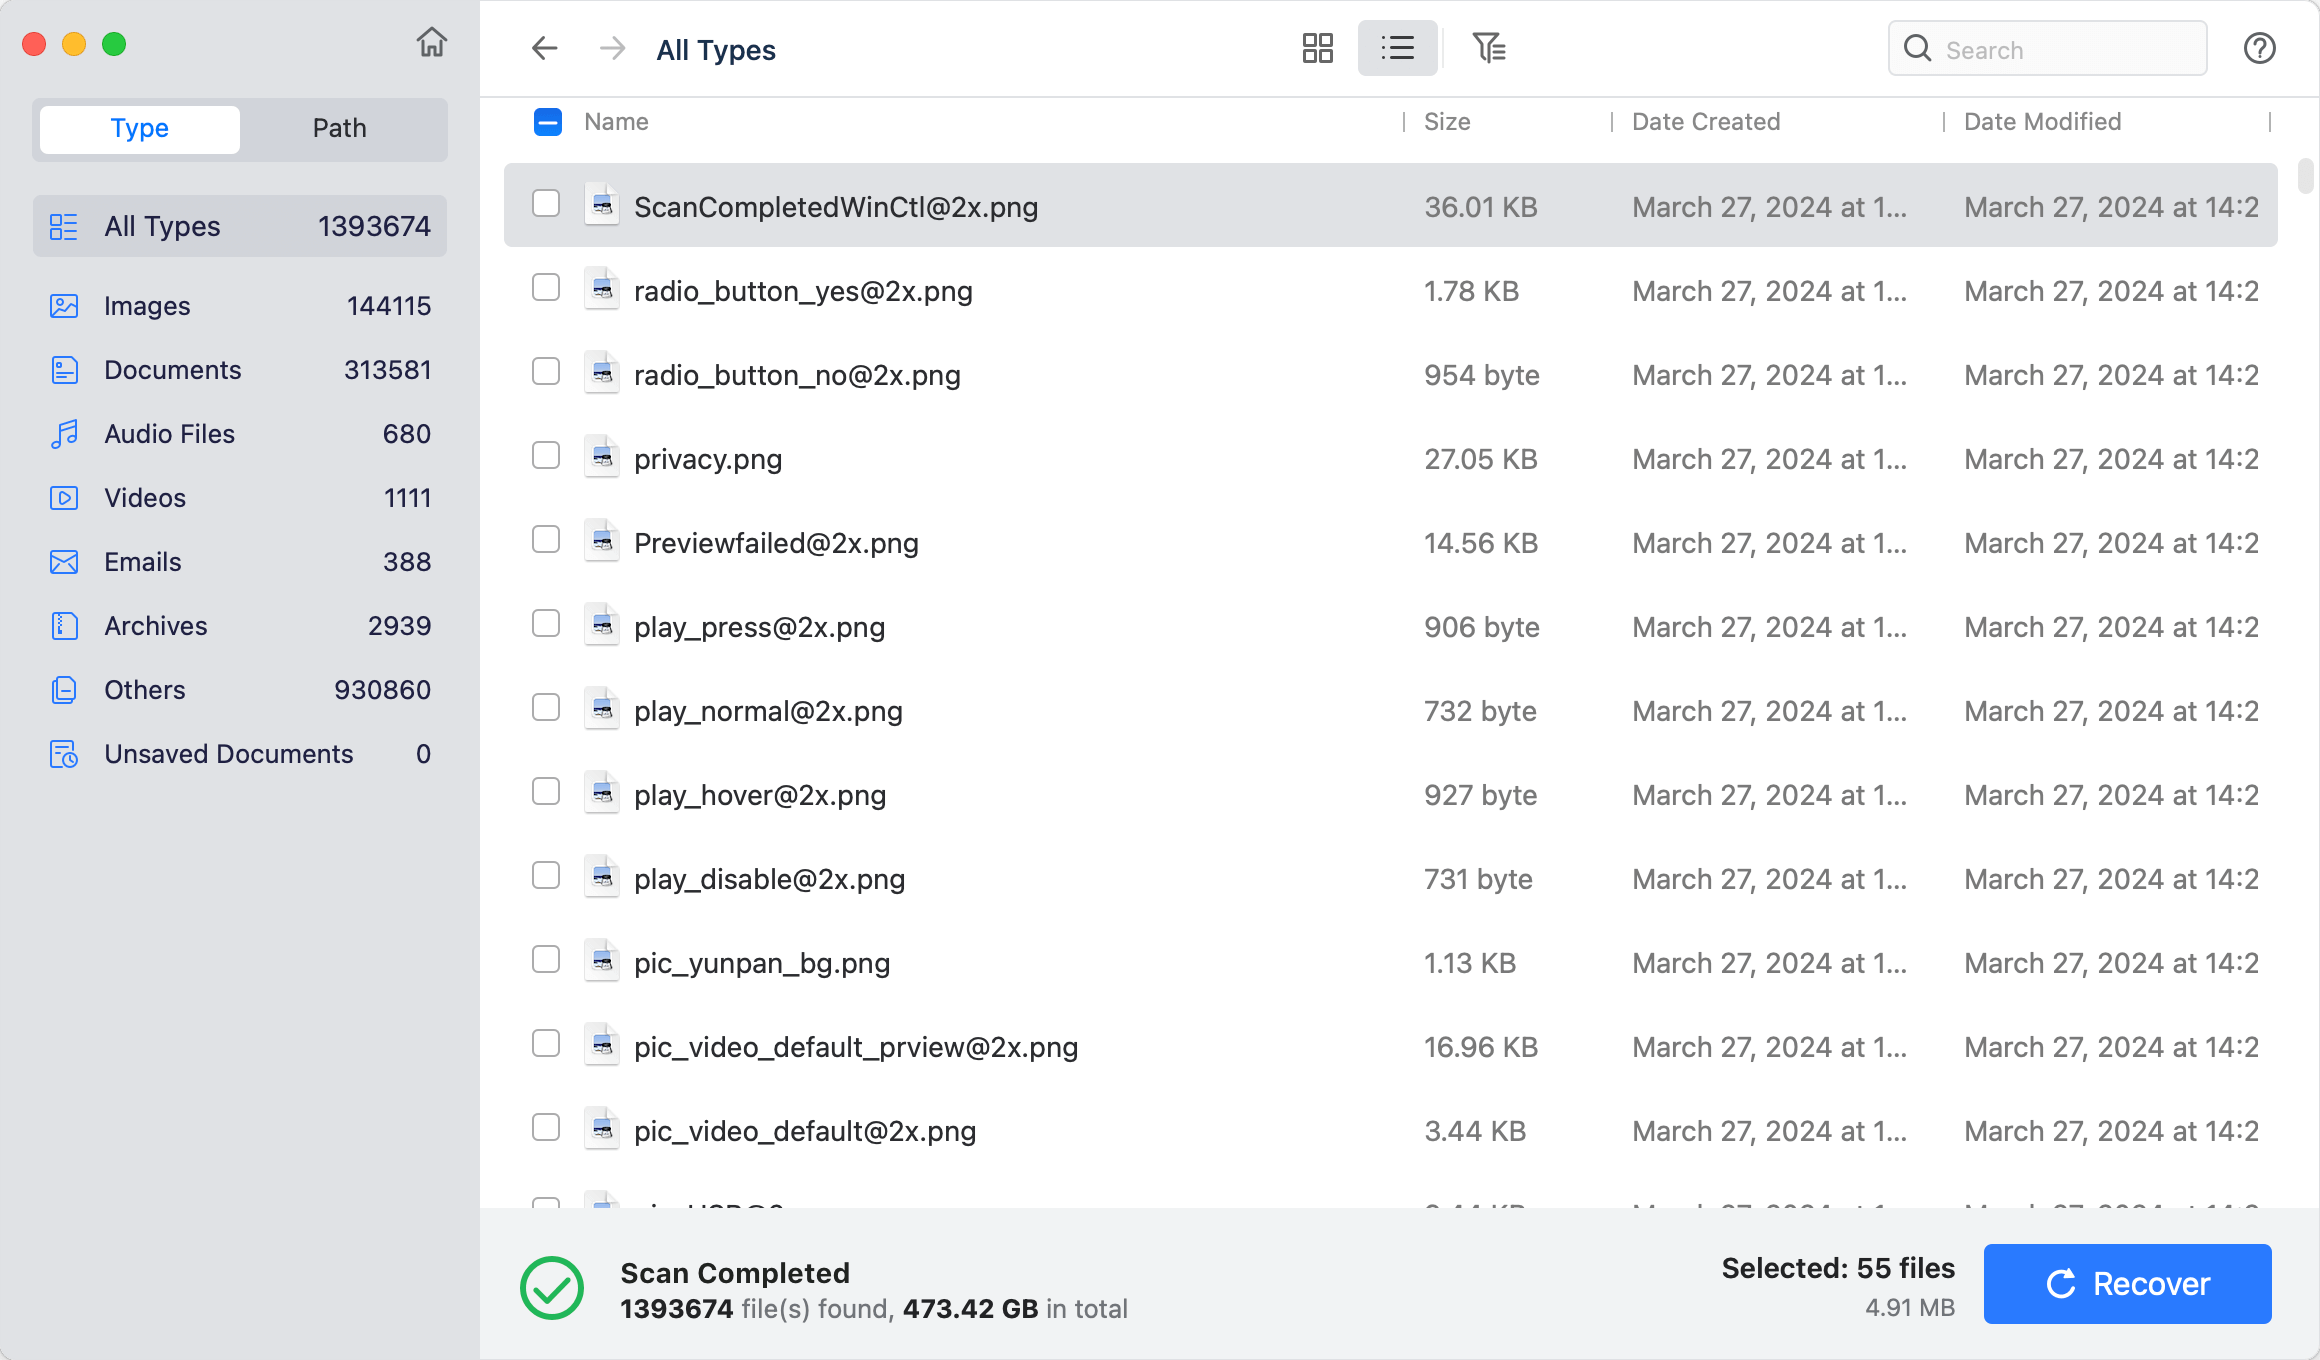
Step 4. Once the scan is completed, you can preview all recoverable files. Then select the wanted files and save them.

Conclusion:
Fixing mounting problems on a Mac with ExFAT or FAT32 drives takes time and the right method. Users can successfully fix these problems by learning about common causes. They can use methods such as manual mounting in Disk Utility, changing Finder Settings, running First Aid in Disk Utility, or using Terminal commands. These methods let users get back to their external drives and keep handling their data without any problems, improving the experience on their Macs.