Replace Hard Drive in MacBook Pro: Step-by-Step Guide
If you need to replace hard drive in MacBook Pro, the easy way is to clone the hard drive to a new drive. For example, DoYourClone for Mac can help you create a bootable and full clone for the MacBook Pro drive. Then you can replace the old drive with the cloned drive without reinstalling the macOS.
![]() Updated by Darren on January 27, 2026
Updated by Darren on January 27, 2026
Quick Navigation:
- Understanding MacBook Pro Hard Drives
- Preparation before Replacing MacBook Pro Hard Drive
- Step-by-Step Hard Drive Replacement on MacBook Pro
- Install macOS after Replacing Hard Drive on MacBook Pro
- Test and Optimization MacBook Pro after Hard Drive Replacement
- Safety Tips for MacBook Pro Hard Drive Replacement
- Benefits of Replacing Hard Drive on MacBook Pro
- Conclusion
MacBook Pro laptops are known for their reliability and performance, but over time, users may encounter storage issues that require replacing the internal hard drive. Whether your drive is failing, running out of space, or you simply want to upgrade to a faster SSD, replacing the hard drive can breathe new life into your device. In this guide, we'll walk you through everything you need to know, from preparation to installation and macOS reinstallation.
Understanding MacBook Pro Hard Drives
Before starting the replacement, it is important to understand the type of hard drive your MacBook Pro uses. Historically, MacBook Pros shipped with traditional spinning hard drives (HDDs), but newer models feature solid-state drives (SSDs) for faster performance and reliability.
HDD vs. SSD
- HDD (Hard Disk Drive): Mechanical storage device, slower read/write speeds, more prone to physical damage.
- SSD (Solid-State Drive): No moving parts, significantly faster, more energy-efficient, and durable.
Apple SSDs
Recent MacBook Pros (2016 and newer) use proprietary Apple SSDs, often soldered onto the motherboard in very recent models. For older models (pre-2016), drives can be replaced more easily, often with standard SATA or PCIe NVMe SSDs.
Compatibility Considerations
- Identify your MacBook Pro model using Apple Menu → About This Mac.
- Check the drive interface and size (2.5-inch SATA, PCIe, or NVMe).
- Make sure the new drive is compatible in terms of physical dimensions, interface, and storage capacity.
Preparation before Replacing MacBook Pro Hard Drive
Before you even open your MacBook Pro, preparation is crucial. Many mistakes during hard drive replacement are caused by skipping preparation steps. Proper planning ensures your data is safe, tools are ready, and the process goes smoothly.
1. Backup Your Data
The most important step before replacing a hard drive is backing up your existing data. Replacing a hard drive will erase everything stored on it, so skipping this step can result in permanent data loss.
Time Machine Backup
- Time Machine is macOS's built-in backup solution that automatically saves copies of your files, apps, and system settings.
- To use it:
1. Connect an external drive (HDD, SSD, or USB drive).
2. Go to System Settings → General → Time Machine.
3. Turn on Time Machine to create a full backup. - Time Machine allows you to restore your system exactly as it was, including all applications, settings, and files.
Cloning Your Drive
- Drive cloning creates an exact replica of your existing drive.
- Tools like DoYourClone for Mac make this process simple.
- Cloning is especially useful if you plan to switch to a new SSD but want the operating system and all apps to work without reinstalling macOS.
Here we will show you how to clone hard drive on MacBook Pro with DoYourClone for Mac:
Step 1. Download and install the software DoYourClone for mac on your MacBook Pro.
DoYourClone for Mac
- Most reliable disk copy software for MacBook Pro.
- Create bootable and full clone backup for macOS.
- Easy to use and safe to clone hard drive on Mac.
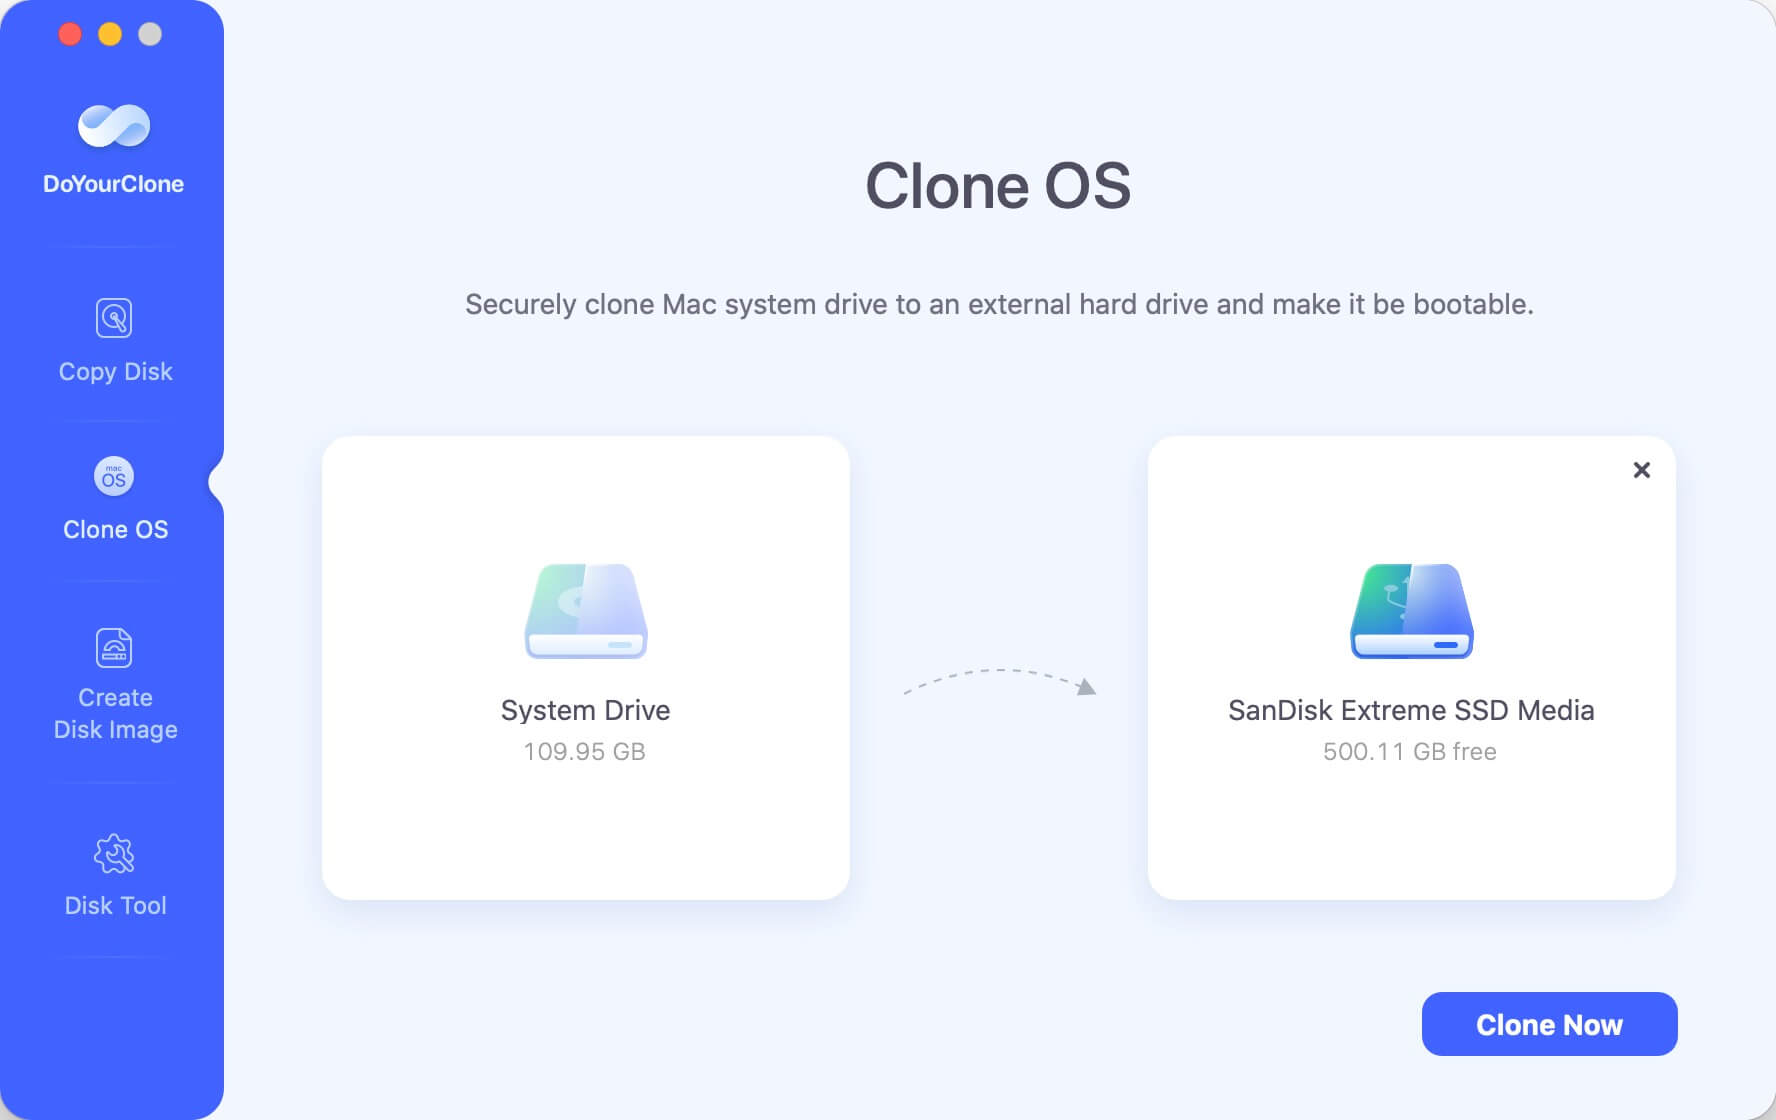
Step 2. Launch the software and change to Clone OS mode. Then select the new drive as the destination disk. Click the Clone Now button.
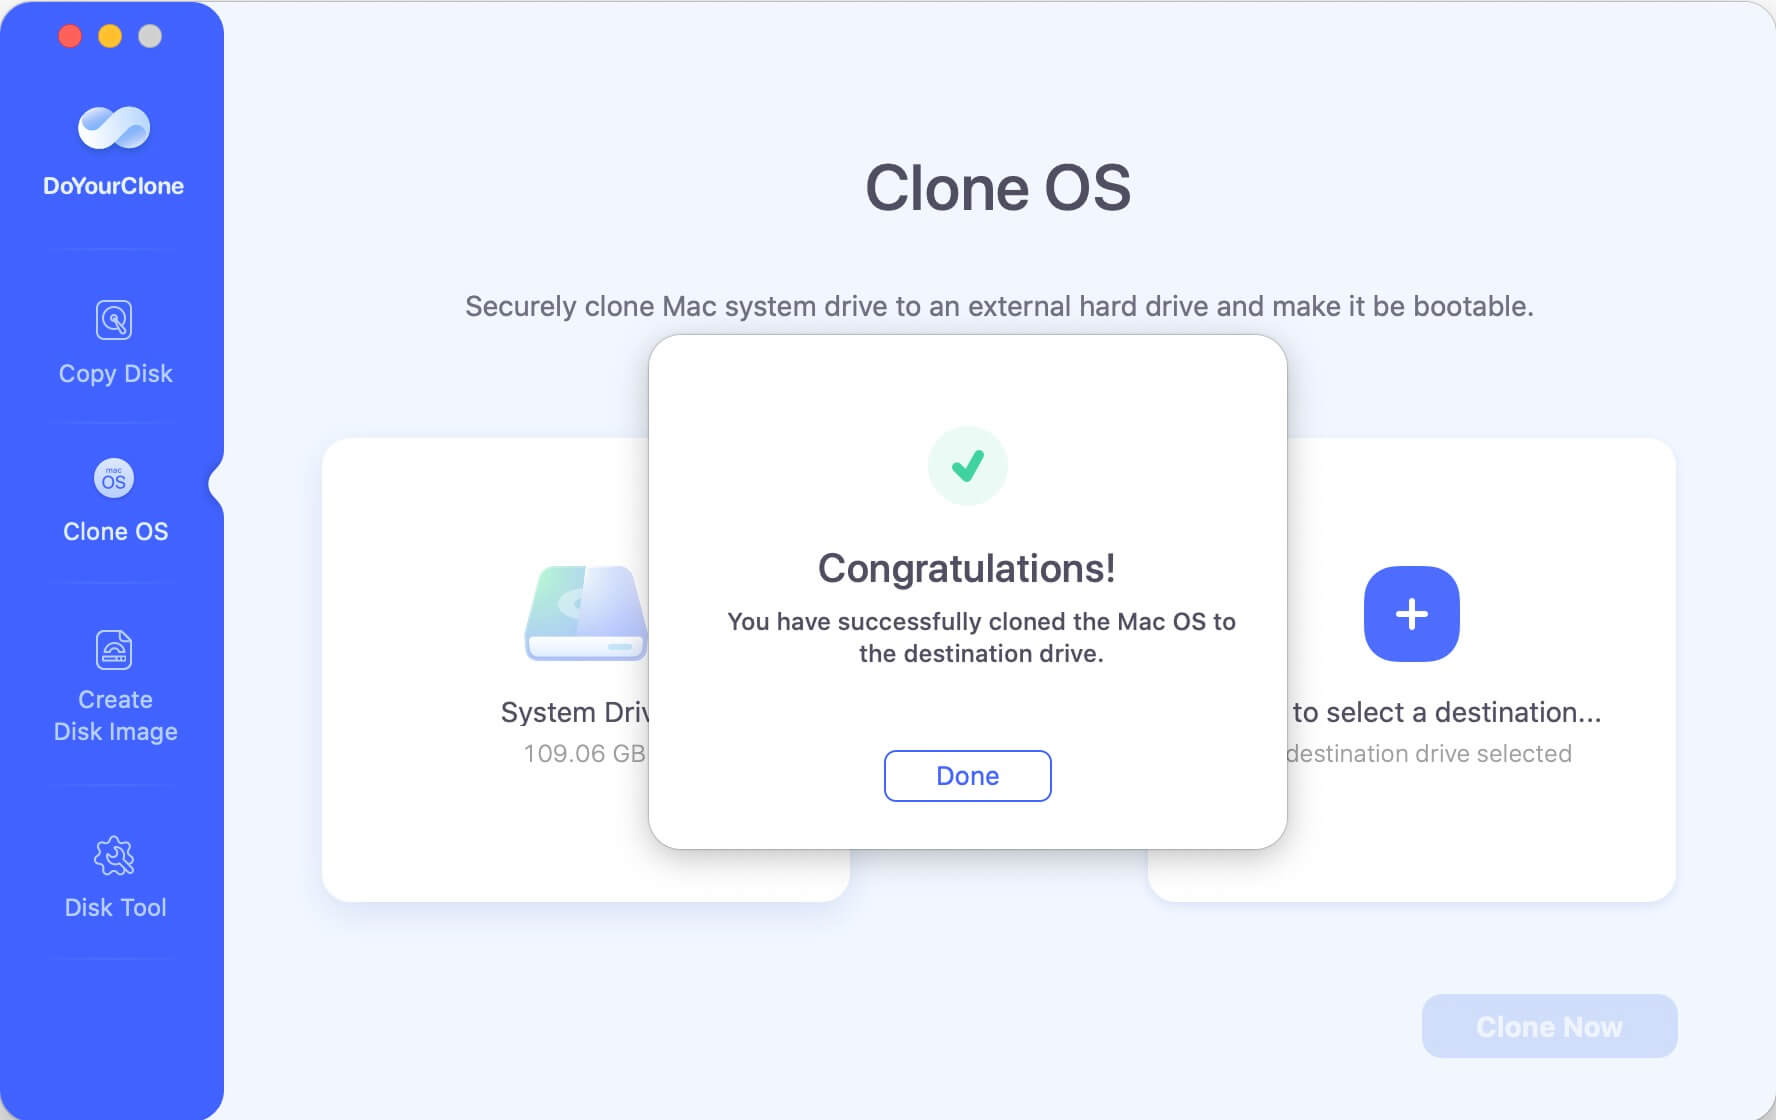
Step 3. The software will start to clone everything from the MacBook Pro system disk to the new drive, including macOS, personal data, apps, and settings.

Step 4. Once the disk cloning process is finished, eject and unplug the new drive from the MacBook Pro.
Cloud Backup (Optional)
- While Time Machine and cloning provide a full backup, cloud services like iCloud, Dropbox, or Google Drive can be used for critical files.
- This ensures important documents are accessible even if something goes wrong during the replacement process.
2. Create a Bootable macOS Installer
If your new drive is blank, macOS will need to be installed before you can use the MacBook. A bootable installer allows you to install macOS without internet dependency and speeds up the installation process.
Steps to Create a Bootable Installer:
- Download the macOS version compatible with your MacBook from the App Store.
- Insert a USB flash drive with at least 16GB of free space.
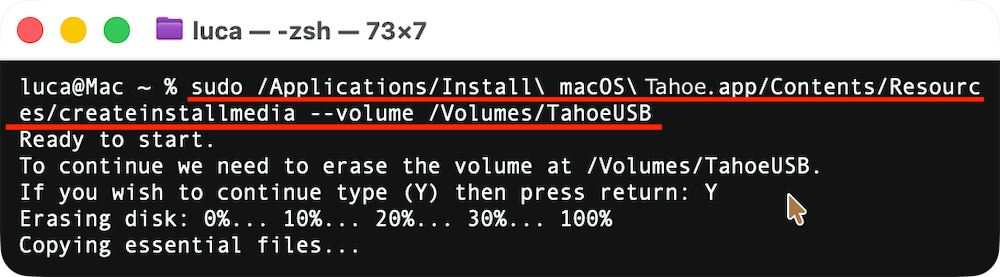
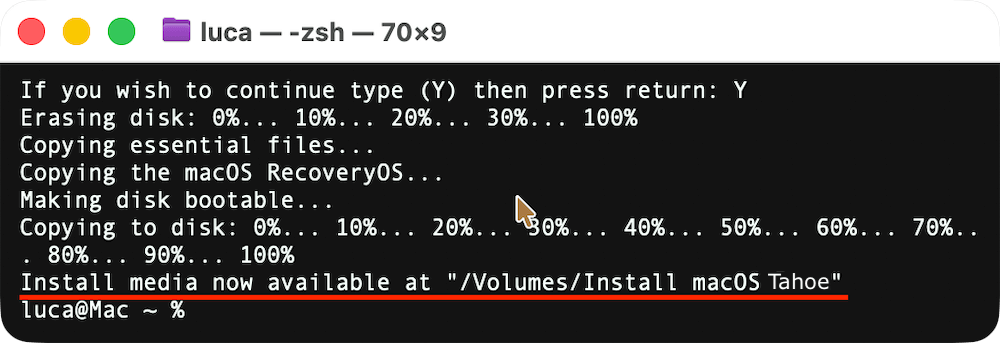
- Open Terminal and enter the createinstallmedia command. For example:
sudo /Applications/Install\ macOS\ Tahoe.app/Contents/Resources/createinstallmedia --volume /Volumes/TahoeUSB
- Wait for the process to complete. Your USB drive now contains a bootable installer.
Why a Bootable Installer Matters:
- Faster installation than downloading macOS online.
- Works even if your internet connection is slow or unavailable.
- Useful for troubleshooting future MacBook issues.
3. Gather Necessary Tools
Having the right tools on hand before you start prevents mistakes and damage to your MacBook.
Essential Tools:
- Pentalobe Screwdriver: Needed to remove the bottom case screws. Different MacBook models may require different sizes (e.g., P5 for most MacBook Pros).
- Torx or Phillips Screwdriver: Used for securing or removing internal screws.
- Spudger or Plastic Pry Tool: Helps safely lift connectors, cables, and the battery without damaging components.
- Anti-static Wrist Strap: Prevents electrostatic discharge (ESD), which can fry sensitive circuits.
Additional Tips:
- Organize screws and small components in a container or magnetic mat to avoid losing them.
- Work in a clean, well-lit environment to minimize the risk of dropping screws or contaminating internal parts.
- Avoid wearing loose clothing or jewelry that could catch on components.
4. Check Your MacBook's Model and Drive Compatibility
Not all MacBook Pro hard drives are interchangeable. It's important to know your exact model and what type of drive it uses.
How to Check Your MacBook Model:
- Click the Apple Menu → About This Mac.
- Note the year and model (e.g., MacBook Pro 2015).
- Verify the drive type (HDD, SATA SSD, NVMe, or proprietary Apple SSD).
Why Compatibility Matters:
- Installing an incompatible drive can prevent your MacBook from booting.
- Some older MacBook models use standard 2.5-inch SATA drives, while newer ones use PCIe NVMe SSDs.
- Very recent models (2021+) often have soldered SSDs, which cannot be replaced without specialized equipment.
5. Optional: Prepare Your Workspace
- Place a soft cloth or anti-static mat under the MacBook to prevent scratches.
- Have a small container or organizer ready for screws and small parts.
- Ensure all necessary cables, drives, and tools are within reach.
By carefully preparing before replacing the hard drive, you minimize risks and make the process much easier, especially for first-time users. Taking the time to back up your data, create a bootable installer, and verify compatibility ensures a smooth transition to your new drive.
Step-by-Step Hard Drive Replacement on MacBook Pro
1. Power Down and Unplug
Always turn off your MacBook Pro and disconnect it from power before beginning any internal work. Wait a few minutes to ensure components discharge.
2. Remove the Bottom Case
- Remove the screws securing the bottom panel. Keep track of each screw as sizes may vary.
- Gently lift the panel using a spudger or plastic pry tool to avoid scratching or bending it.
3. Locate the Existing Hard Drive
Older MacBook Pros have 2.5-inch hard drives mounted with screws or brackets. Newer removable SSDs are usually in a slot on the motherboard.
4. Disconnect and Remove the Old Drive
- Carefully unplug the drive connector.
- Remove mounting screws or brackets securing the drive.
- Lift the drive out gently, avoiding contact with other internal components.
5. Install the New Hard Drive or SSD
- Insert the new drive into the same slot or bracket.
- Connect it securely to the drive interface.
- Reattach any mounting screws or brackets.
6. Reassemble the MacBook Pro
- Carefully place the bottom panel back and tighten screws.
- Reconnect the MacBook to power and external devices.
If the new drive is cloned from the old MacBook Pro hard drive, you can try to boot the MacBook Pro directly now. Normally, the cloned drive should be bootable.
Install macOS after Replacing Hard Drive on MacBook Pro
If you didn't clone the old system disk to the replaced new drive, then you will need to install the macOS on the new drive. Once the new drive is installed, you need to prepare it and install macOS.
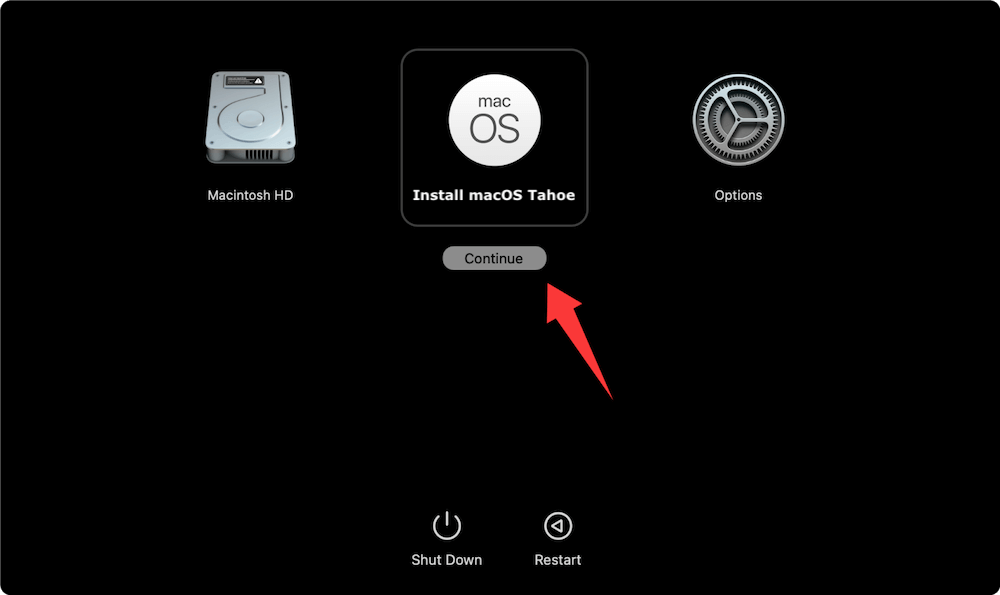
1. Boot from the USB Installer
- Connect the bootable USB installer.
- Power on the MacBook while holding the Power or Option (⌥) key.
- Select the bootable USB drive as the startup disk.
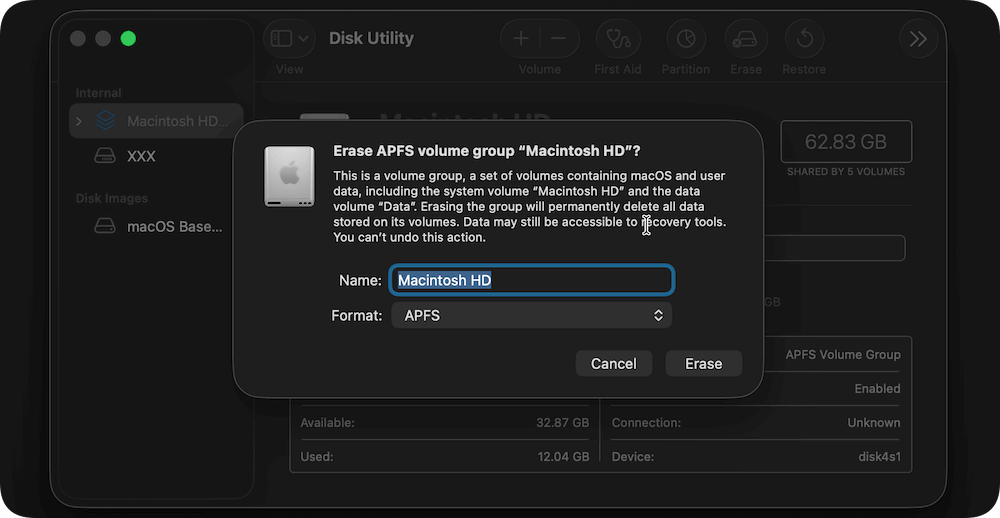
2. Format the New Drive
- Open Disk Utility from the installer menu.
- Select the new drive and choose Erase.
- Use APFS for SSDs or Mac OS Extended (Journaled) for HDDs.
- Name the drive and click Erase to prepare it for macOS.
3. Install macOS
- Exit Disk Utility and choose Install macOS.
- Follow the on-screen prompts to complete installation.
- Once installed, the system will restart into the setup assistant.

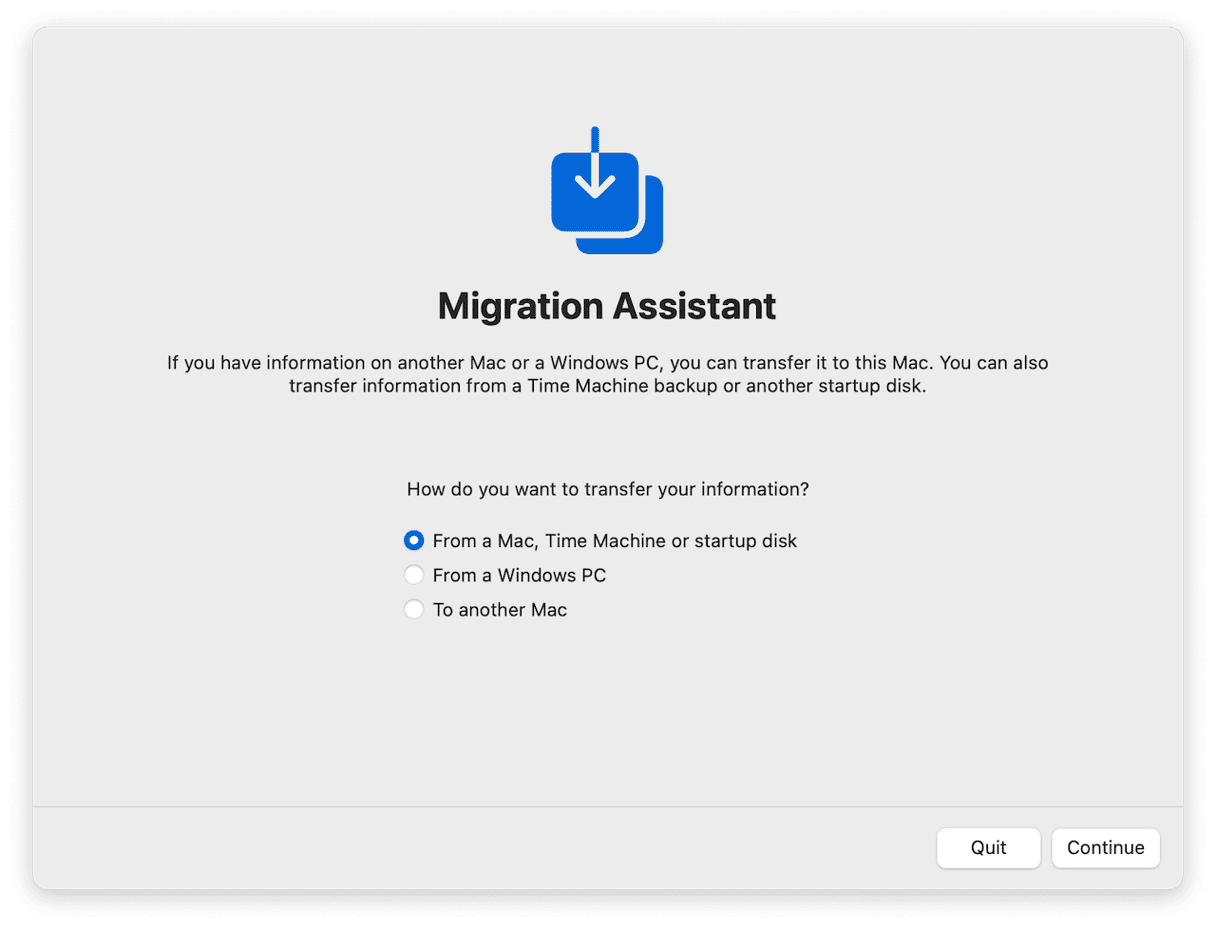
4. Restore Your Data
- If you have a Time Machine backup, use Migration Assistant to restore files.
- For cloned drives, your system will be identical to the old drive.
Test and Optimization MacBook Pro after Hard Drive Replacement
After installation, it's essential to verify everything is working correctly.
1. Verify Drive Recognition
- Open About This Mac → Storage to ensure the drive is recognized.
- Check System Information → Storage for detailed information.
2. Check Performance
- Test read/write speeds using tools like Blackmagic Disk Speed Test.
- Confirm improvements if upgrading from HDD to SSD.
3. Enable TRIM Support for SSDs
TRIM helps maintain SSD performance over time:
sudo trimforce enable
- Reboot and verify TRIM is active.
4. Troubleshooting Common Issues
- Drive not recognized: Check connections and compatibility.
- macOS installation errors: Recreate bootable USB or reformat the drive.
- Slow performance: Ensure SSD is properly installed and TRIM is enabled.
Safety Tips for MacBook Pro Hard Drive Replacement
Replacing a hard drive involves handling sensitive electronics. Follow these precautions:
1. Avoid Static Discharge
Wear an anti-static wrist strap or touch a grounded metal object before handling components.
2. Handle Components Carefully
Avoid touching the circuit board contacts. Keep screws and brackets organized to prevent losing them.
3. Work in a Clean Environment
Dust and debris can damage components or cause overheating.
4. Seek Professional Help if Needed
If your MacBook Pro has a soldered SSD or you're unsure of compatibility, consult Apple or certified repair centers.
Benefits of Replacing Hard Drive on MacBook Pro
Replacing your MacBook Pro's hard drive can offer several advantages:
- Faster Performance: Upgrading from HDD to SSD drastically improves boot times and application loading.
- Expanded Storage: Larger capacity drives provide more room for files, apps, and media.
- Data Reliability: New drives are less prone to failure, especially if the old drive showed signs of wear.
- Extended Device Life: A new hard drive can extend the lifespan of your MacBook Pro.
Conclusion
Replacing the hard drive in a MacBook Pro may seem intimidating, but with the right preparation, tools, and careful attention, it is achievable even for non-professionals. Back up your data, choose a compatible drive, and follow step-by-step instructions to install and configure your new storage. Not only will this improve your MacBook Pro's performance, but it can also give your laptop a new lease on life. Regular backups and careful maintenance will ensure your device continues to perform at its best for years to come.
DoYourClone for Mac
DoYourClone for Mac, one of the best Mac disk cloning software, can help you clone HDD, SSD, external storage device on Mac, upgrade HDD to SSD, create full disk image backup, etc. It also can clone everything from your Mac to an external HDD/SSD and create a full bootable clone backup. 100% safe and easy-to-use.
Written & Updated by Anderson
Anderson is a big fan of computer technology. He joined DoYourData in 2018 and has been writing 200+ articles about disk clone, data recovery, computer technology, data erasure, Mac system optimization, etc. He loves music, movie, and reading. In his spare time, he’s studying music and playing tennis.