Quick Navigation:
- Why Create a Bootable USB Installer?
- Steps to Create A Bootable macOS Big Sur USB Installer
- Create A Bootable Clone Backup for macOS Big Sur
- Troubleshooting Common Issues
- Conclusion
Making a macOS Big Sur bootable USB installer might be a helpful tool when reinstalling the operating system, troubleshooting a Mac, or performing a clean installation. This process allows you to install macOS Big Sur directly from a USB drive without the need for internet recovery or the Mac App Store. Regardless of your level of experience with Macs or familiarity with Apple products, this tutorial will help you in your needs.
Why Create a Bootable USB Installer?
There are several reasons why having a bootable macOS installer on a USB drive can be useful:
- Reinstall macOS: If your Mac is malfunctioning or running slowly, reinstalling macOS Big Sur from a bootable USB drive can help resolve these issues.
- Perform a clean installation: A bootable installer allows you to completely wipe your Mac's hard drive and perform a fresh installation of macOS Big Sur, giving your system a clean slate.
- Troubleshoot Mac problems: If your Mac won't boot or is experiencing software issues, a bootable installer can help you access recovery tools and reinstall the operating system.
- Install macOS on multiple Macs: If you need to install macOS Big Sur on multiple Macs, a bootable USB installer makes the process faster and more convenient.
Now that you know why a bootable installer is helpful, let's move on to the tools and requirements needed to create one. Before you begin, make sure you have the following:
- A Mac: You'll need access to a Mac running macOS High Sierra or later to download the macOS Big Sur installer and create the bootable USB.
- 16GB or larger USB drive: Ensure you have a USB flash drive with at least 16GB of storage. A larger capacity drive will allow more room for future macOS updates.
- Stable internet connection: You'll need an internet connection to download the macOS Big Sur installer from the Mac App Store.
- macOS Big Sur installer: The installer is available through the Mac App Store. Download it before proceeding with creating the USB installer.
- Admin access on your Mac: You must have administrative privileges to run certain terminal commands necessary for creating the bootable USB.
Steps to Create A Bootable macOS Big Sur USB Installer
Step 1: Prepare your USB Drive
In order to generate a bootable USB installer, a USB drive requiring at least 16 GB of space is required. While a 16 GB drive will suffice, a larger drive may offer more flexibility if you plan to use it for other purposes in the future. The drive should also be relatively fast, as a slower drive can significantly increase the time required to create the bootable installer.
Formatting the USB drive is an essential step to ensure it's ready for use as a bootable installer. Here's how to format it using Disk Utility:
- Click on the Finder icon in your Dock. Go to Applications > Utilities folder, open Disk Utility.
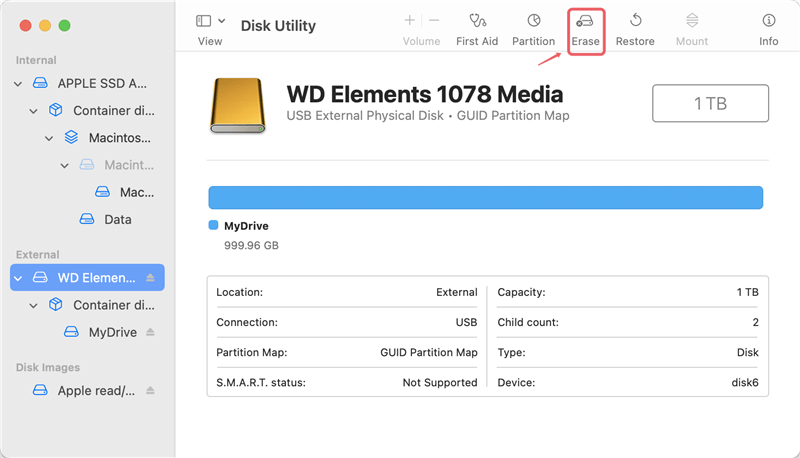
- In Disk Utility, you'll see a list of drives on the left. Find and select your USB drive. It should be listed under "External" drives. Click the Erase button at the top.
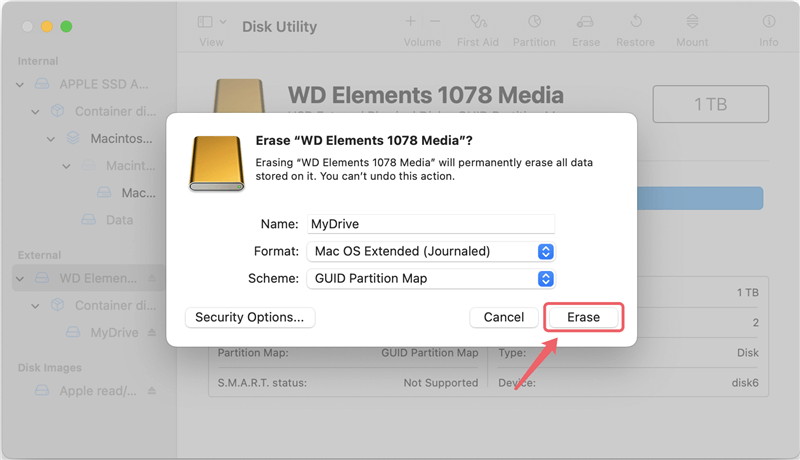
- A pop-up window will show up. Select "GUID Partition Map" as the "Scheme" and "Mac OS Extended (Journaled)" as the "Format."
- To start the formatting process, click "Erase." Make sure you have backed up any vital files because doing this will erase everything on the device.

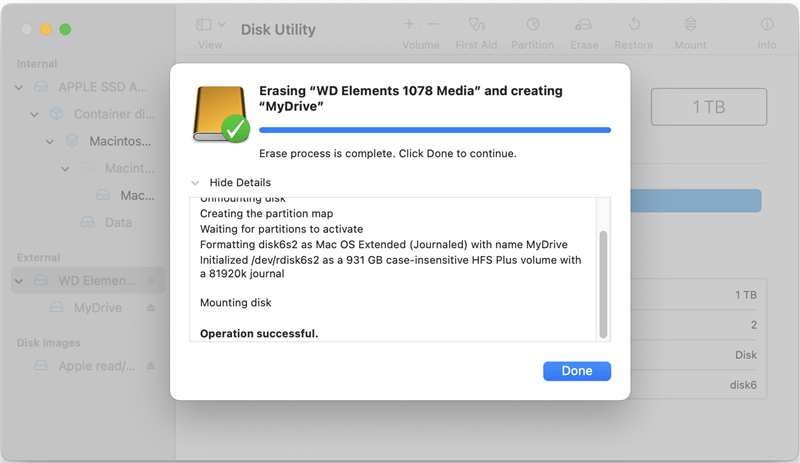
After the process is complete, your USB drive will be formatted and ready to be used as a bootable installer.
Step 2: Download macOS Big Sur installer
To download the macOS Big Sur installer, follow these steps:
- Click on the App Store icon in your Dock or find it in your Applications folder.
- In the App Store search bar, type "macOS Big Sur" and press Enter.
- Locate the macOS Big Sur installer in the search results and click the Get button to download it.
- The installer will be downloaded to your Applications folder. Your internet speed may determine how long this takes.
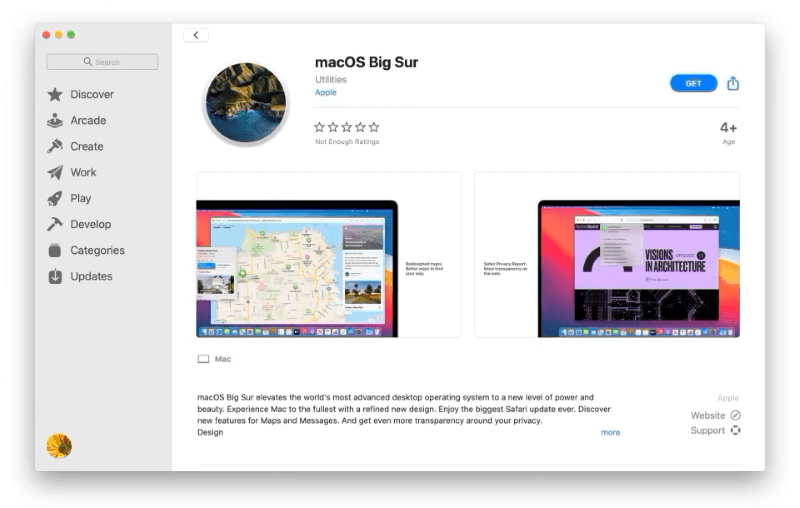
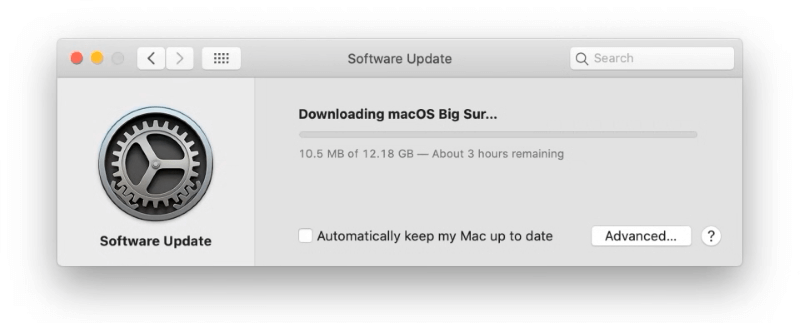
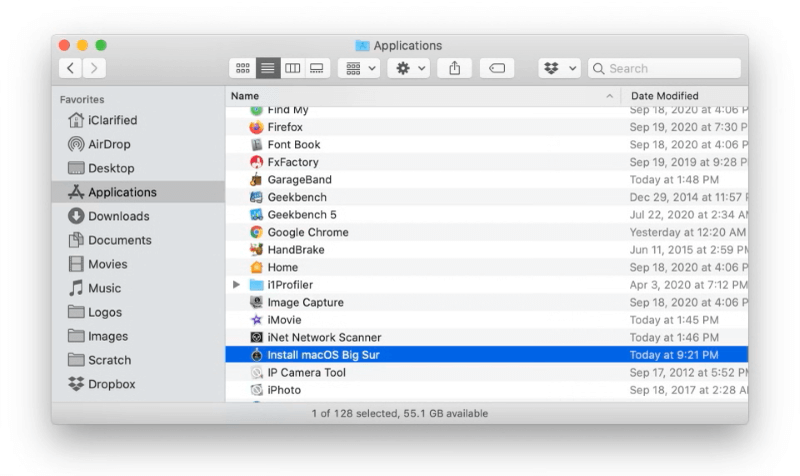
Step 3: Create the Bootable USB installer
Creating the bootable installer involves using Terminal, a powerful command-line tool on macOS. Follow the steps below:
- Go to Applications > Utilities and double-click on Terminal.
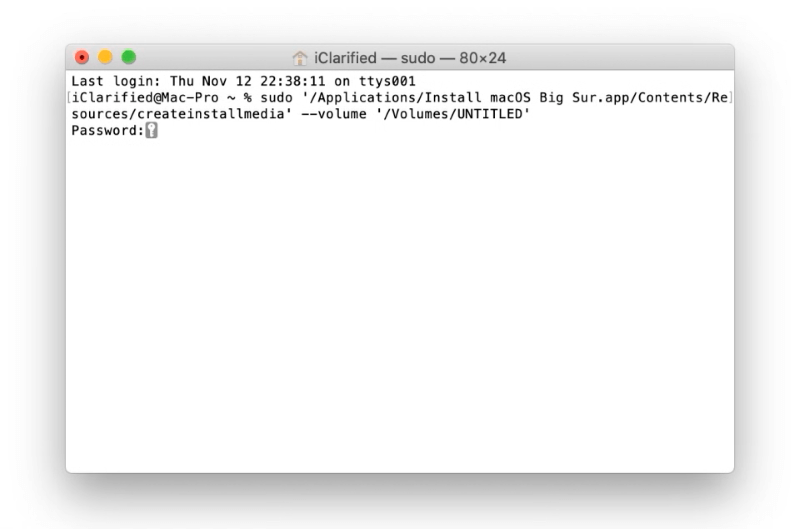
- In Terminal, type the following command and press Enter:
sudo '/Applications/Install macOS Big Sur.app/Contents/Resources/createinstallmedia' --volume '/Volumes/UNTITLLED'
Replace "UNTITLLED" with the name you gave your USB drive if you chose a different name.
sudo allows you to run commands with superuser privileges.
'/Applications/Install macOS Big Sur.app/Contents/Resources/createinstallmedia' specifies the path to the createinstallmedia tool within the macOS installer package.
--volume '/Volumes/UNTITLLED' points to the USB drive you've prepared.
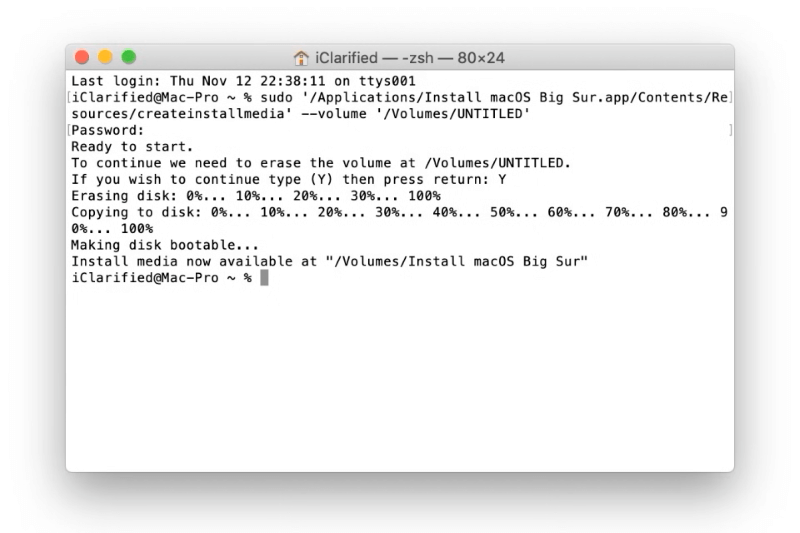
- You will be prompted to enter your administrator password. Type it in and press Enter. Terminal will ask you to confirm that you want to erase the USB drive. Type "Y" and press Enter to proceed.
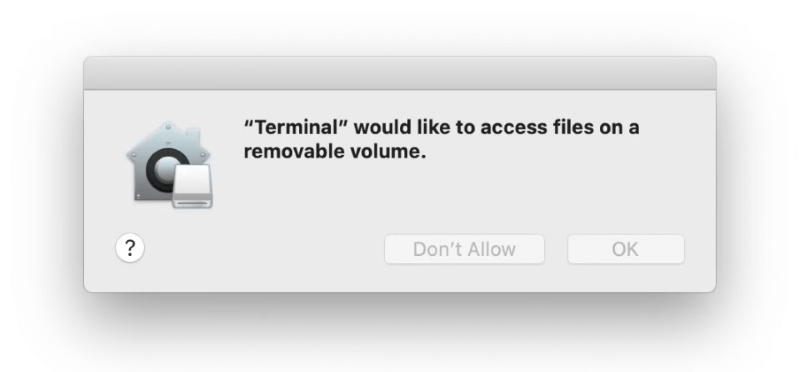
- The process will take some time, as Terminal copies the macOS Big Sur installer files to your USB drive. You'll see progress updates in the Terminal window. Once completed, you'll receive a confirmation message.
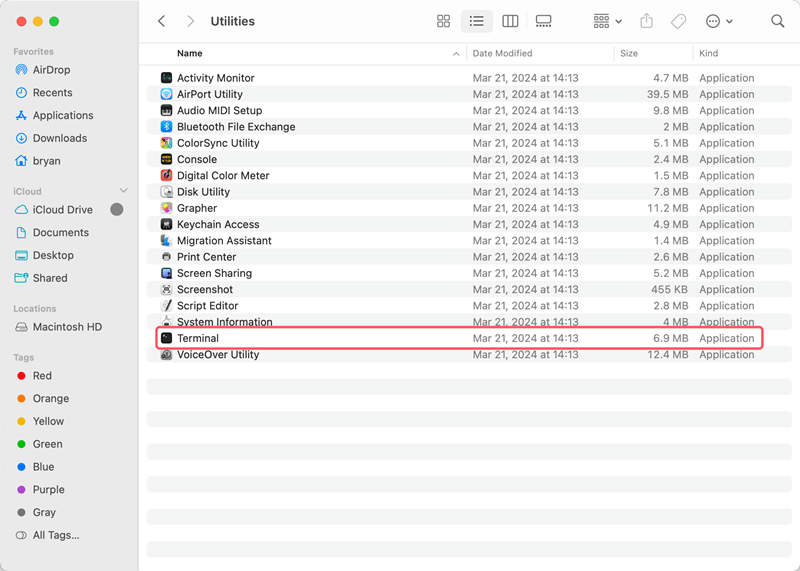
To ensure the bootable USB installer was created correctly, check that the drive has the following structure:
- The drive should be labeled "Install macOS Big Sur" (or the name you chose).
- It should contain a "macOS Install Data" folder and an "Install macOS Big Sur" application file.
Step 4: Using the bootable USB installer
To use your bootable USB installer, follow these steps:
- Ensure the USB drive is plugged in and restart your Mac.
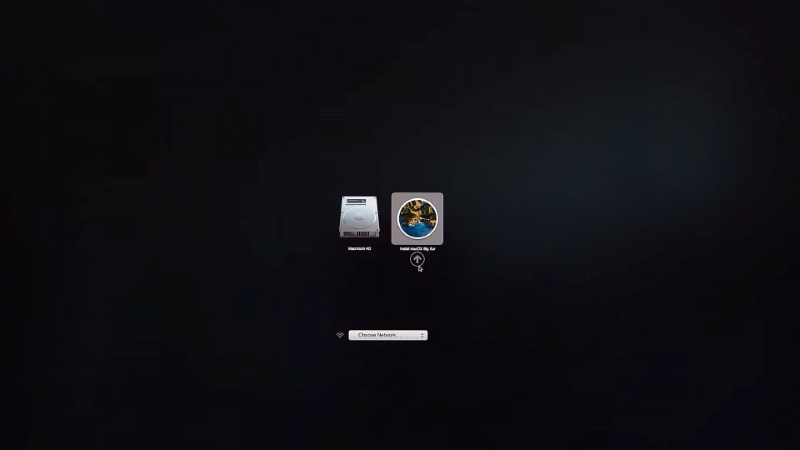
- Hold down the Option key during startup until you see the Startup Manager. (If you are using an Apple silicon chip Mac machine, press and hold the Power button instead.)
- Use the arrow keys to choose the USB drive and press Enter. Then you can follow the onscreen wizard to install macOS Big Sur step by step.
Create A Bootable Clone Backup for macOS Big Sur
There is another way to run macOS Big Sur directly without reinstalling the OS. We suggest you clone the macOS Big Sur drive with DoYourClone for Mac. It can create an bootable copy for the drive and you can boot the Mac from the drive directly. It's very useful to create an exact backup for your Mac, updating the system disk, create a test system environment, or migrate the system to another computer.
DoYourClone - Reliable Disk Clone Software
- Create bootable clone for macOS Big Sur.
- Best disk cloning software for Mac.
- Clone system, applications, and personal data fully.
After downloading the installing the disk cloning software on your Mac, do as following steps to clone your macOS Big Sur with the software.
Step 1. Connect an external drive to the Mac and then run the disk copy software from launchpad.
Note: As the cloning process will overwrite the destination drive, ensure to move the important files to another place. Or just use an empty disk as destination drive.
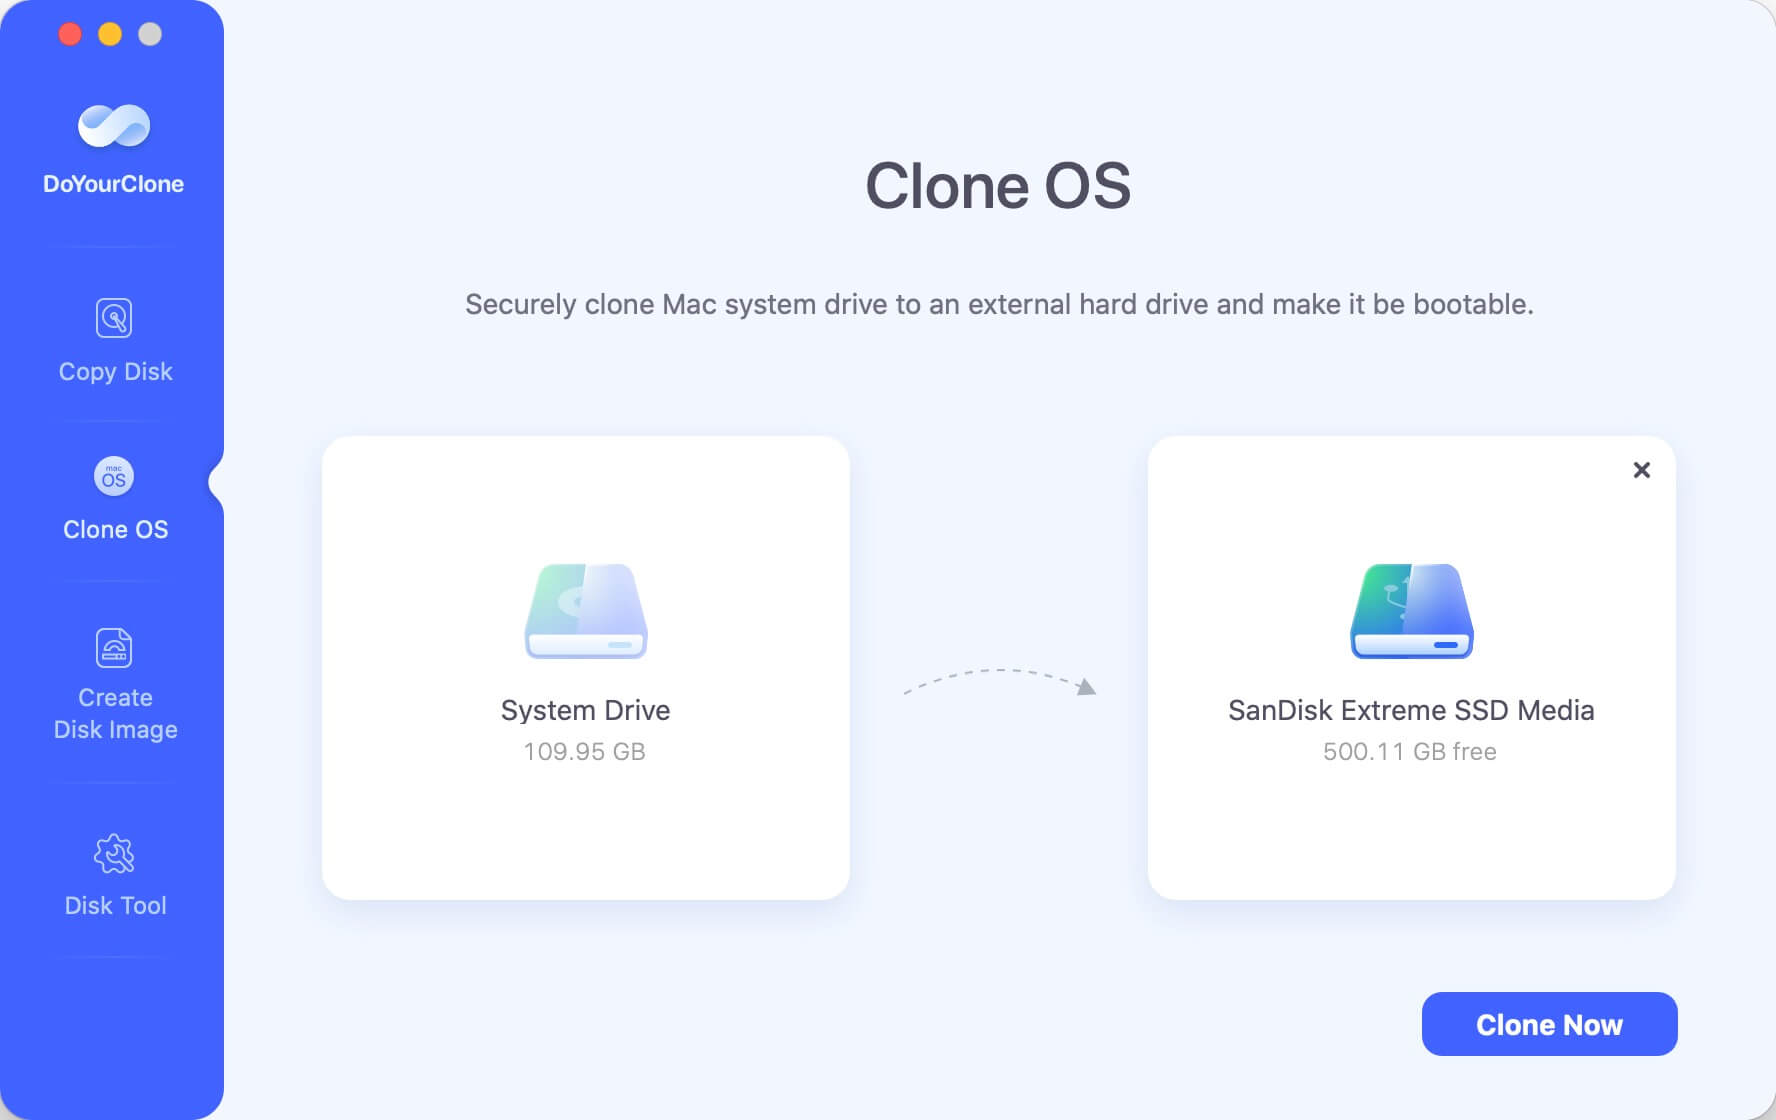
Step 2. Select the mode Clone OS. The system drive will be selected automatically as source. Select the external hard drive as destination and click Clone Now to start cloning.
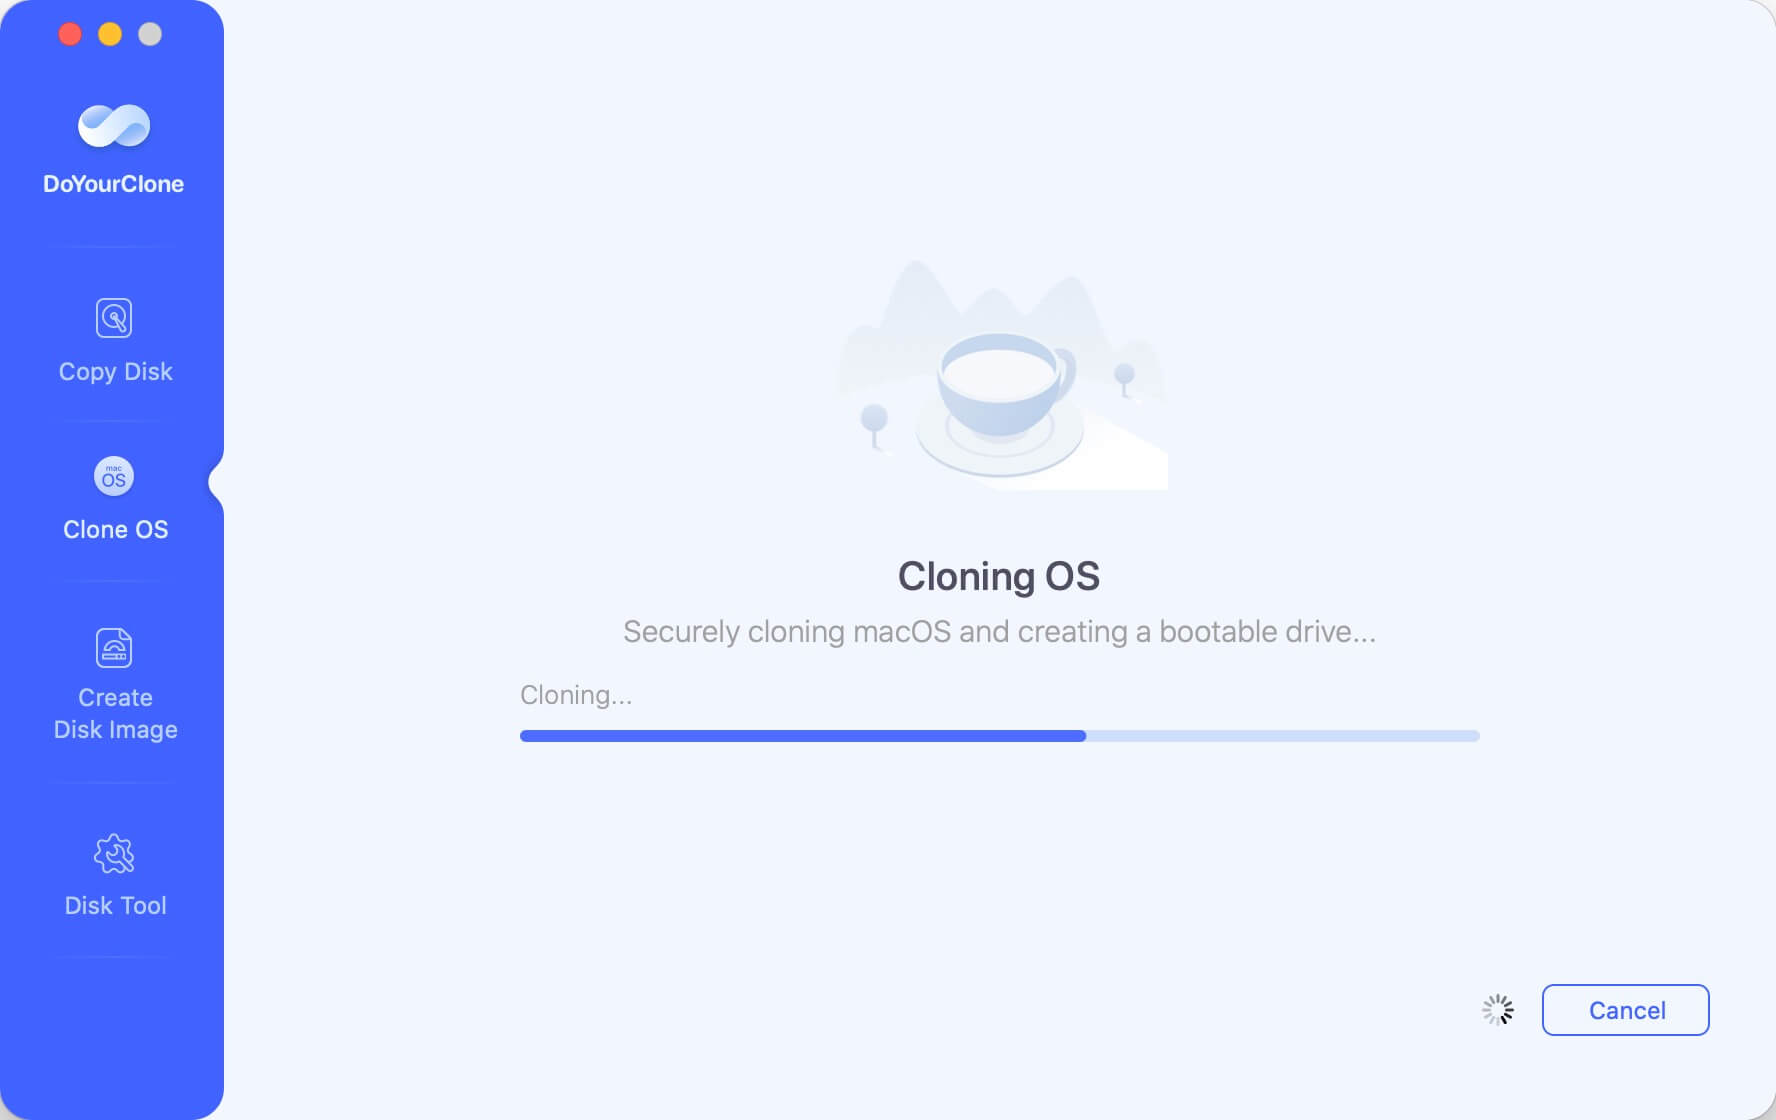
Step 3. It will take some time to finish the cloning. After the cloning process is done, all the system data, applications and your personal files are cloned to the external hard drive.
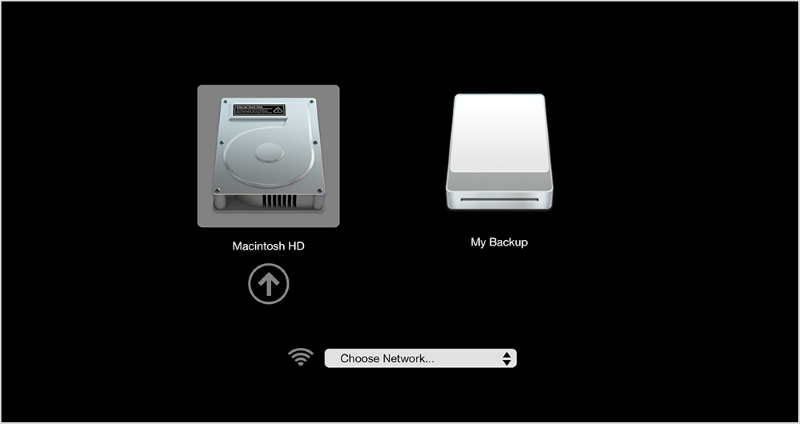
At last, you can check if the cloned drive can boot up normally or not. Just restart the Mac and then press and hold on the Option key (or Power button for Apple silicon chip machines). If the drive is cloned successfully, you will see the cloned drive is list as boot drive. Select the clone drive and click the arrow up or Continue button to boot from it.
Troubleshooting Common Issues
If you encounter errors during the creation of your bootable USB installer, here are some common issues and their solutions:
- USB drive not recognized: Verify that you are using a suitable drive and that your USB drive is formatted correctly (Mac OS Extended, GUID Partition Map). Try utilizing an other USB port or drive if the USB drive is still not detected.
- Permission Issues: If you get a "Permission denied" error, ensure you're using sudo to run the command. Verify that you're entering your administrator password correctly.
- Formatting errors: Double-check that the USB drive is correctly formatted as "Mac OS Extended (Journaled)" with "GUID Partition Map." Reformat the drive if necessary.
- Corrupted installer: If the installer appears to be corrupted or incomplete, re-download macOS Big Sur from the App Store and try again.
- Installer fails to create: Verify that you are using the right Terminal command and that the macOS Big Sur installer is in your Applications folder if Terminal returns an error throughout the process.
- Mac won't boot from USB: Try resetting the NVRAM (Non-Volatile Random Access Memory) by starting your Mac with the Option, Command, P, and R keys held. This will help if your Mac won't boot from the USB device.
Conclusion
Making a bootable USB installer for macOS Big Sur is a simple step that may help you manage your Mac more quickly and efficiently. Whether you're performing a clean installation, troubleshooting issues, or preparing for future upgrades, having a bootable USB drive at your disposal ensures you're ready for any situation. By using the procedures described in this guide article, you'll have a reliable installation medium that can help you get the most out of your macOS Big Sur experience.
Besides, we suggest you use DoYourClone for Mac to clone your macOS Big Sur as backup. The software can ensure the cloned drive is bootable. It will be very useful to run macOS Big Sur immediately once you suffer issues with the internal system drive.
DoYourClone for Mac
DoYourClone for Mac, one of the best Mac disk cloning software, can help you clone HDD, SSD, external storage device on Mac, upgrade HDD to SSD, create full disk image backup, etc. It also can clone everything from your Mac to an external HDD/SSD and create a full bootable clone backup. 100% safe and easy-to-use.