Quick Navigation:
- Upgrade to Windows 11
- Check your PC meets the hardware requirements
- Ways to update Windows 7 to Windows 11
- Ways to update Windows 8/10 to Windows 11
- New Features Of Windows 11
- How to recover lost data after upgrading to Windows 11?
Would you like to upgrade to the latest version of Windows 11? Here is a step-by-step guide to doing so!
Microsoft has recently released Windows 11 to improve the experience of its users. The new operating system would deliver an excellent experience and bring you closer to all you love the most!
Anyone can freely upgrade to Windows 11. But, before you take the steps towards the up-gradation, it is far essential to make sure that whether your system would allow you for that or not?
If you are interested to know would your system be able for this recent update or not? Just give a reading to this article!
Upgrade to Windows 11
Recently, Microsoft has launched a new update. Well, multiple pictures of the Windows 11 were gone viral before it was found in the market. On 24th June 2021, the higher authorities let the users download Windows 11.
With the release of Windows, various questions and doubts pop up in people's minds. Thus, they start looking for them all. The Windows came with many major and minor changes. The operating system comes along with multiple new and exciting features.
With Windows 11, the users would be able to download and run multiple applications on their computers. Besides it, you will also find a few changes in the Start menu to make it operate better. Above all, the team has also made efforts to change the overall look of Windows11. And thus, for now, Window 11 gives you an appearance of a Mac.
Check your PC meets the hardware requirements
You can not upgrade to Windows 11 if your computer is not compatible with Windows 11. Most Windows 10 hardware would support this update, but the same would not be for all the devices.
Microsoft has also updated the hardware requirements for Windows 11. For instance, from now TPM 2.0-enabled processor would be required for this purpose. And beside it, 4GB RAM, along with the 64GB on-device storage, is necessary. So, these requirements would make various devices ineligible for this update.
A 1GHz or faster processor with two or more cores on the compatible 64-bit processor would be required. The computer must have a graphic card DirectX 12 or later with a WDDM 2.0 driver would be required. The HD display should be greater than 9" diagonally and must have 8 bits per color channel. And lastly, the Microsoft account and internet connectivity would be a must. Get Windows 11 checker.
So, if your computer can fulfill all of these hardware requirements, then you can take the step to download the updates.
How to upgrade to Windows 11?
Just after the release of Windows 11, many of us had already installed it. But, if you have not installed it, you can go to Microsoft's official website to get free access to bug-free Windows 11.
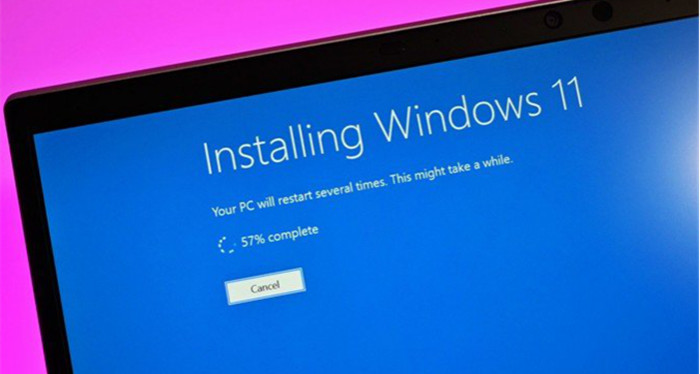
And suppose your system fulfills the requirements mentioned above. In that case, you can easily update to Windows 11 by just a very easy-to-follow step.
Ways to update Windows 7 to Windows 11
Various ways let you update your Windows 7 to Windows 11. But, here is the most straightforward and most accessible of them. You can follow these steps and can get your windows update:
- Click on "Start Menu" and then click on the "Control Panel".
- From the "Control Panel Page", you can choose the "Windows Updates".
- Hit the link which would take you to the Window's update page.
- From this page, click the "Check For Updates", and as a result, Windows will start to check for the latest updates.
- After the Windows search for the updates, you need to click the "Install The Updates."
- Alternatively, you can also click on the two other available options, which would provide you multiple numbers of available updates and optional updates.
- From the list of available updates, choose and install the updates you are required.
- An alternative "Update to Windows 11" would also be available there; click on it.
- And as a result, your Windows 7 will be updated.
Ways to update Windows 8/10 to Windows 11
To update Windows 10 to Windows 11, you can follow the following steps:
- Open Windows 10 on your computer.
- And then go to the "Settings Tab," or here you can also type the CTRL + S and look for the "Settings" option.
- After the settings, you need to click the "Windows Insider Program".
- Click on "Get Started".
- The Windows Insider Program will start loading, and here you would have to provide the Microsoft account.
- After getting logged in, you should go to the Windows Insider Account.
- Here, choose the Insider Settings to Dev Channel and click on the Update and Security.
- Click on Check For The Updates.
- See the option to upgrade your Windows to Windows 11. Click on that.
New Features Of Windows 11
Windows 11 is available with various new and the most awaited features, thus bringing you closer to the things you love the most. The following are the most notable and noticeable changes or parts of Windows 11:
- The startup menu has been upgraded. The Taskbar and windows come along with rounded corners and transparency.
- Here, you can install all the intergraded Android Apps from the Microsoft Store.
- The Microsoft Teams will have the facelift and would be present on the Taskbar from now.
- The users can get access to the widgets from the Taskbar and can also personalize.
- The virtual Desktop Support will be available with some unique features just like as Mac has.
How to recover lost data after upgrading to Windows 11?
The installation of Windows 11 may format your hard drive or cause data loss on Windows 11. How to recover lost data after upgrading to Windows 11? Don’t worry, just try Do Your Data Recovery.
Do Your Data Recovery
- Recover lost data due to OS upgrade, deletion, format, logical error, partition loss, etc.
- Recover lost data from SSD, HDD, memory card, USB flash drive, digital camera, external disk, etc.
- The best Windows 11 data recovery software.
If you don’t have a backup of your lost data, you can download and run this Windows 11 data recovery software to help you quickly get lost data back. Now, follow the steps below:
Step 1. Select the hard drive where you lose your files.
Open Do Your Data Recovery on your computer, then select the hard drive where you lose your files. You also can recover lost data from deleted/lost hard drive partition.

Step 2. Scan the hard drive.
Just click on Scan button. Do Your Data Recovery will scan the hard drive and find deleted/lost files.
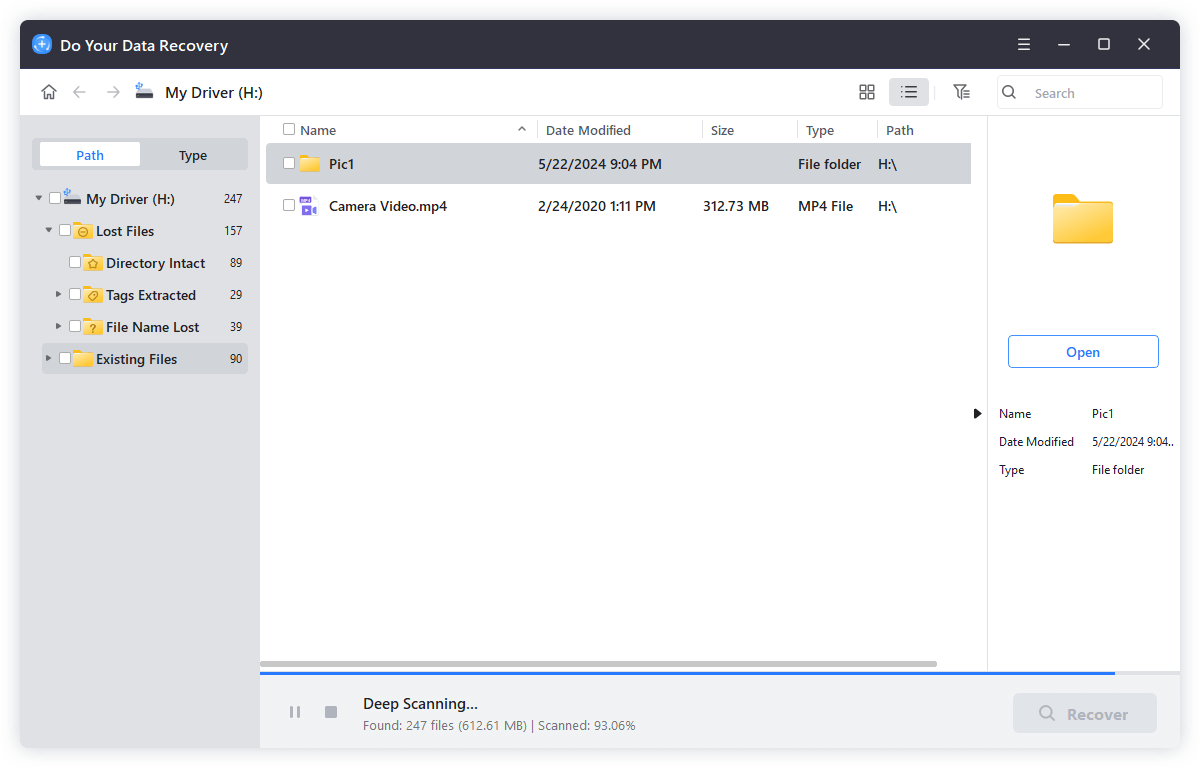
Step 3. Preview and recover lost files.
Once the scan is completed, you can preview all recoverable files. Then select the wanted files and save them. If the quick scan can not find all lost files, try advanced recovery mode, find much more lost files.

Conclusion
Microsoft has introduced a new operating system this year. Windows 11 gives some very unique, different ad new features to the users. The update is completely free but, your system must be compatible with this update.
So, if you are interested in going with those updates, you can follow the steps described above to get the latest updates!
Written & Updated by Justin Kenny
Justin Kenny is a writer & editor of DoYourData. He joined DoYourData in 2016 and focuses on writing articles about Windows data recovery, Mac data recovery, external device data recovery, hard drive clone, data erasure, Mac cleanup, computer issue fixes, etc. He is a super fan of Apple devices and is big on testing new digital device and system utility software.