The reliable Mac data recovery software to recover deleted or lost files.
Free TrialFinding what you’re searching for is considerably easier when your computer’s data is organized into various partitions. It’s now simpler than ever to maintain tabs on the amount of storage space you have available with Windows 11’s Disk Management panel.
This useful program may come in handy when you need to adjust the size of your storage device’s partitions, combine and shrink partitions, etc. Additionally, it may be used to debug a wide range of system issues and faults.
If Windows’ Disk Management software fails to load, so what do you do? Isn’t it obvious that you can’t ignore this? The “Disk Management not working on Windows 11” problem has been addressed in this article. There are a variety of ways to get around this problem.
Fixes of Disk Management Not Working in Windows 11
We’ve come up with a couple of ideas for dealing with the problem. Take a look and discover which works best for you. All of these need you to have administrator rights.
Method 1: Check Your Hardware
When moving around your computer, there is a good potential that you accidentally triggered a hardware failure by bumping it against anything. The Windows disk manager may not load correctly if your computer’s motherboard and storage devices have a problem communicating with each other.
Check your PC for any possible connectivity difficulties. Verify that no connection errors are causing the disk management not loading problem by inspecting the connections between the storage, power supply, and your motherboard.
Method 2: Using Services Window
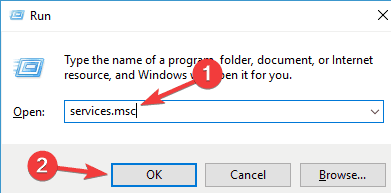
Launch the Run dialogue box by using the Windows + R combination. Enter “services.msc” in the textbox and press Enter.
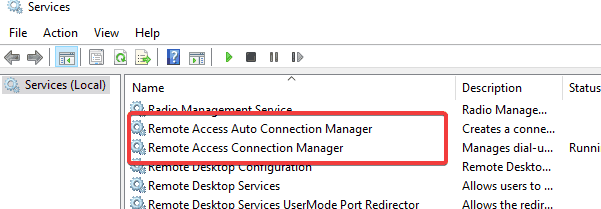
Then, scroll down and double-click Remote Access Connection Manager.
Make sure to pick Disabled as your startup type in the drop-down menu.
To save your changes, click the Apply and OK buttons at the bottom of the window.

In the Services window, choose Remote Access Auto Connection Manager by clicking it twice.
The Startup type drop-down option should be set to Disabled. Then, as before, click Apply and OK.
Double-clicking the Virtual Disk icon will bring up the dialogue seen in the following screenshot.

Select Manual or Automatic from the Startup Type drop-down option. Once you’ve done that, click Apply and OK to confirm your changes.

Restart your computer now, and then launch the Disk Management tool.
The Disk Management tool in Windows may be simply repaired using the Services tool.
Method 3: Use SFC Scannow
You may run the SFC in Safe Mode once in a while if your PC is experiencing several issues. It has the ability to correct corrupted system files on a computer, as well as restore its health.
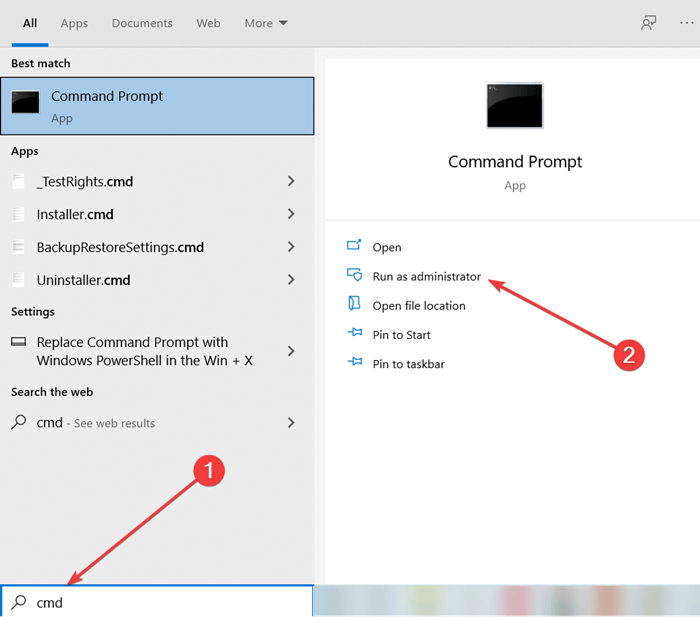
To open Command Prompt with administrator credentials, press Windows Key + S, enter cmd, and click on Run as administrator.
Press the Return key once you’ve entered the following command:
sfc /scannow

The Command Prompt displays the results of the scan, as well as any fixes that were made. Windows has to be restarted after the System File Checker fixes certain files.
Fixing problems with Windows system files is easy using Scannow, often known as System File Checker. So, this may also be useful in the case of a problem with Disk Management.
Method 4: Run A DISM Scan
It’s possible that a DISM scan might help you if the SFC scan doesn’t work. To do this, follow the instructions below.
As an administrator, open a Command Prompt window.
Enter the following command into the Command Prompt and click Enter:
DISM /Online /Cleanup-Image /RestoreHealth

The DISM scan has begun. Avoid interrupting this process since it might take up to 20 minutes to finish the DISM scan. Check to see whether the issue continues when the scan is complete.
Method 5: Remove External Peripherals
Do you have any external devices attached to your Windows PC, such as a USB stick, speaker, memory card reader, and so forth?

In this scenario, we recommend that remove any external devices and then restart your computer. An external device may sometimes conflict with the settings of your device. After removing all of the external peripherals, run the Disk Management program to determine whether it’s working correctly.
Method 6: Update Windows
Using an out-of-date version of Windows might result in a variety of issues. Disk management is one of these issues that isn’t loading correctly.
These are the steps to updating Windows.
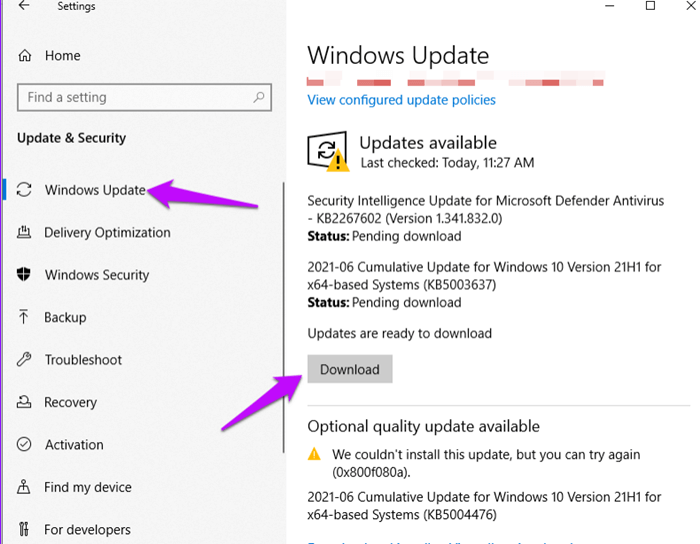
In the startup menu, locate and choose Settings.

Select Update and security at the bottom of the page.
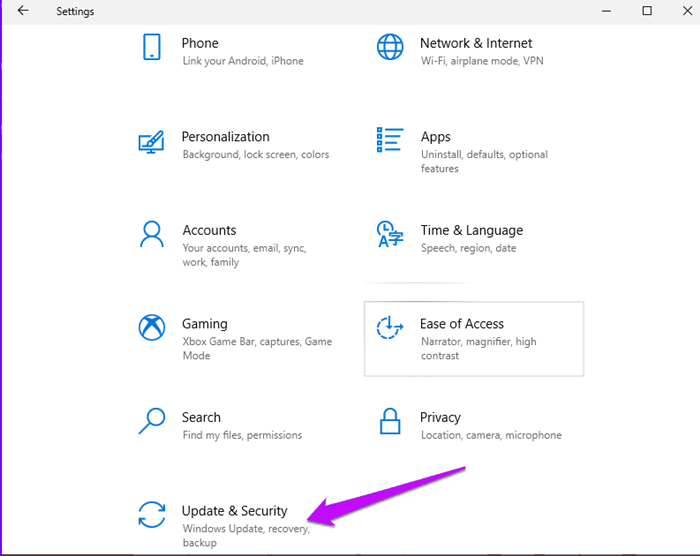
In the right-hand pane of Windows Settings Update and Security, look for new updates. Install the new features by clicking Download.
Conclusion
That’s all there is to it. After reading this post, you now know how to repair the problem of Windows 11’s disk management not functioning. Whether you find this helpful, please let us know if you can now open Disk Manager in Windows 11.
DoYourData Products
DoYourData Super Eraser for Mac
Permanently shred files or wipe hard drive to prevent data recovery on Mac.
Free TrialClone HDD, SSD, Mac OS, external disk, USB drive, and more under Mac OS.
Free Trial