Complete Guide: How to Format PC Before Clean Install Windows 11 26H2
Formatting a drive cannot make the data gone for good. If you need to format a drive and ensure the data is unrecoverable, you can use the software DoYourData Super Eraser. The software wipe data with certified data wiping algorithms and can guarantee the data is no longer recoverable.
 Updated by Shirly Chen on September 24, 2026
Quick Navigation:
- Why Format Hard Drive before Installing Windows 11 26H2
- Essential Preparation Checklist before Formatting
- Securely Wipe Your PC (DoYourData Super Eraser)
- How to Format PC During Windows 11 26H2 Clean Installation
- Post-Installation Setup Steps for Windows 11 26H2
- FAQs about Formatting PC before Windows 11 26H2 Installation
- Final Conclusion
The release of Windows 11 26H2 brings exciting upgrades to performance, system intelligence, and user experience. While updating through Windows Update is fast, performing a fresh start is often the best way to get peak performance from your computer.
Over time, operating systems collect system logs, software traces, registry clutter, and temporary files that slow down your computer. A clean installation removes all existing software junk and gives you a brand-new operating system experience.
Before starting a fresh setup, knowing how to format PC before clean install Windows 11 26H2 properly is essential. In this complete guide, we will walk you through preparing your files, wiping your disk safely, and completing a smooth installation.
Why Format Hard Drive before Installing Windows 11 26H2
Formatting your hard drive or SSD before installing a new operating system offers several key advantages:
- Eliminates System Clutter: Completely clears out old software conflicts, corrupted files, and system bugs accumulated over time.
- Removes Malware & Security Threats: Erases hidden malware, adware, or spyware that standard antivirus scans might miss.
- Optimizes Drive Performance: Re-aligns file system structures and fixes logical partition errors for optimal SSD speed.
- Prevents Upgrade Errors: Ensures Windows 11 26H2 installs on a fresh partition without lingering junk from old Windows builds.
Essential Preparation Checklist before Formatting
Formatting completely deletes everything stored on the target partition. Before erasing your hard drive, make sure you complete these three crucial preparation steps.
1. Backup All Your Important Files
Copy all your critical photos, work documents, saved videos, and browser bookmarks to an external hard drive, USB flash drive, or cloud storage service. Double-check your User folder, Downloads directory, and Desktop.
2. Note Down License Keys and Installed Software
Make a list of paid software programs you rely on, such as Microsoft Office, creative design suites, or specialized utilities. Write down product license keys and serial numbers so you can reactivate them easily after installing Windows 11 26H2.
3. Create a Windows 11 26H2 Bootable USB Installation Drive
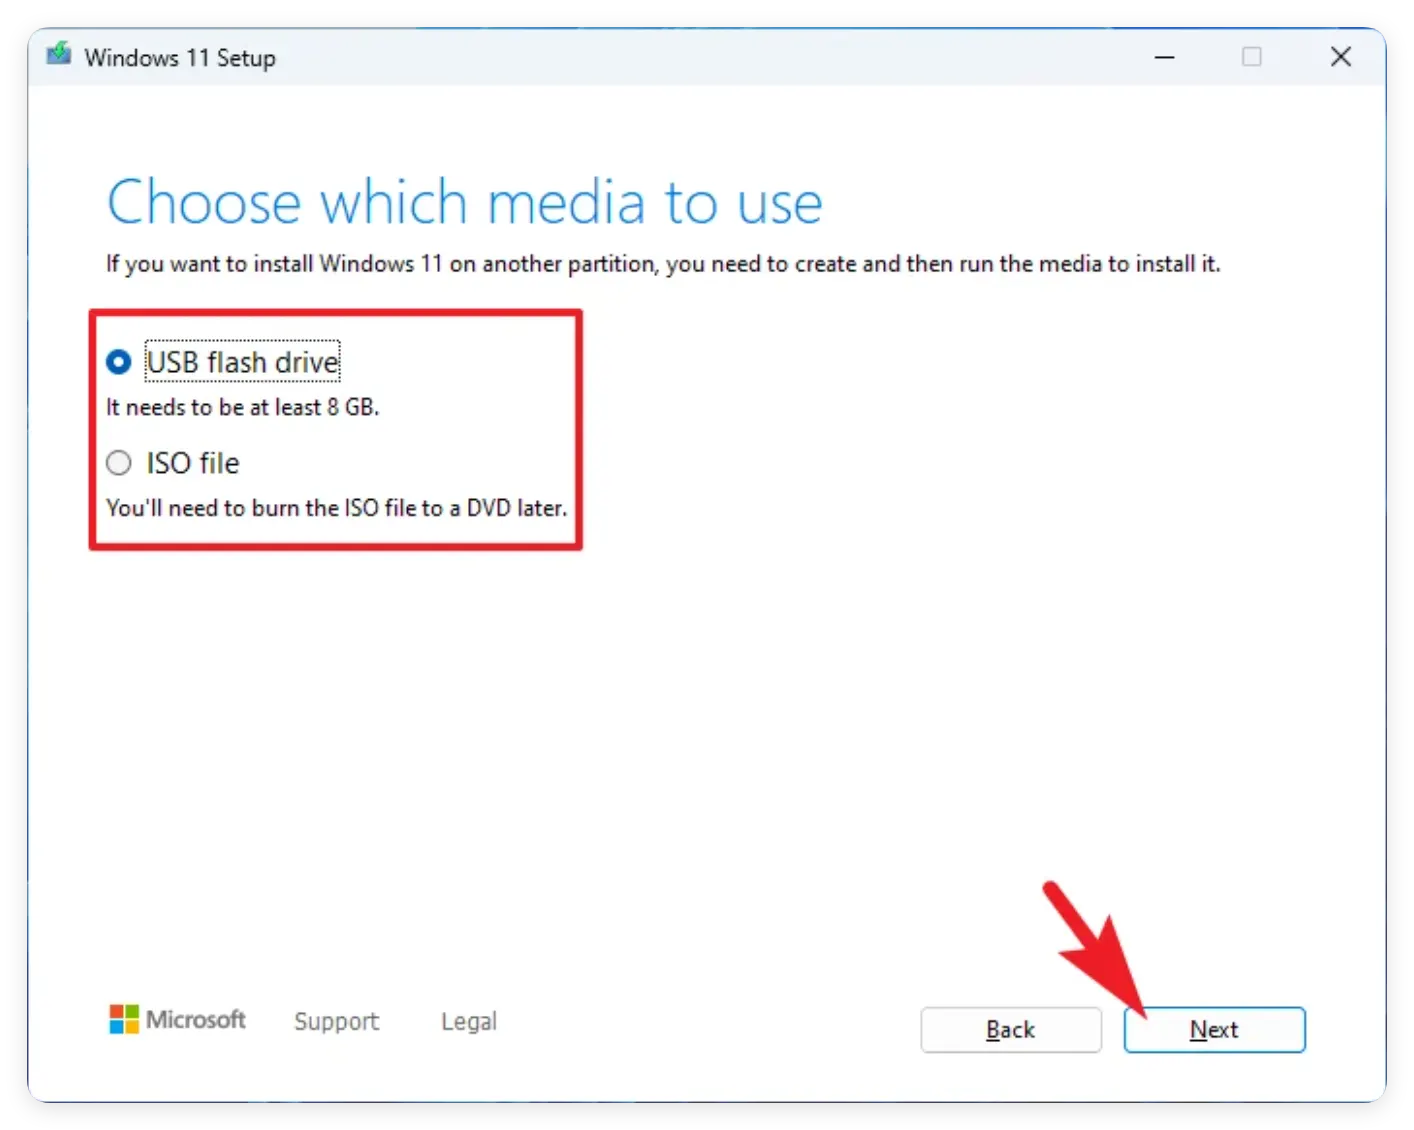
You need a bootable USB installer to reinstall Windows after formatting:
Step A: Insert a USB flash drive (at least 8 GB storage) into your PC.
Step B: Download the official Windows 11 Media Creation Tool from Microsoft's website.
Step C: Run the tool, choose 'Create installation media for another PC', select Windows 11 26H2, and choose your USB drive.
Step D: Wait for the tool to download the required installation files and complete the bootable USB drive.
Securely Wipe Your PC (DoYourData Super Eraser)
Standard Windows quick formatting removes file pointers, but raw data remains recoverable using data recovery tools. If you are preparing a secondhand PC, passing a computer to someone else, or simply want a 100% clean disk foundation, standard formatting is not enough.
To ensure all sensitive privacy records, old passwords, and residual data are permanently erased beyond recovery, use a professional disk wiping tool like DoYourData Super Eraser.
Why Use DoYourData Super Eraser Before Installing Windows 11 26H2?
DoYourData Super Eraser utilizes certified military-grade data erasure algorithms (such as DoD 5220.22-M and Peter Gutmann methods) to overwrite drive sectors completely.
- Permanent Data Erasure: Overwrites existing drive sectors so wiped data can never be recovered by any recovery software.
- Safe for SSDs & HDDs: Safely erases mechanical hard drives (HDDs) and solid-state drives (SSDs) without reducing hardware lifespan.
- Flexible Wipe Modes: Allows you to wipe individual partitions, secondary drives, or prepare unallocated space effortlessly.
- Easy 3-Step Operation: Clean interface designed for both beginners and experienced computer users.
How to Wipe Secondary Drives or Partitions with DoYourData Super Eraser:
Step 1: Download & Install - Download and install DoYourData Super Eraser on your current Windows PC.
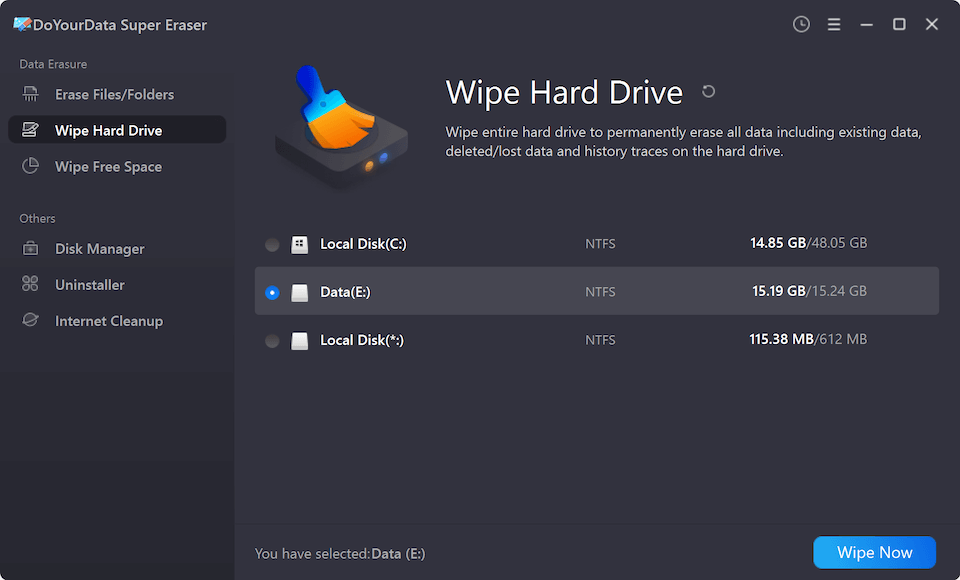
Step 2: Choose Erasure Mode - Launch the program and select 'Wipe Hard Drive' or 'Wipe Free Space' from the main interface. Select the target drive partition you want to format and wipe clean.
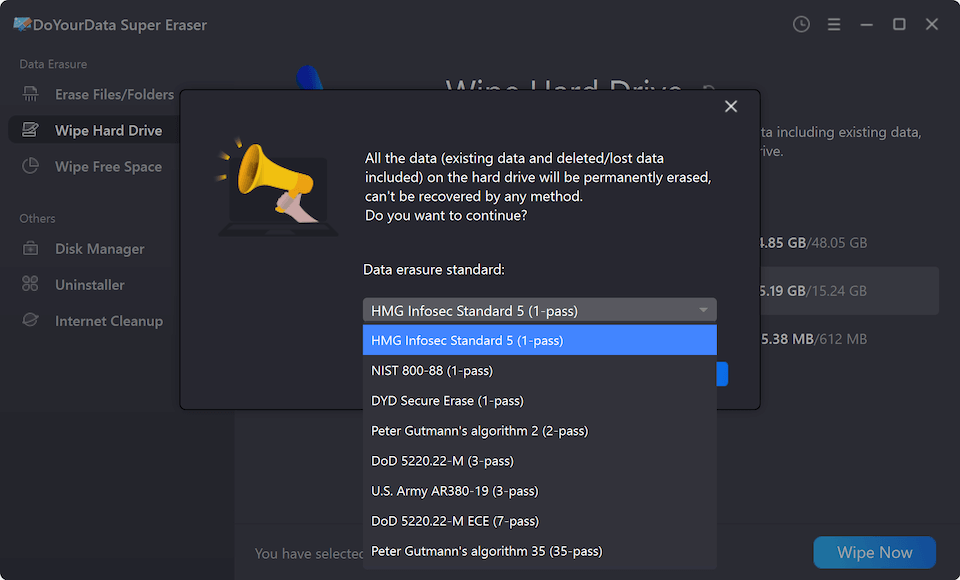
Step 3: Select Wiping Standard - Select a data erasure standard to wipe data permanently. There are multiple certified data erasure algorithms supported.
Step 4: Execute Secure Erasure - Confirm and start the data wiping process. DoYourData Super Eraser will permanently erase all data on the selected drive safely.
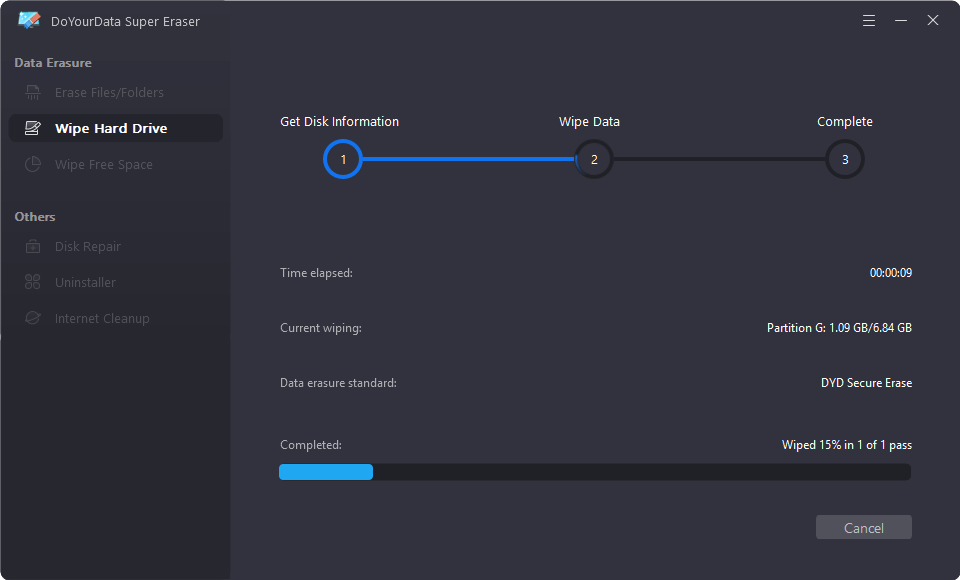
💡 Tip: If you want to wipe the PC system drive, you can first process the clean installation of Windows 11 26H2. Then use DoYourData Super Eraser to wipe the free space of the system drive.
How to Format PC During Windows 11 26H2 Clean Installation
Once your files are safely backed up and non-system partitions are wiped, you are ready to format your primary boot drive (C: drive) and clean install Windows 11 26H2.
Step-by-Step Installation & Format Process:
Step 1: Plug in Bootable USB - Insert your Windows 11 26H2 bootable USB drive into your PC.
Step 2: Boot from USB - Restart your PC and repeatedly press the Boot Menu key (F12, F11, F8, or Del depending on your motherboard) to open boot selection.
Step 3: Select Boot Device - Select your USB flash drive from the boot menu list and press Enter.
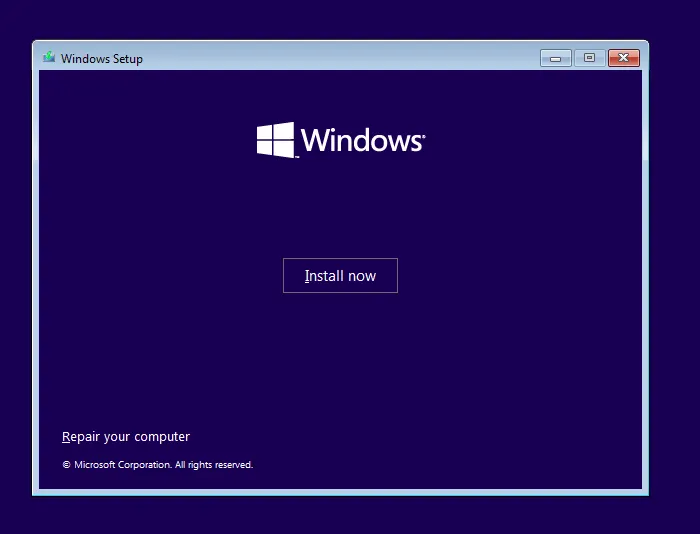
Step 4: Start Windows Setup - Choose your language, time, and keyboard preferences on the Windows Setup screen, then click 'Install now'.
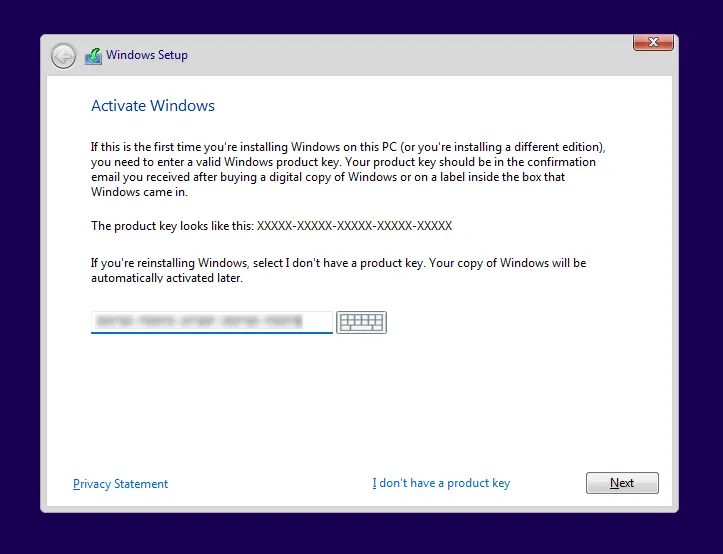
Step 5: Enter License Key - Enter your Windows product key (or click 'I don't have a product key' to activate automatically later via digital license).
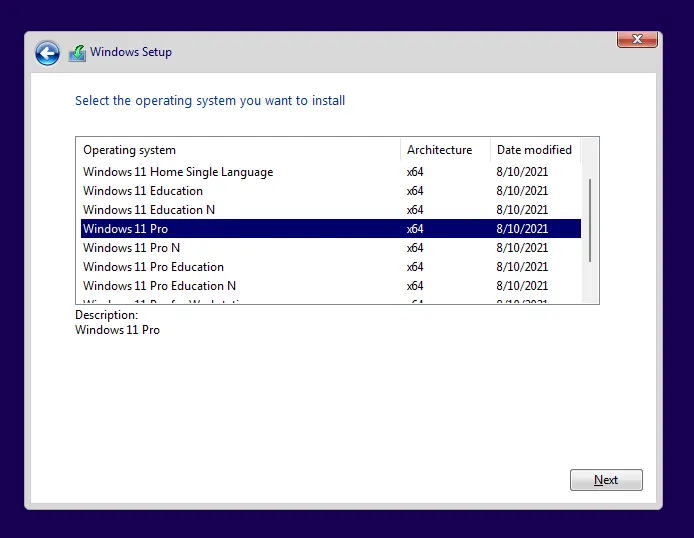
Step 6: Choose Custom Installation - When asked 'Which type of installation do you want?', choose 'Custom: Install Windows only (advanced)'.
Step 7: Format C: Drive Partition - Select your primary operating system partition (usually Drive 0 Partition with your old C: drive). Click the 'Format' button in the toolbar. Confirm by clicking 'OK'.
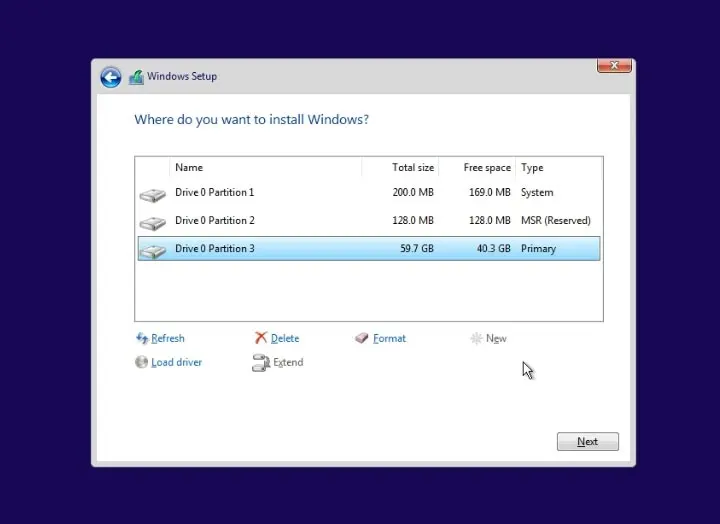
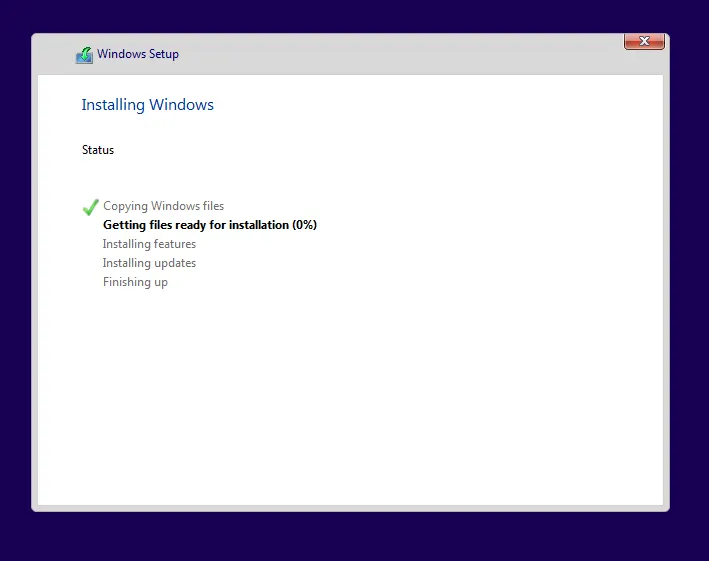
Step 8: Complete Clean Setup - With the freshly formatted partition selected, click 'Next' to begin installing Windows 11 26H2 clean.
Post-Installation Setup Steps for Windows 11 26H2
After Windows 11 26H2 finishes installing and boots to the desktop, follow these post-setup steps to ensure maximum stability:
- Run Windows Update: Go to Settings > Windows Update and click 'Check for updates' to download the latest hardware drivers.
- Install Official Drivers: Download graphics drivers directly from NVIDIA, AMD, or Intel for optimum gaming and screen performance.
- Restore Personal Data: Connect your external drive and copy your personal documents, photos, and files back to your computer.
- Reinstall Software: Reinstall essential web browsers, productivity programs, and software utilities.
FAQs about Formatting PC before Windows 11 26H2 Installation
Final Conclusion
Performing a clean installation is the best way to enjoy a fast, responsive, and glitch-free computer experience on Windows 11 26H2.
By following this guide on how to format PC before clean install Windows 11 26H2, you ensure that your personal files are safely backed up, unwanted data is securely wiped with DoYourData Super Eraser, and your new operating system is installed on a completely fresh foundation.
DoYourData Super Eraser
DoYourData Super Eraser, the award-winning data erasure software, offers certified data erasure standards including U.S. Army AR380-19, DoD 5220.22-M ECE to help you securely and permanently erase data from PC, Mac, HDD, SSD, USB drive, memory card or other device, make data be lost forever, unrecoverable!
Written & Updated by Shirly Chen
Shirly Chen has been writing data recovery, data erasure articles for DoYourData over 4 years. She has been working as a professional website content writer & editor for quite a long time. She also writes articles about disk clone, Mac optimization, disk backup, etc.