Quick Navigation:
- What is a .dmg file?
- Create Disk Image with Disk Utility
- Create a disk image for macOS Ventura using DoYourClone
- Conclusion:
- FAQs about Creating Disk Image for macOS Ventura
An identical replica of a disk or partition is called a disk image. One duplicate of a big, infrequently-accessed file can be kept as a backup, or the space saved can be used for other often-accessed files. Disk images are available in numerous file formats, making them compatible with various computer systems and operating systems. The disk image format on macOS is .dmg. Now, you can create a disk image for macOS Ventura.
To back up everything and selectively recover what you need, disk image backups are a great option. Consider the scenario when you purchase a new personal computer with preinstalled software such as Windows and Microsoft Office.
You can transfer only the files you need from the backup disk image to the new machine. With disk image backup, you can restore individual files and directories rather than the entire system.
What is a .dmg file?
Disk images, often known as.dmg files, contain a replica of an entire data of a disk (CD, DVD, USB stick, etc.). Since 2000, DMG images have been the standard for online software distribution for Mac OS X users. Unlike the former default Mac OS disk image format DiskCopy, which was completely hazardous to copy over anything other than an HFS (Mac) partition, DMG images can be safely stored on any partition type, such as Windows (NTFS). They can be safely distributed over FTP, email, etc.

While both DiskCopy and DMG images offer compression, DMG images also feature encryption, which can be a double-edged sword regarding platform compatibility, especially in Mac OS 9. Because of this, if you want to keep disk images from Mac OS 9 or older, you might consider generating CDR images instead.
Disk image creation advantages:
 The purpose and benefits of creating a disk image are the same whether you're working with Mac OS X or Windows. Disk images have numerous uses and advantages. Using a disk image, you can do things like:
- Put the program on several computers without having to download it repeatedly.
- Transfer data from one drive or partition to another when working with inaccessible files in the Finder.
- Make a disk or partition that can be used as a boot device.
- Roll back changes made to a disk or partition.
File transfers to and from an encrypted disk image are as simple as those involving an unencrypted disk image. When working with an encrypted disk image, please keep in mind the following:
- Since an image is seen as a single file, backup tools will need to back up the entire Image if any files within it have been modified.
- A picture file's password can't be changed.
- You can't make your home directory an encrypted disk image.
Create Disk Image with Disk Utility
First, the macOS Ventura offers the built-in free tool Disk Utility which can be used to create disk image. You can use it to create disk image for your hard drive on Mac.
🎯 Note: It's not supported to create images of individual APFS volumes. Also, it's impossible create images of APFS containers on Mac computers with Apple silicon or an Apple T2 Security Chip.
Creating a Disk Image
This technique is simple, and Apple even has a rather informative page in its knowledge base to explain it. You can follow the guide below to create a disk image on macOS Ventura steps by step:
Step 1: Launch the Disk Utility application under "Utilities" in "Applications".

Step 2: Choose the hard drive you want to create disk image. Click File, then New Image, then Image from "DriveName" as the source.
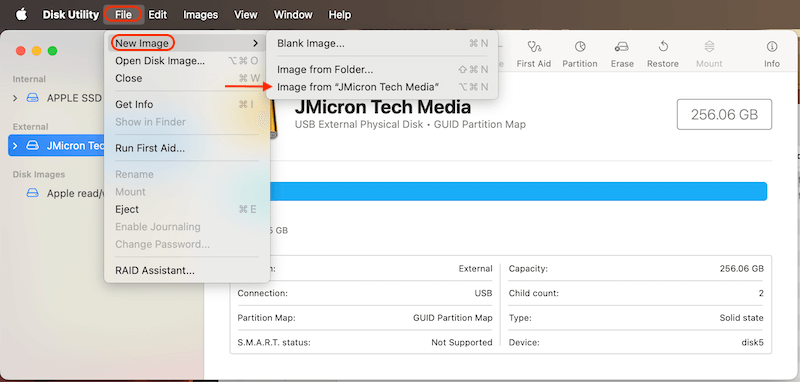
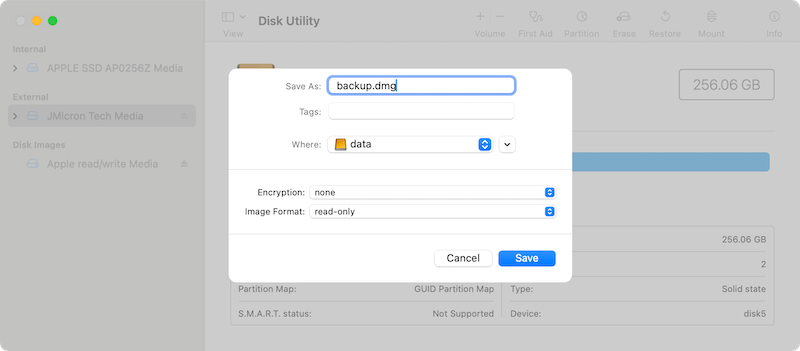
Step 3. In the popup window, you can name the disk image, choose the location to hold the disk image. You can also choose to encrypt the disk image or not.
At last, you need to assign the format for the disk image. The DVD/CD master image will end in.cdr for use with external software. If you don't have a good reason not to, go with "read/write." Click on "Save" button to start creating disk image for the drive.
Step 4: The duration of this procedure is uncertain depending on the disk size. Select the Image, then go to "Images", and then" Add Checksum" to generate a checksum of the Image.
Disk Image Mounting and Unmounting with Encryption
1. It is possible to copy files to the encrypted disk image immediately after it has been produced because it will automatically mount for the first time. If multiple files are mounted, the disk image for the designated volume will always be on top.
2. Unmount the encrypted disk image when you are done using it. You can eject it from any Finder window by dragging its icon or clicking the eject button.
3. Simply double-clicking the disk image you made will re-mount it. Personal.dmg is the name of the disk image shown below. You can find it at the very top of the list.
4. Type in your password. It's safe to proceed by clicking OK. The disk image should now be mounted.
Create a disk image for macOS Ventura using DoYourClone
As there are some limits to create disk image with Disk Utility, you may want a more comprehensive solutions. For instance, if you want to create disk image for APFS format macOS drive, Disk Utility will not help. However, there are other solutions to do the job without a problem.
DoYourClone for Mac is a powerful, safe and easy-to-use disk cloning software. It can help you easily create a disk image backup for macOS Ventura. It's able to create disk image for APFS drive on macOS.
DoYourClone for Mac
- Clone HDD, SSD and external disk on Mac OS Ventura.
- Create bootable clone for macOS Ventura.
- Create disk image backup (.dmg or .zip) for macOS Ventura.
Now, follow the steps below to create a disk image backup for macOS Ventura.
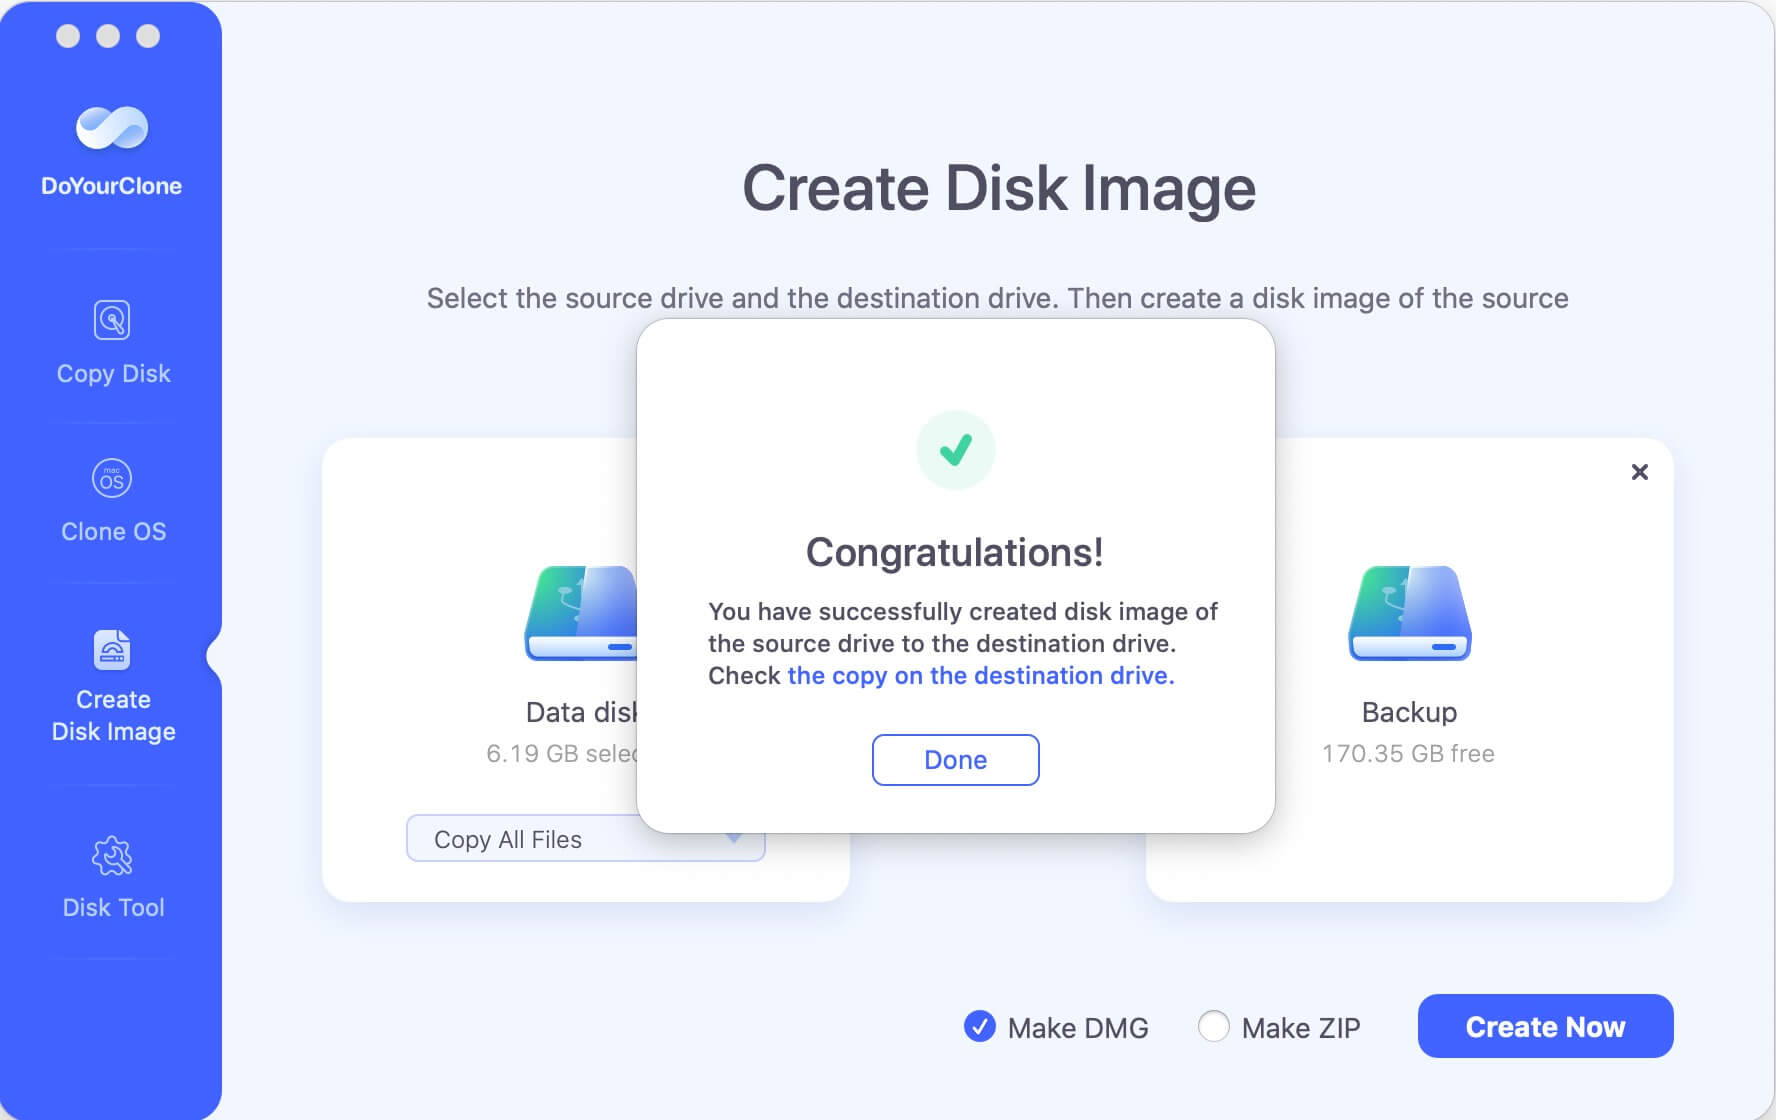
Step 1. Open DoYourClone for Mac, choose disk cloning mode - Create Disk Image. Then select the source drive and the destination drive. It will create a disk image of the source drive and save it to the destination drive.
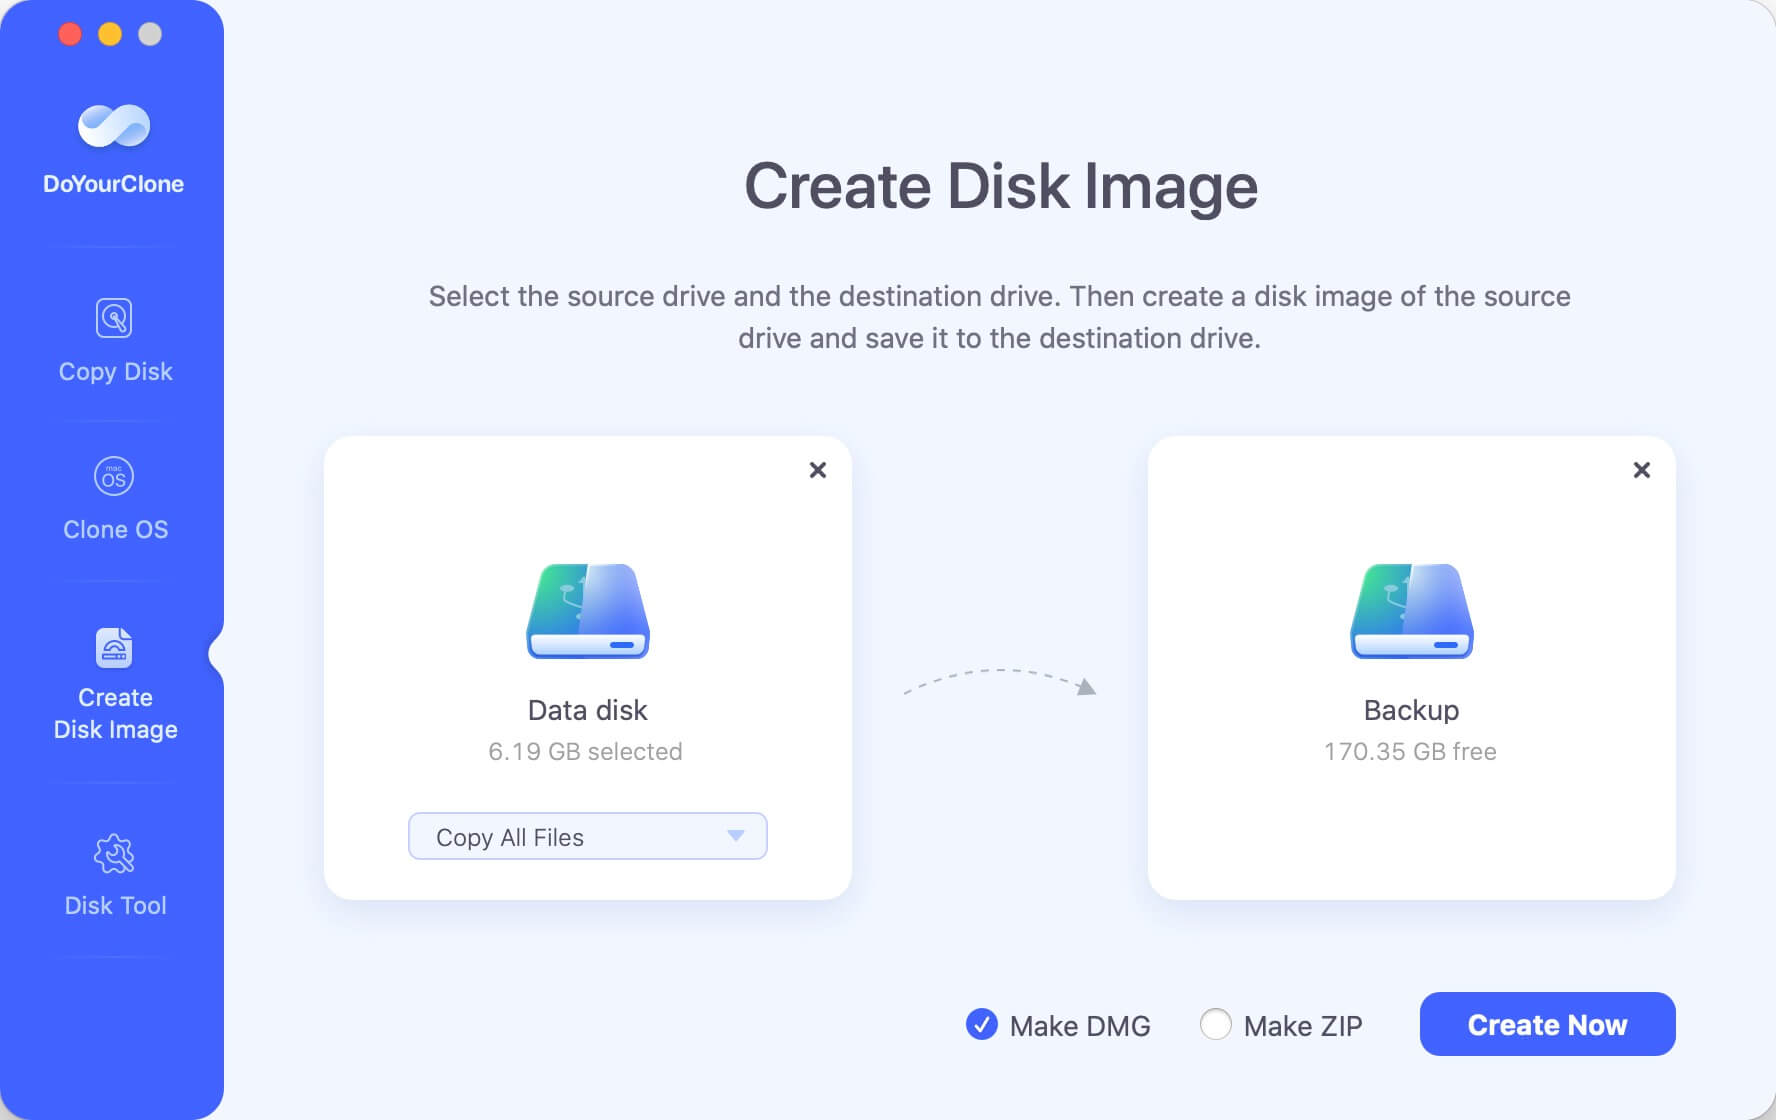
Step 2. Click on Create Now to create a .dmg or .zip disk image of the source drive and save it to the destination drive.
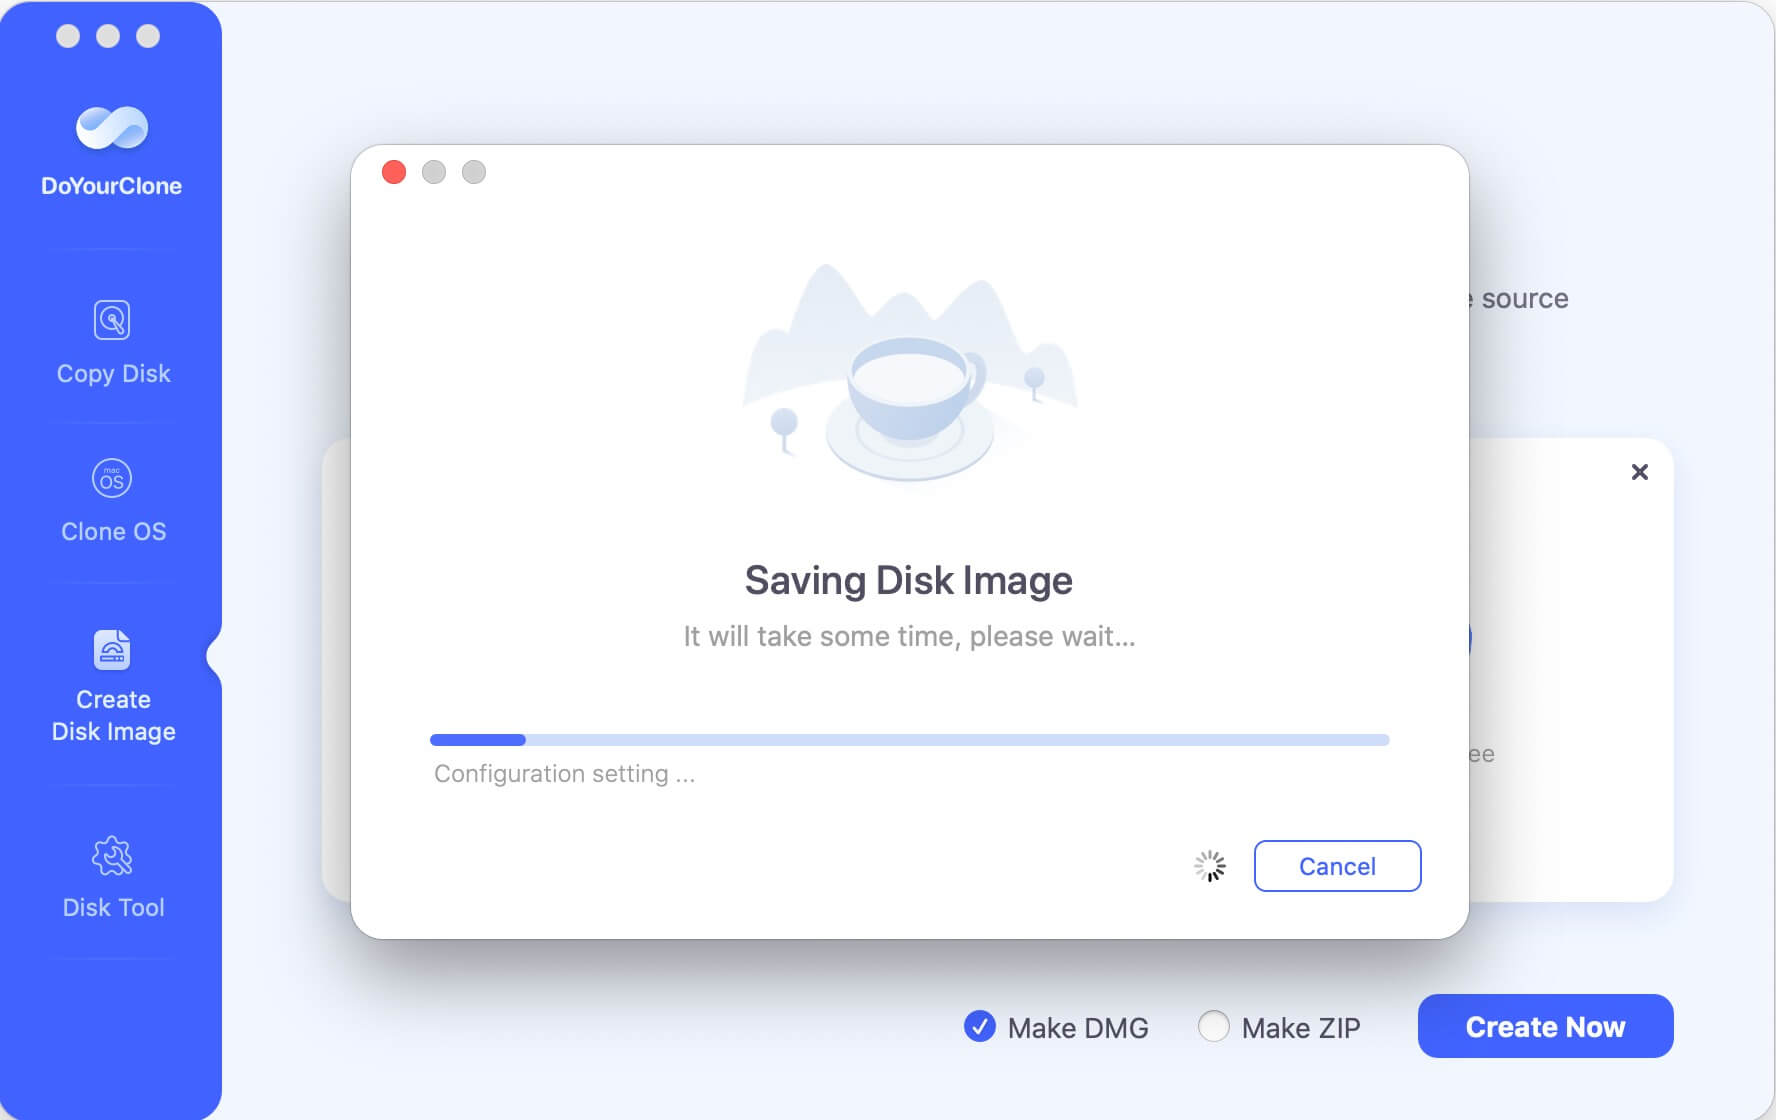
Once the process gets finished, you can check the disk image of macOS Ventura on the destination drive.
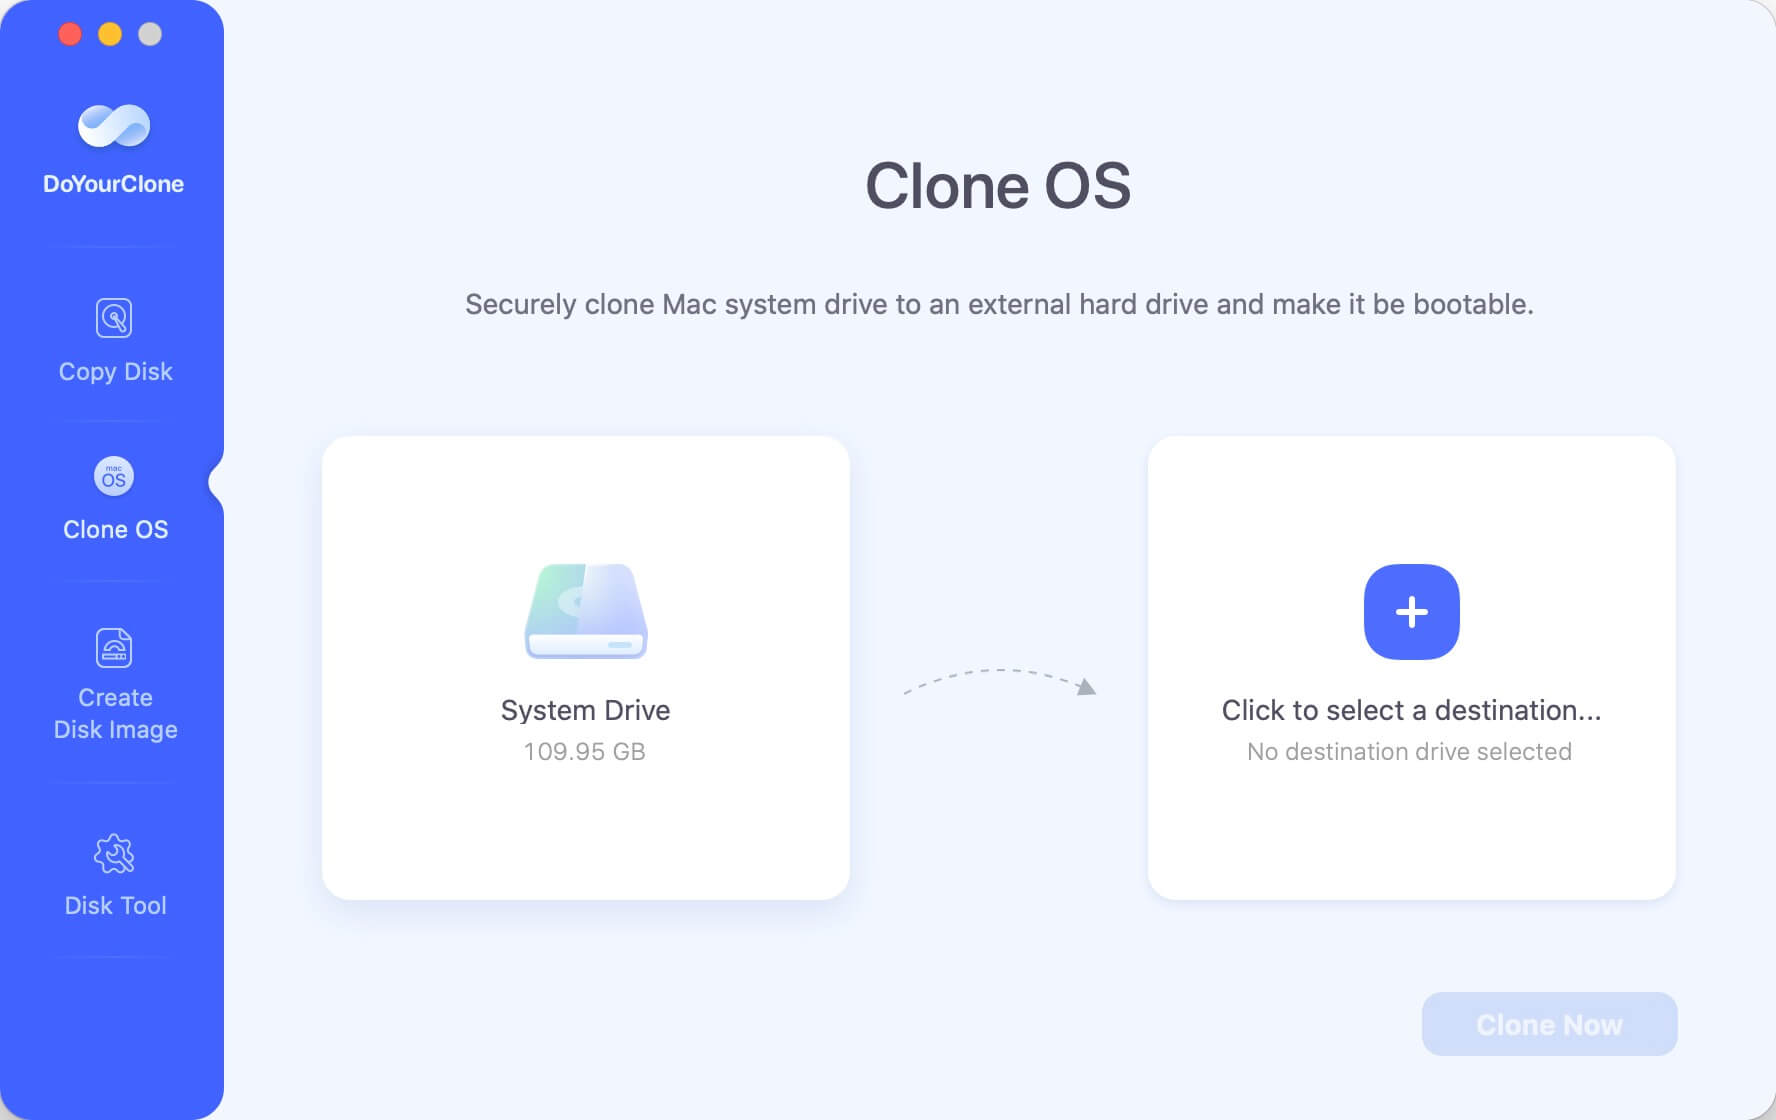
What's more, the software is capable of creating a bootable copy of macOS Ventura with the option "Clone OS". Which is more useful to back up the macOS along with all the installed programs and personal files. It can help boot Mac to continue works or troubleshoot issues if the Mac cannot boot.
Conclusion:
If you have macOS Ventura installed on your Mac, you can use the DoYourClone for Mac or Disk Utility tools to make an encrypted image of a disk. In order to access something that has been encrypted, a password is needed. It is possible to utilize an encrypted disk image the same way as any other disk image file, as a safe place to store data.
Network volumes and detachable media like Zip drives, USB flash media, and FireWire hard drives are all fair game for making backups or creating new file versions. An individual password safeguards each encrypted disk image.
FAQs about Creating Disk Image for macOS Ventura
1. What is a disk image in macOS Ventura?
A disk image (.dmg) is a file that contains a complete copy of a file system. It can be used for backup purposes, to distribute software, or to store files in a single, compressed format. On macOS Ventura, disk images are often used for system backups or software distribution.
2. How do I create a disk image with Disk Utility on macOS Ventura?
You can create a disk image using the built-in Disk Utility app. Here are the steps:
- Open Disk Utility (found in Applications and then Utilities).
- Select "File" from the menu and then "New Image".
- Choose the location, name, and format (e.g., compressed or read/write) for the disk image.
- If you want to encrypt the disk image, you can choose the encryption option.
- Click "Save" to create the disk image.
3. Are there any limits to create disk image with Disk Utility?
With Disk Utility, it's not able to create disk image for individual APFS volumes. Also, you can't create disk image for APFS containers on Mac with Apple silicon or Apple T2 Security Chip.
4. How to create disk image for APFS volumes and containers on Apple silicon and Apple t2 Security Chip Mac?
You can use the software DoYourClone for Mac to achieve the goals. Here are the steps:
- Download and install DoYourClone for Mac on your machine.
- Run it and choose the "Create Disk Image" mode.
- Select the drive which you want to image and the destination drive to hold the image.
- Click "Create Image" to start the process.
DoYourClone for Mac
DoYourClone for Mac, one of the best Mac disk cloning software, can help you clone HDD, SSD, external storage device on Mac, upgrade HDD to SSD, create full disk image backup, etc. It also can clone everything from your Mac to an external HDD/SSD and create a full bootable clone backup. 100% safe and easy-to-use.