How to Format FAT32 to NTFS on Windows or Mac?
![]() Updated by Justin Kenny on 2022-03-08
Updated by Justin Kenny on 2022-03-08
Any USB storage device is pre-installed with the FAT32 file system, which is compatible with various systems. Nevertheless, the FAT32 file system has a problem in that a single file cannot exceed 4GB.
So, if you attempt to transfer a file bigger than 4GB to a FAT32-formatted disk, you will get the error notice "the file is too large for the target file system." Converting the target disk from FAT32 to NTFS is a simple solution in this scenario.
Windows users have been using NTFS as the default file system since Windows XP, so if you're still using devices formatted with FAT32, you're losing out on the current performance and technological advancements that NTFS provides. Here's how to change a Windows drive's file system from FAT32 to NTFS.
FAT32-To-NTFS Conversion Without Formatting
Follow these methods to convert FAT32 to NTFS:
Method 1: Using CMD
Run "diskmgmt.msc" to launch Disk Management and examine the disk's drive letter whose file system you wish to change. Please keep it in mind since you will need it in the future.
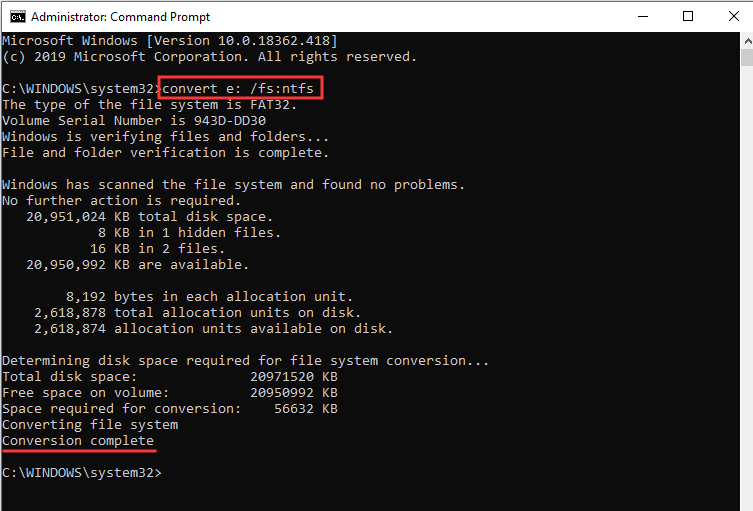
Step 1. Type Command Prompt in the search bar and execute it as administrator.

Step 2. Type convert driveletter /fs:ntfs without quotes in the command prompt window and hit the Enter key. Make sure that the drive letter of the destination partition is entered correctly. The conversion is expected to be completed in a short time.
FAT32-To-NTFS Conversion By Formatting
Formatting the storage device is another option for moving from FAT32 to NTFS. This approach is best suited for those who wish to reformat and reorganize their hard disk at the same time. It will delete all of the data on the drive. Remember to create a copy of the essential files on your computer's hard disk.
Method 2: Using Diskpart Command
To format a drive under NTFS, use the Diskpart command, as outlined below:
- In order to open Command Prompt, use the procedure outlined in the preceding paragraphs.
- Type in the commands below in sequence, then press Enter on the keyboard to confirm after entering each command.
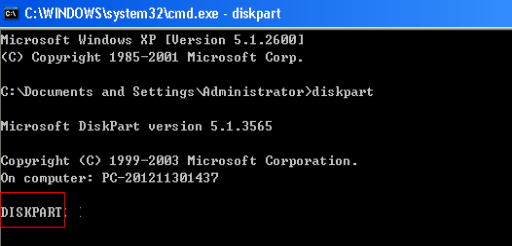
- Diskpart may be typed into the Command Prompt once you've opened it.
![format FAT32 to NTFS]()
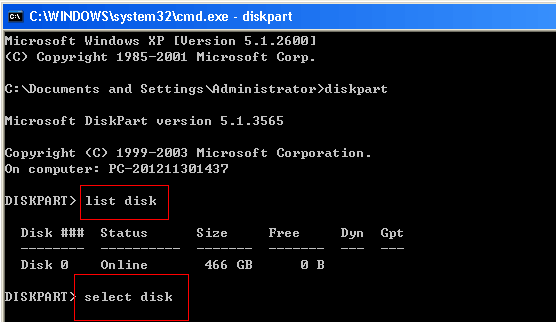
- Select disk 0, 1, 2... in the list that appears when you type list disk. On the other hand, (depending on the kind of disk you wish to format)
![format FAT32 to NTFS]()
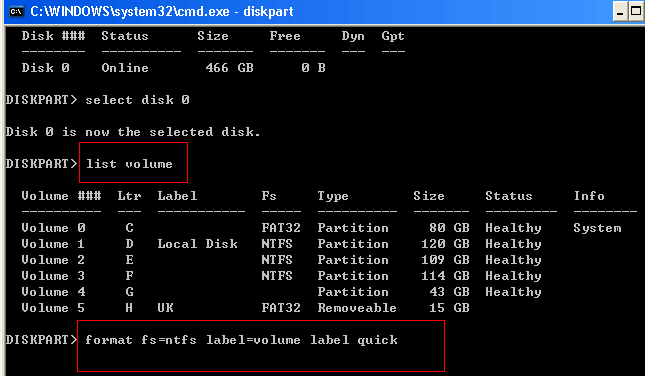
- Enter format fs=ntfs label=volume label fast after typing list volume in the text box provided (volume label is the partition label you want to format.)>
![format FAT32 to NTFS]()
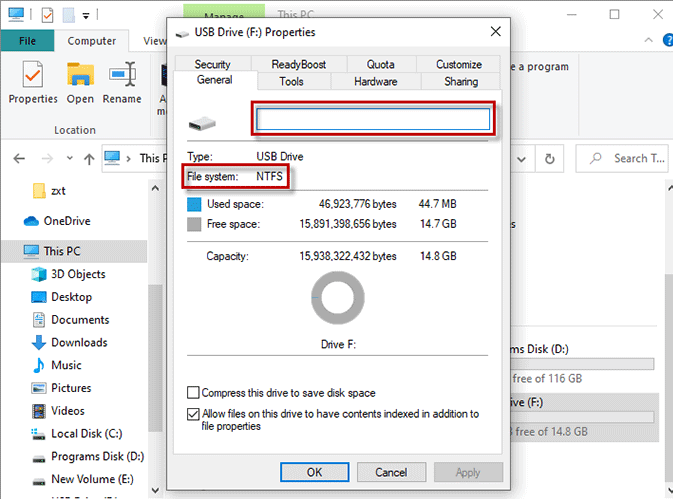
- To locate the USB drive that has been formatted, you will see that it has been changed to NTFS and that the volume label has been removed. The USB drive may be renamed if required.
![format FAT32 to NTFS]()
Method 3: Using File Explorer
Even though this is the recommended method, it may not be possible to convert your disk from FAT32 to NTFS without formatting it. Formatting the disk may be the best solution if your file system has issues or if you just wish to wipe the drive and reuse it.
To put it another way, you'll have an empty NTFS drive installed in place of your present FAT32 disk and all of your current data. There are a few methods to do this, but the simplest is using Windows File Explorer.
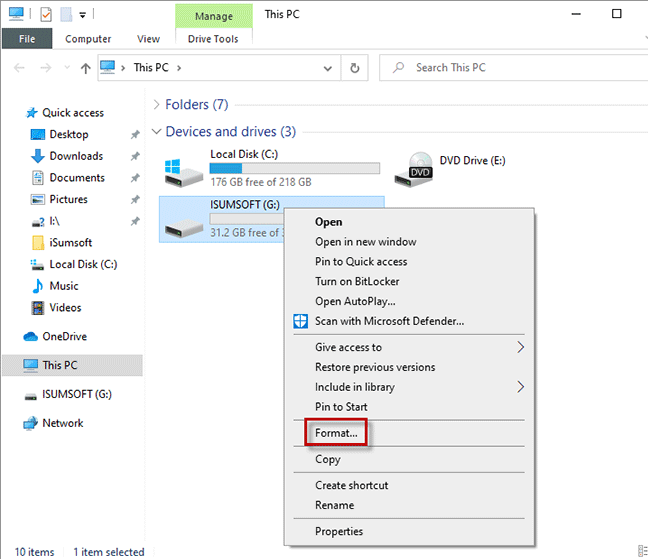
- Open This PC area in Windows File Explorer by utilizing the left-hand navigation pane. In the Devices and drives area, you'll find a list of all of your hard disks.
- Right-click the drive you want to convert to FAT32 format. Press the Format button in the context menu.
![format FAT32 to NTFS]()
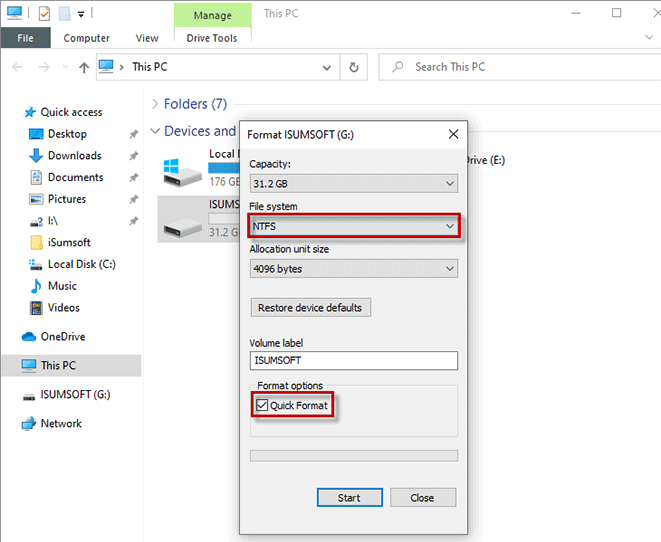
- In the Formatting box, you may choose the name, file type, and formatting style for the document. In the File system drop-down option, choose NTFS. Set a new tag in the Volume label box to give your drive a new name. Enabling the Speedy format option will also enable a quick wipe of your disk.
![format FAT32 to NTFS]()
- The formatting process will begin after you click the Start button.
- Windows will prompt you for approval before proceeding with the format, informing you of the potential for data loss. To confirm, click OK.
According to the drive's size and whether or not you choose the rapid format option while formatting, this process may take anything from a few minutes to hours. It is possible to utilize the disk immediately once the NTFS formatting procedure has finished.
Recover Lost Data after Formatting FAT32 to NTFS
If your forgot to back up your data before formatting FAT32 to NTFS, you still have the chance to get the lost data back. Do Your Data Recovery is a powerful data recovery software, it supports to easily and completely recover lost data after formatting FAT32 to NTFS. Download it here:
Do Your Data Recovery
- Recover lost data after formatting FAT32 to NTFS.
- Recover lost data from HDD, SSD, USB flash drive, memory card, etc.
- Recover lost data from RAW file system.
Whether you have formatted FAT32 or not, you can use this data recovery software to recover lost data from your device. Here are the steps.
Step 1. Open Do Your Data Recovery on your computer, then select the formatted device to start data recovery.

Step 2. Click on Scan button. The quick scan will find recently deleted files. The deep scan can find all recoverable files.
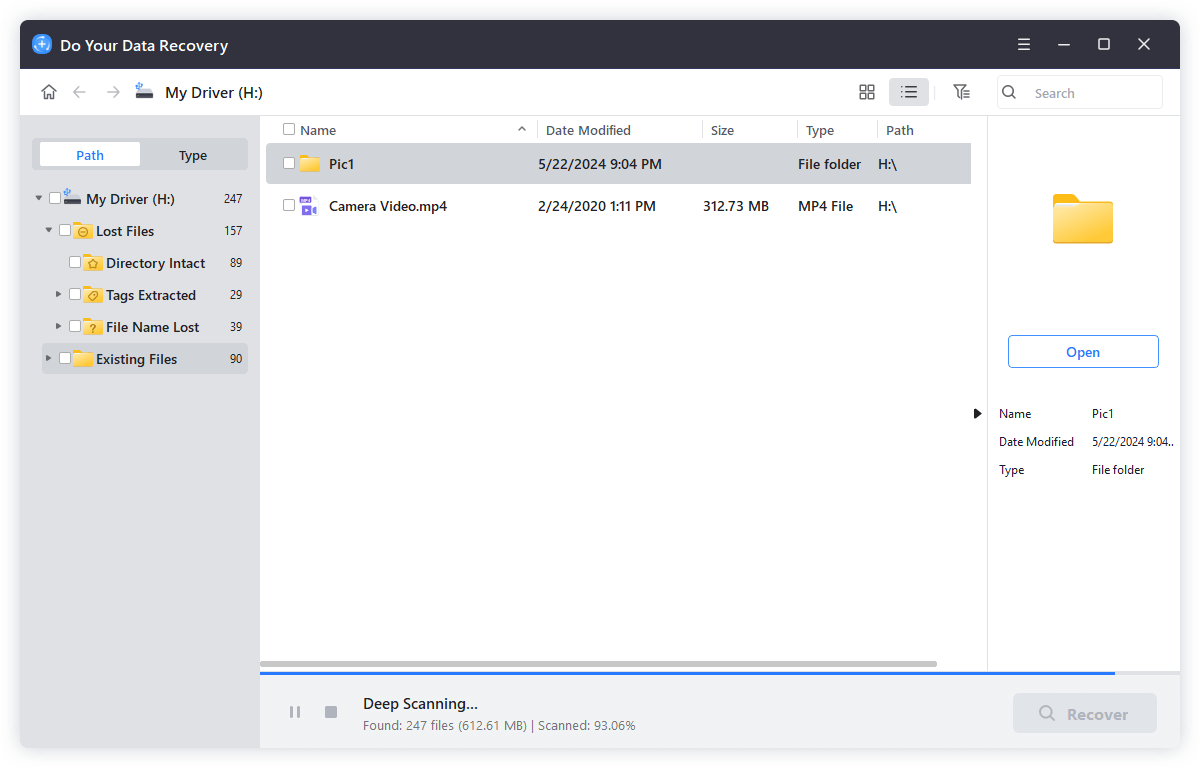
Step 3. Once the scan is completed, just preview and recover the lost files.

You also can download DoYourData Super Eraser to format FAT32 to NTFS on both Windows and Mac. It also supports to permanently erase data from FAT32, NTFS file system.
Written & Updated by Justin Kenny
Justin Kenny is a writer & editor of DoYourData. He joined DoYourData in 2016 and focuses on writing articles about Windows data recovery, Mac data recovery, external device data recovery, hard drive clone, data erasure, Mac cleanup, computer issue fixes, etc. He is a super fan of Apple devices and is big on testing new digital device and system utility software.