Sony is a worldwide recognized brand, so it is not strange to have Sony devices in our homes. One of them is the Sony memory stick, the competition of SD cards. Like all storage devices, you can lose information, so it is always necessary to have a tool available to recover files. That's why today we'll show you how to recover lost data from Sony memory stick on Mac.
About Sony Memory Stick Data Recovery on Mac
These memory devices were released to the market in 1998, as a direct competition of SD cards, and Sony used them in all their multimedia devices: cameras, cell phones, etc. Like any storage device, if you delete the data, it is "permanently" deleted. That's where the Data Recovery Software comes into play. For example, Mac data recovery software can help you recover all lost data from Sony memory stick on Mac.
Data can be lost in different ways: from formatting the Sony memory stick to manually deleting the files on the Sony memory stick, so it is somewhat more common than it seems. Different programs claim to be able to recover all your data, but not all manage to comply with what they say. That's why today we present Do Your Data Recovery for Mac, the best program you can use to recover lost data from Sony memory stick on Mac.
Do Your Data Recovery for Mac – the best Sony memory stick data recovery software for Mac.
Do Your Data Recovery for Mac is the fastest data recovery software for recovering lost data from Sony memory stick or other device. You can recover all your data from Sony memory stick, even if the Sony memory stick was formatted/corrupted, in a few clicks. If you would like to have a step-by-step guide on how to recover lost data from Sony memory stick on Mac, we'll show it to you below.
Step by step: how to recover lost data from Sony memory stick on Mac?
In order to follow this guide you need:
- Download and install Do Your Data Recovery for Mac
- A Sony Memory Stick connected to your Mac
Once everything is ready, follow the steps:
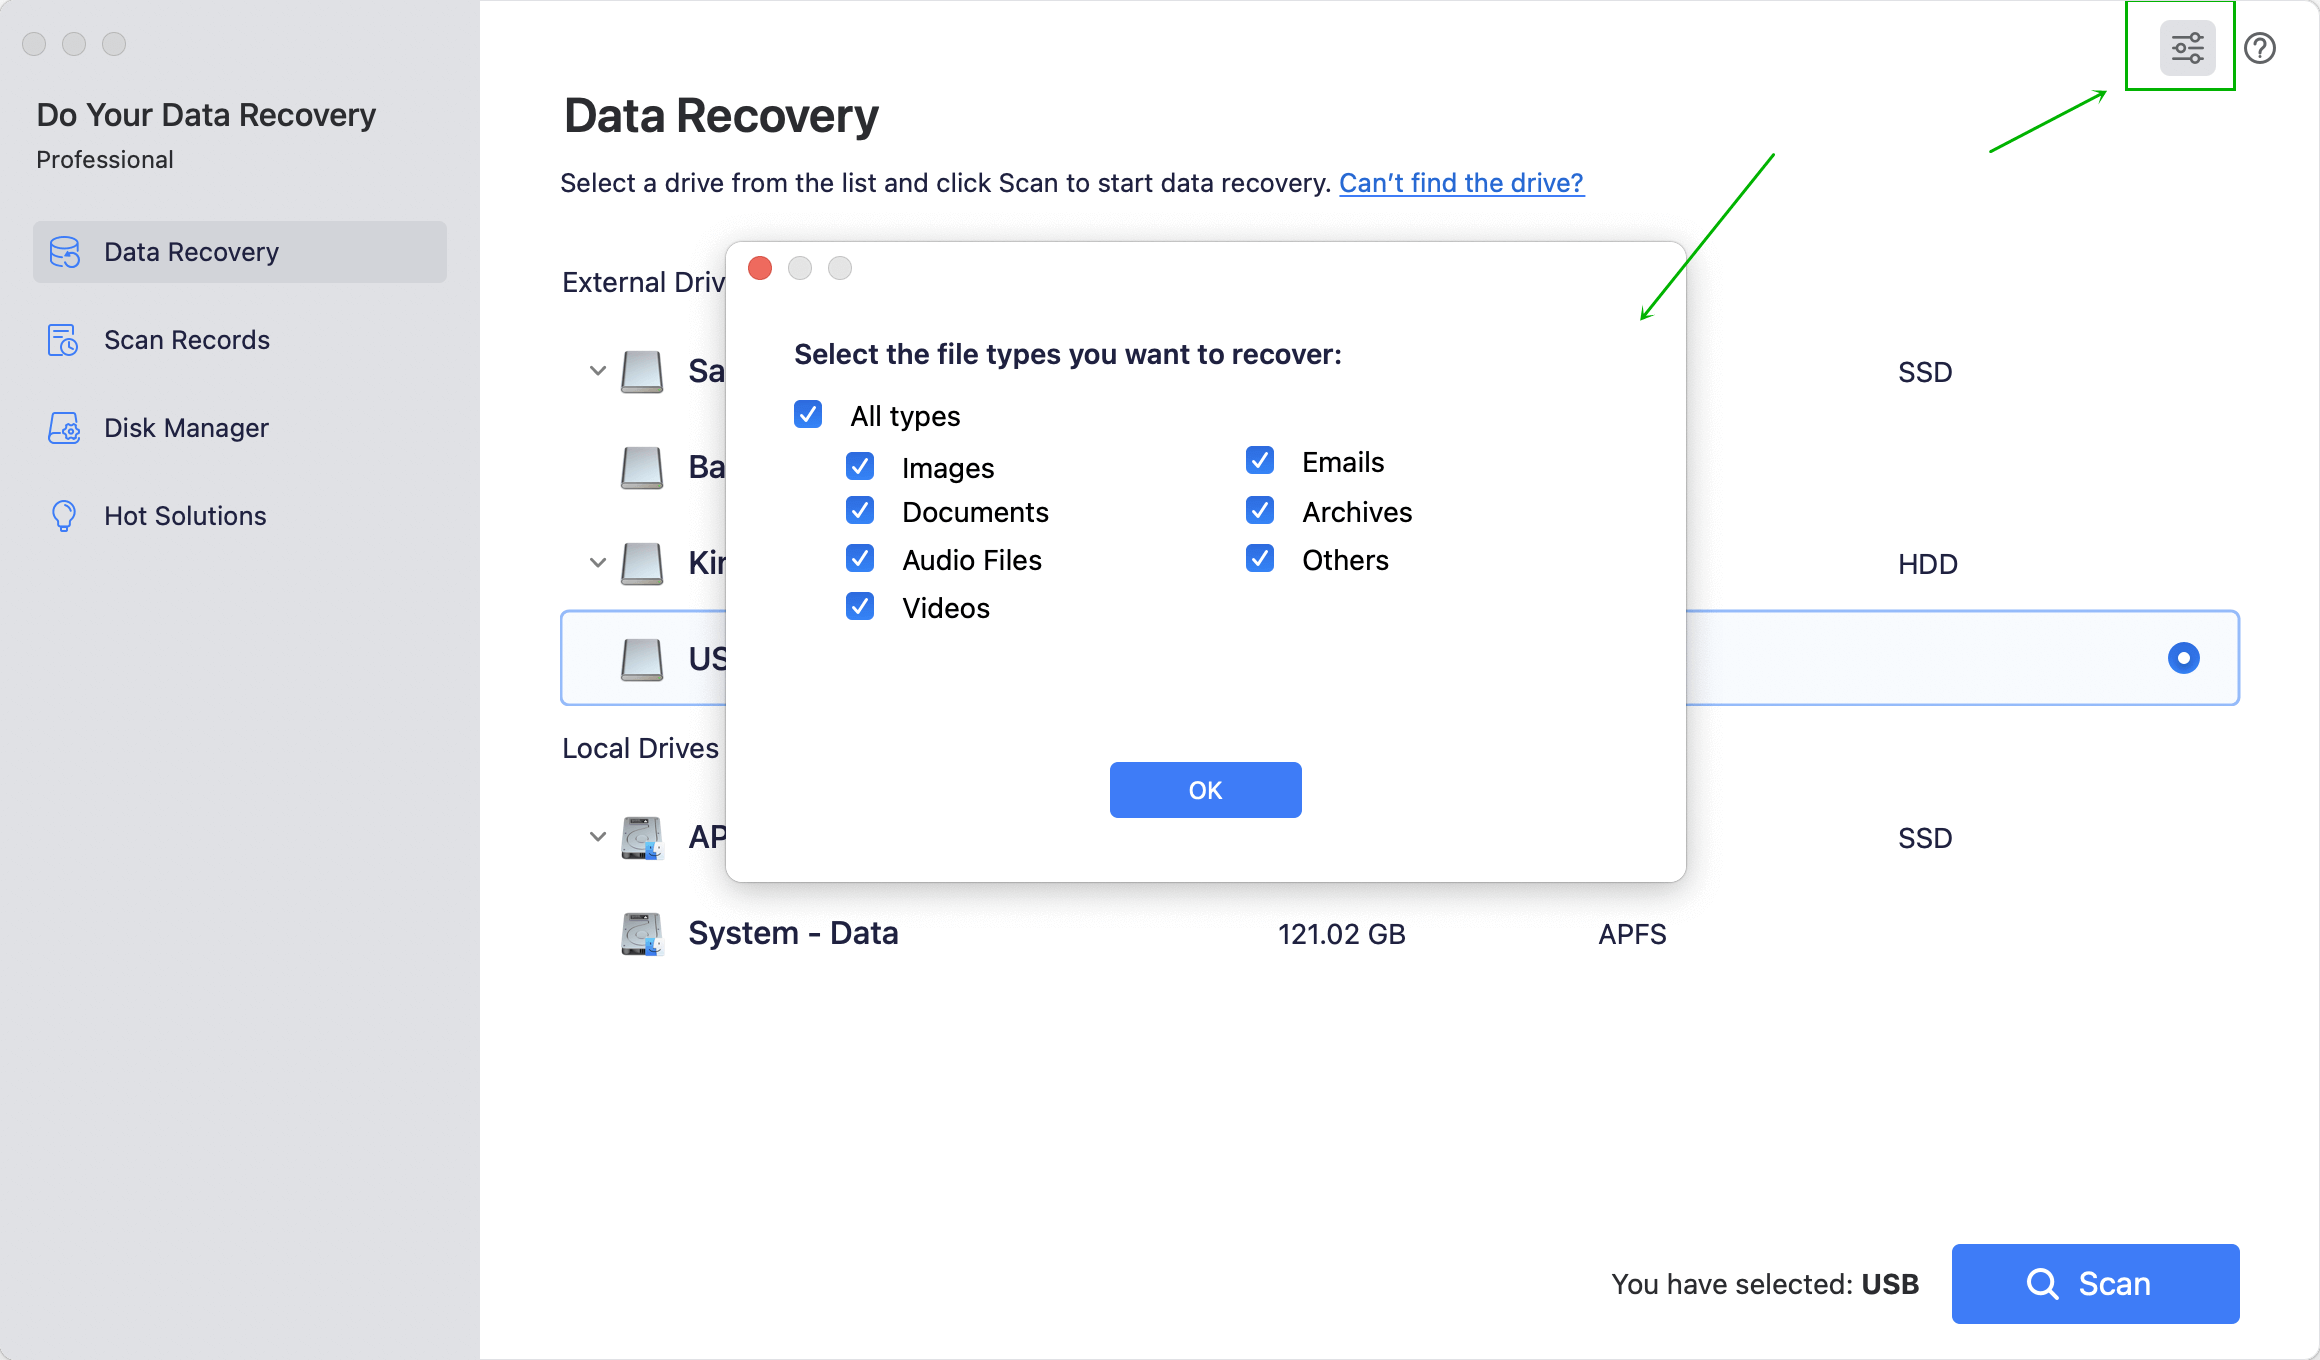
Step one: Select the file types.
Once you open Do Your Data Recovery for Mac, you will see the option to select the types of files you want to recover. If you want to select files of all formats, leave the "Select all file types" box checked.

Step Two: Select your Sony Memory Stick and scan.
In the next window, all available devices for recovery will appear. Select the Sony Memory Stick and press the "Scan" button.

Step three: Preview and recover lost data from Sony memory stick.
This is the last step. It is necessary to select the files that you want to recover. Once you have selected the files you want, press the "Recover" button.

That is all. With three simple steps you can recover lost data from Sony memory stick on Mac. But, before you recover all your lost data on the Sony memory stick, please don’t new data to the Sony memory stick. Why? Just in case that the lost data would be overwritten by the new data. Do Your Data Recovery for Mac can completely recover deleted, formatted, damaged or inaccessible data from Sony memory stick under Mac OS. Just download it here: